
Managing Salesforce metadata
Overview
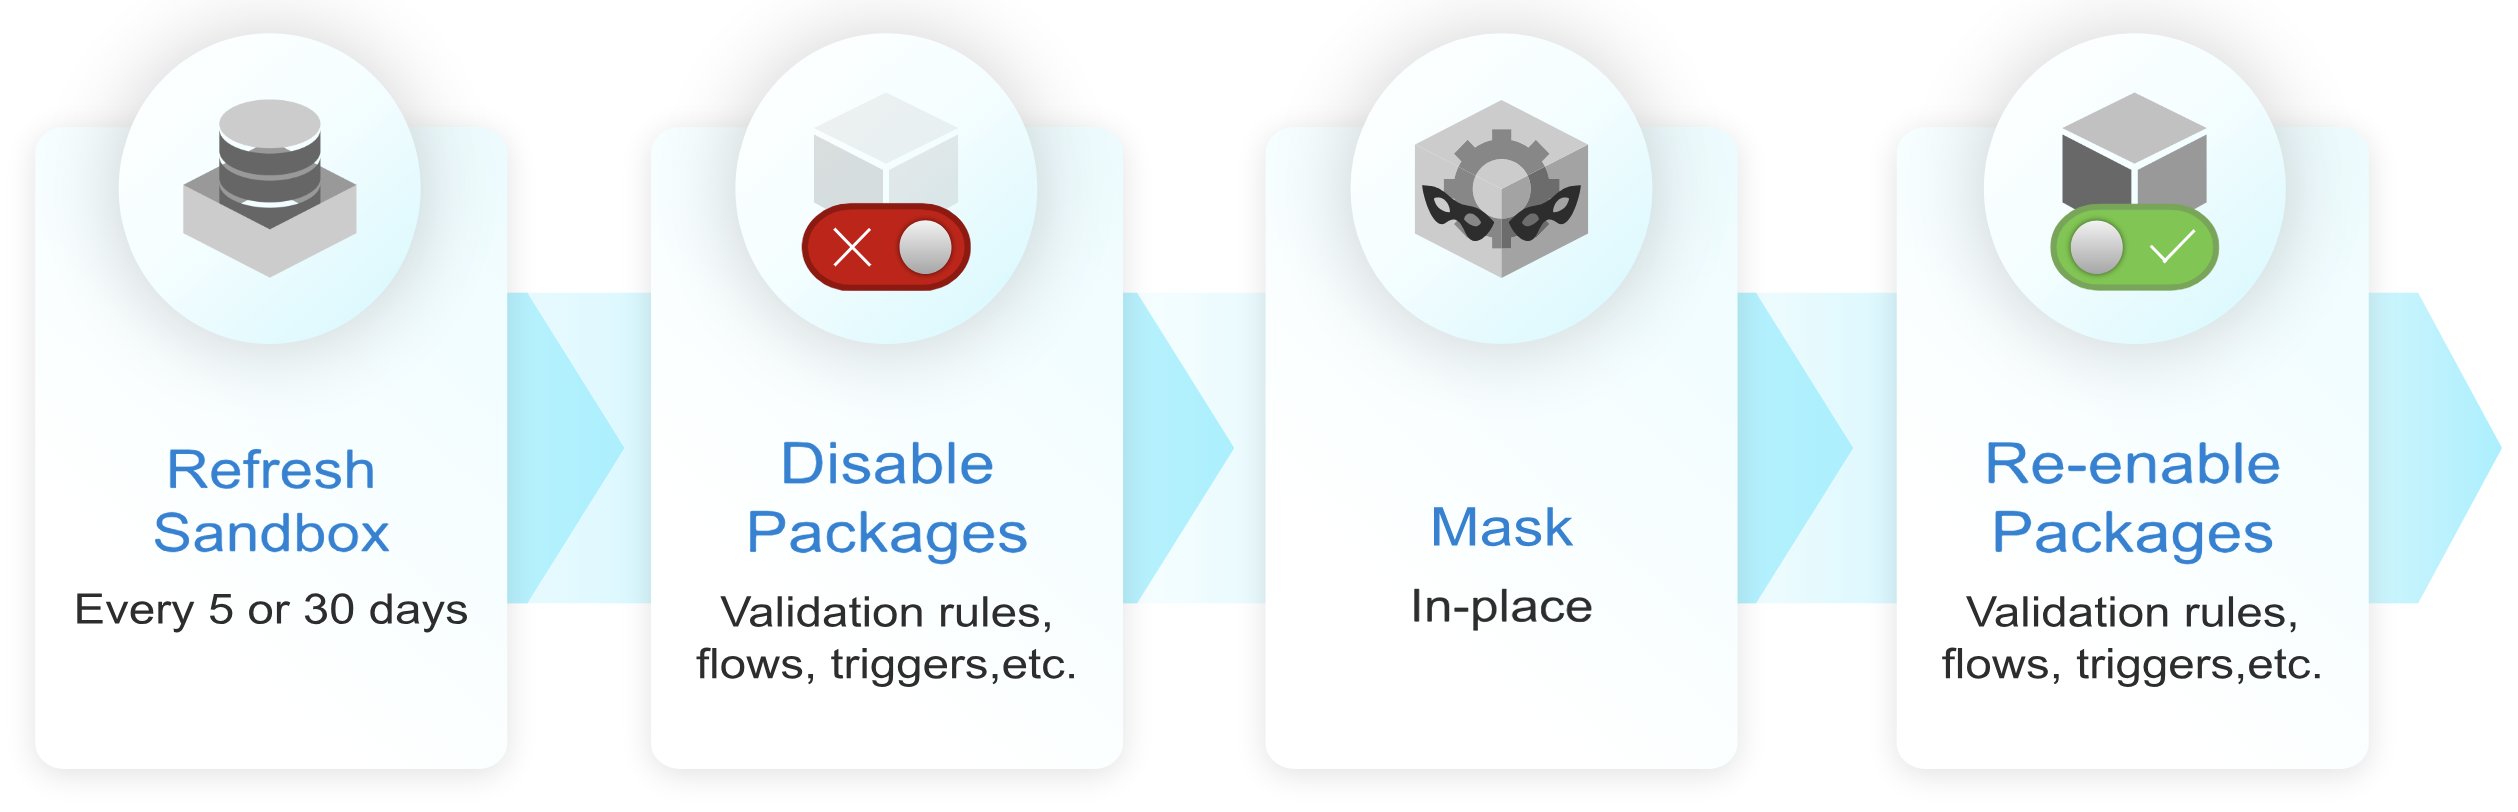
Salesforce has multiple built-in automations, triggers, flows, and validation rules. These can make large-scale data updates slow, or even unfeasible. When masking, Delphix is reading and writing large volumes of data and these automations can get activated, slowing down masking or causing critical failures. To get around these limitations, Delphix can turn off these automations temporarily. After masking completes, metadata components are turned back-on to ensure that the sandbox metadata returns to its original pre-masked state.
In Salesforce, automations are usually referred to as ‘metadata’, ‘metadata components’ or ‘metadata packages’.
Delphix recommends always disabling metadata components to ensure masking runs successfully.
Performance impact of automations: Triggers and other automations can slow down data updates. Triggers are typically in place for when records are initially created. Data masking does not need to re-trigger those automations.
Reduce errors: Disabling packages reduces the likelihood of errors such as timeouts or row locking issues.
Bypass stale data problems: When updating data without disabling metadata components, validation rules on stale data might be triggered, erroring out. When validation rules evolve over time, previously created records might no longer satisfy them. As data is updated, it might activate triggers that affect tables that are not even being updated. Some of these triggers will cause validation rules to be tested; and if there is stale data that doesn’t satisfy the validation rules, Salesforce will error out.
Metadata management can be triggered as part of masking jobs (for more information refer to the Masking data section) or it can be run independently as a stand-alone process for each connector. Running it as independent process has the following benefits:
Disable and enable desired metadata components once, regardless of the number of compliance jobs.
Run multiple compliance jobs consecutively, without the need for repeated metadata management for each job. This reduces masking duration and wait times associated with the pre and post-processing steps.
Disabling metadata on the connector
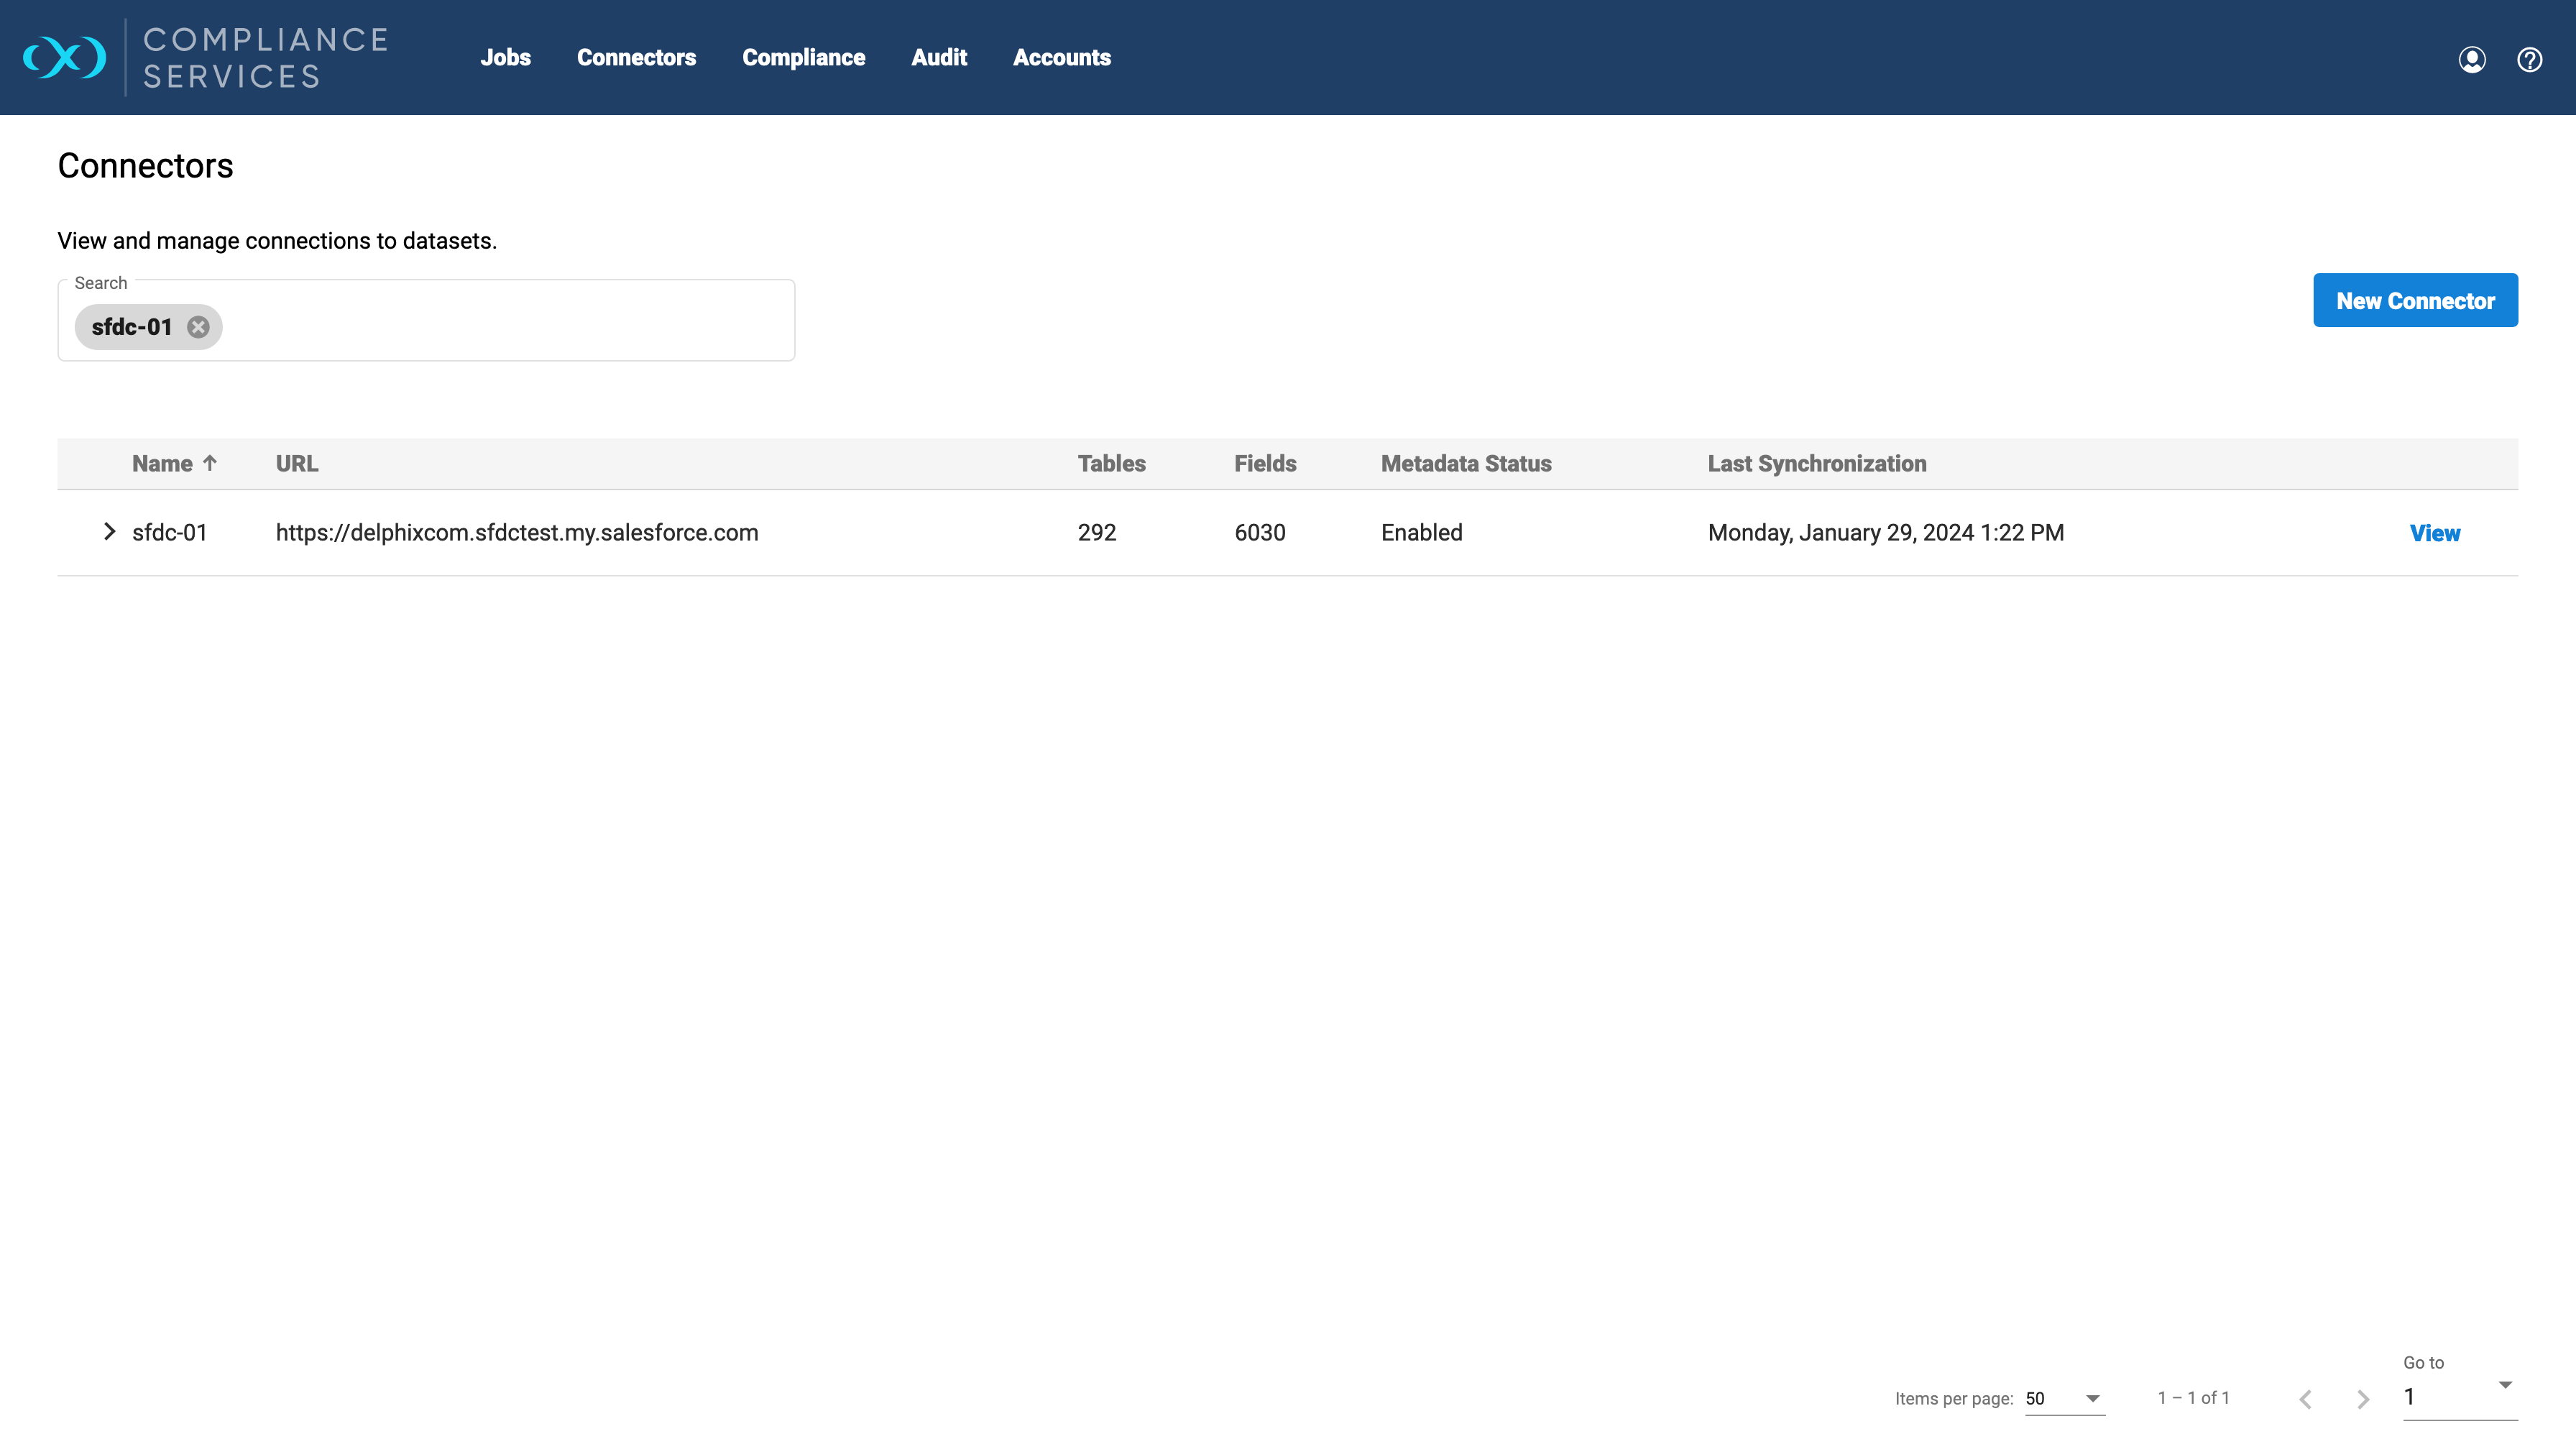
Go to the Connectors page, identify the connector, then click the View button to navigate to the connector's Details page.
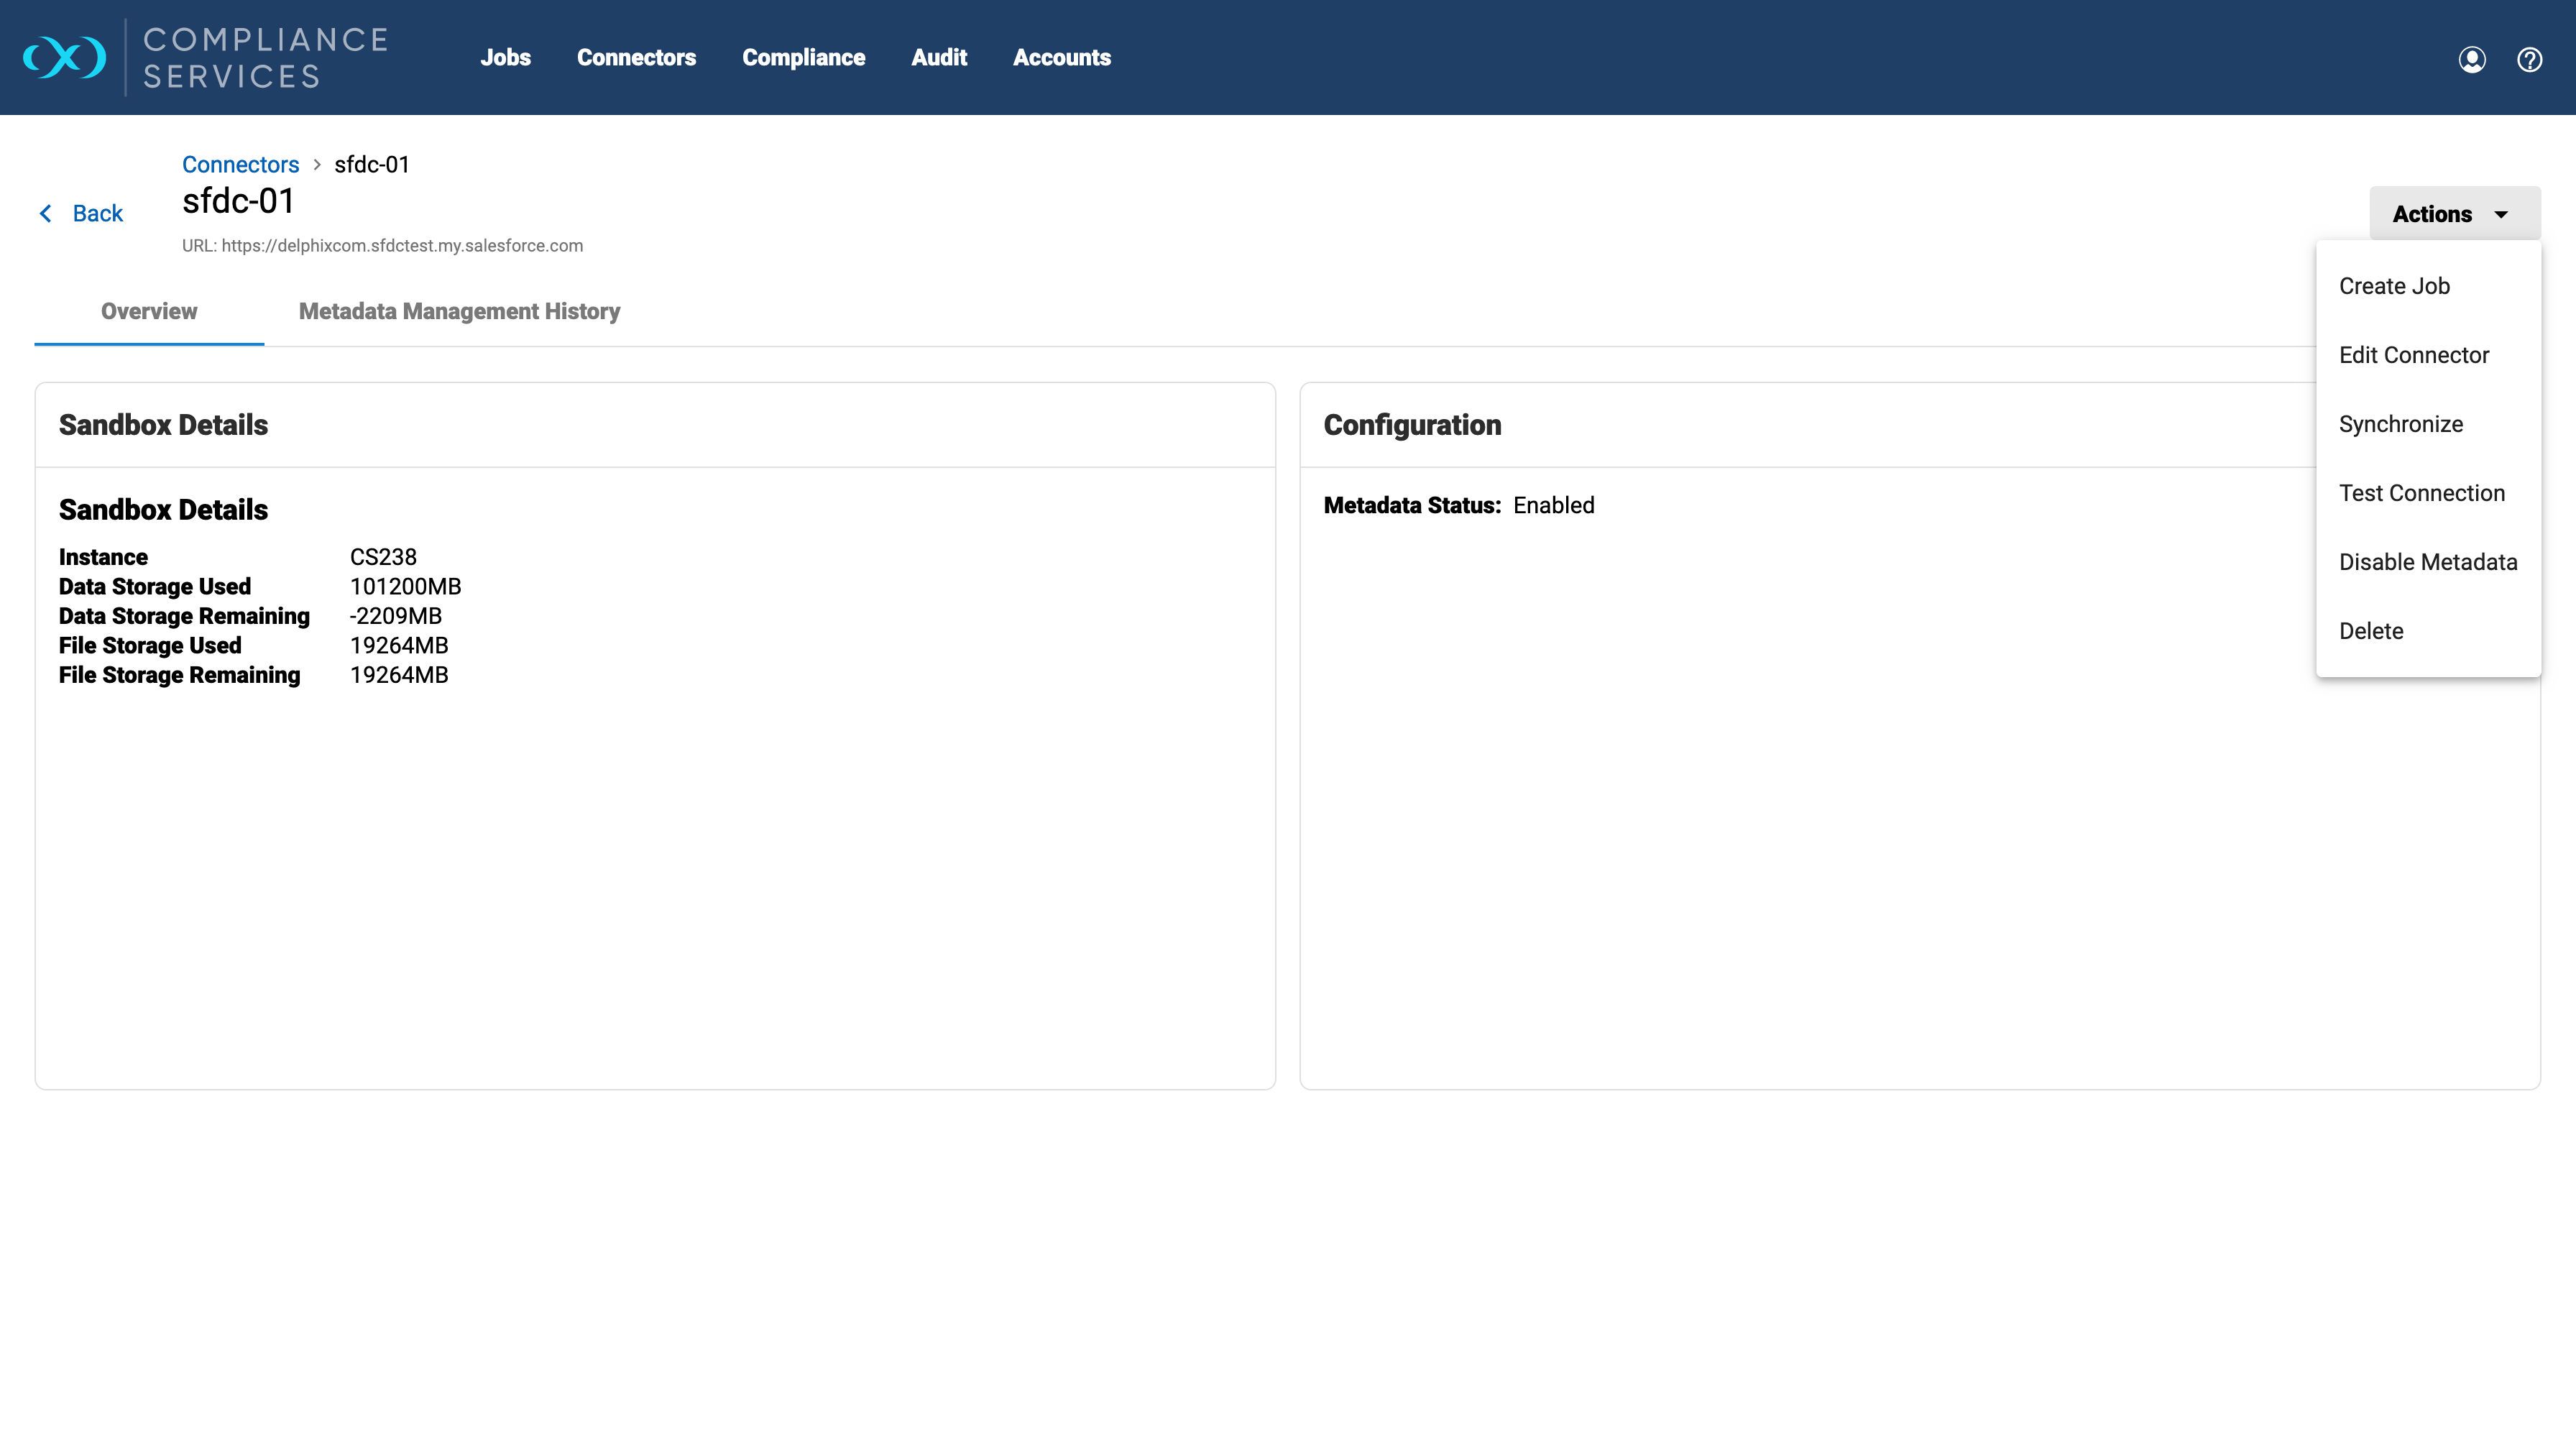
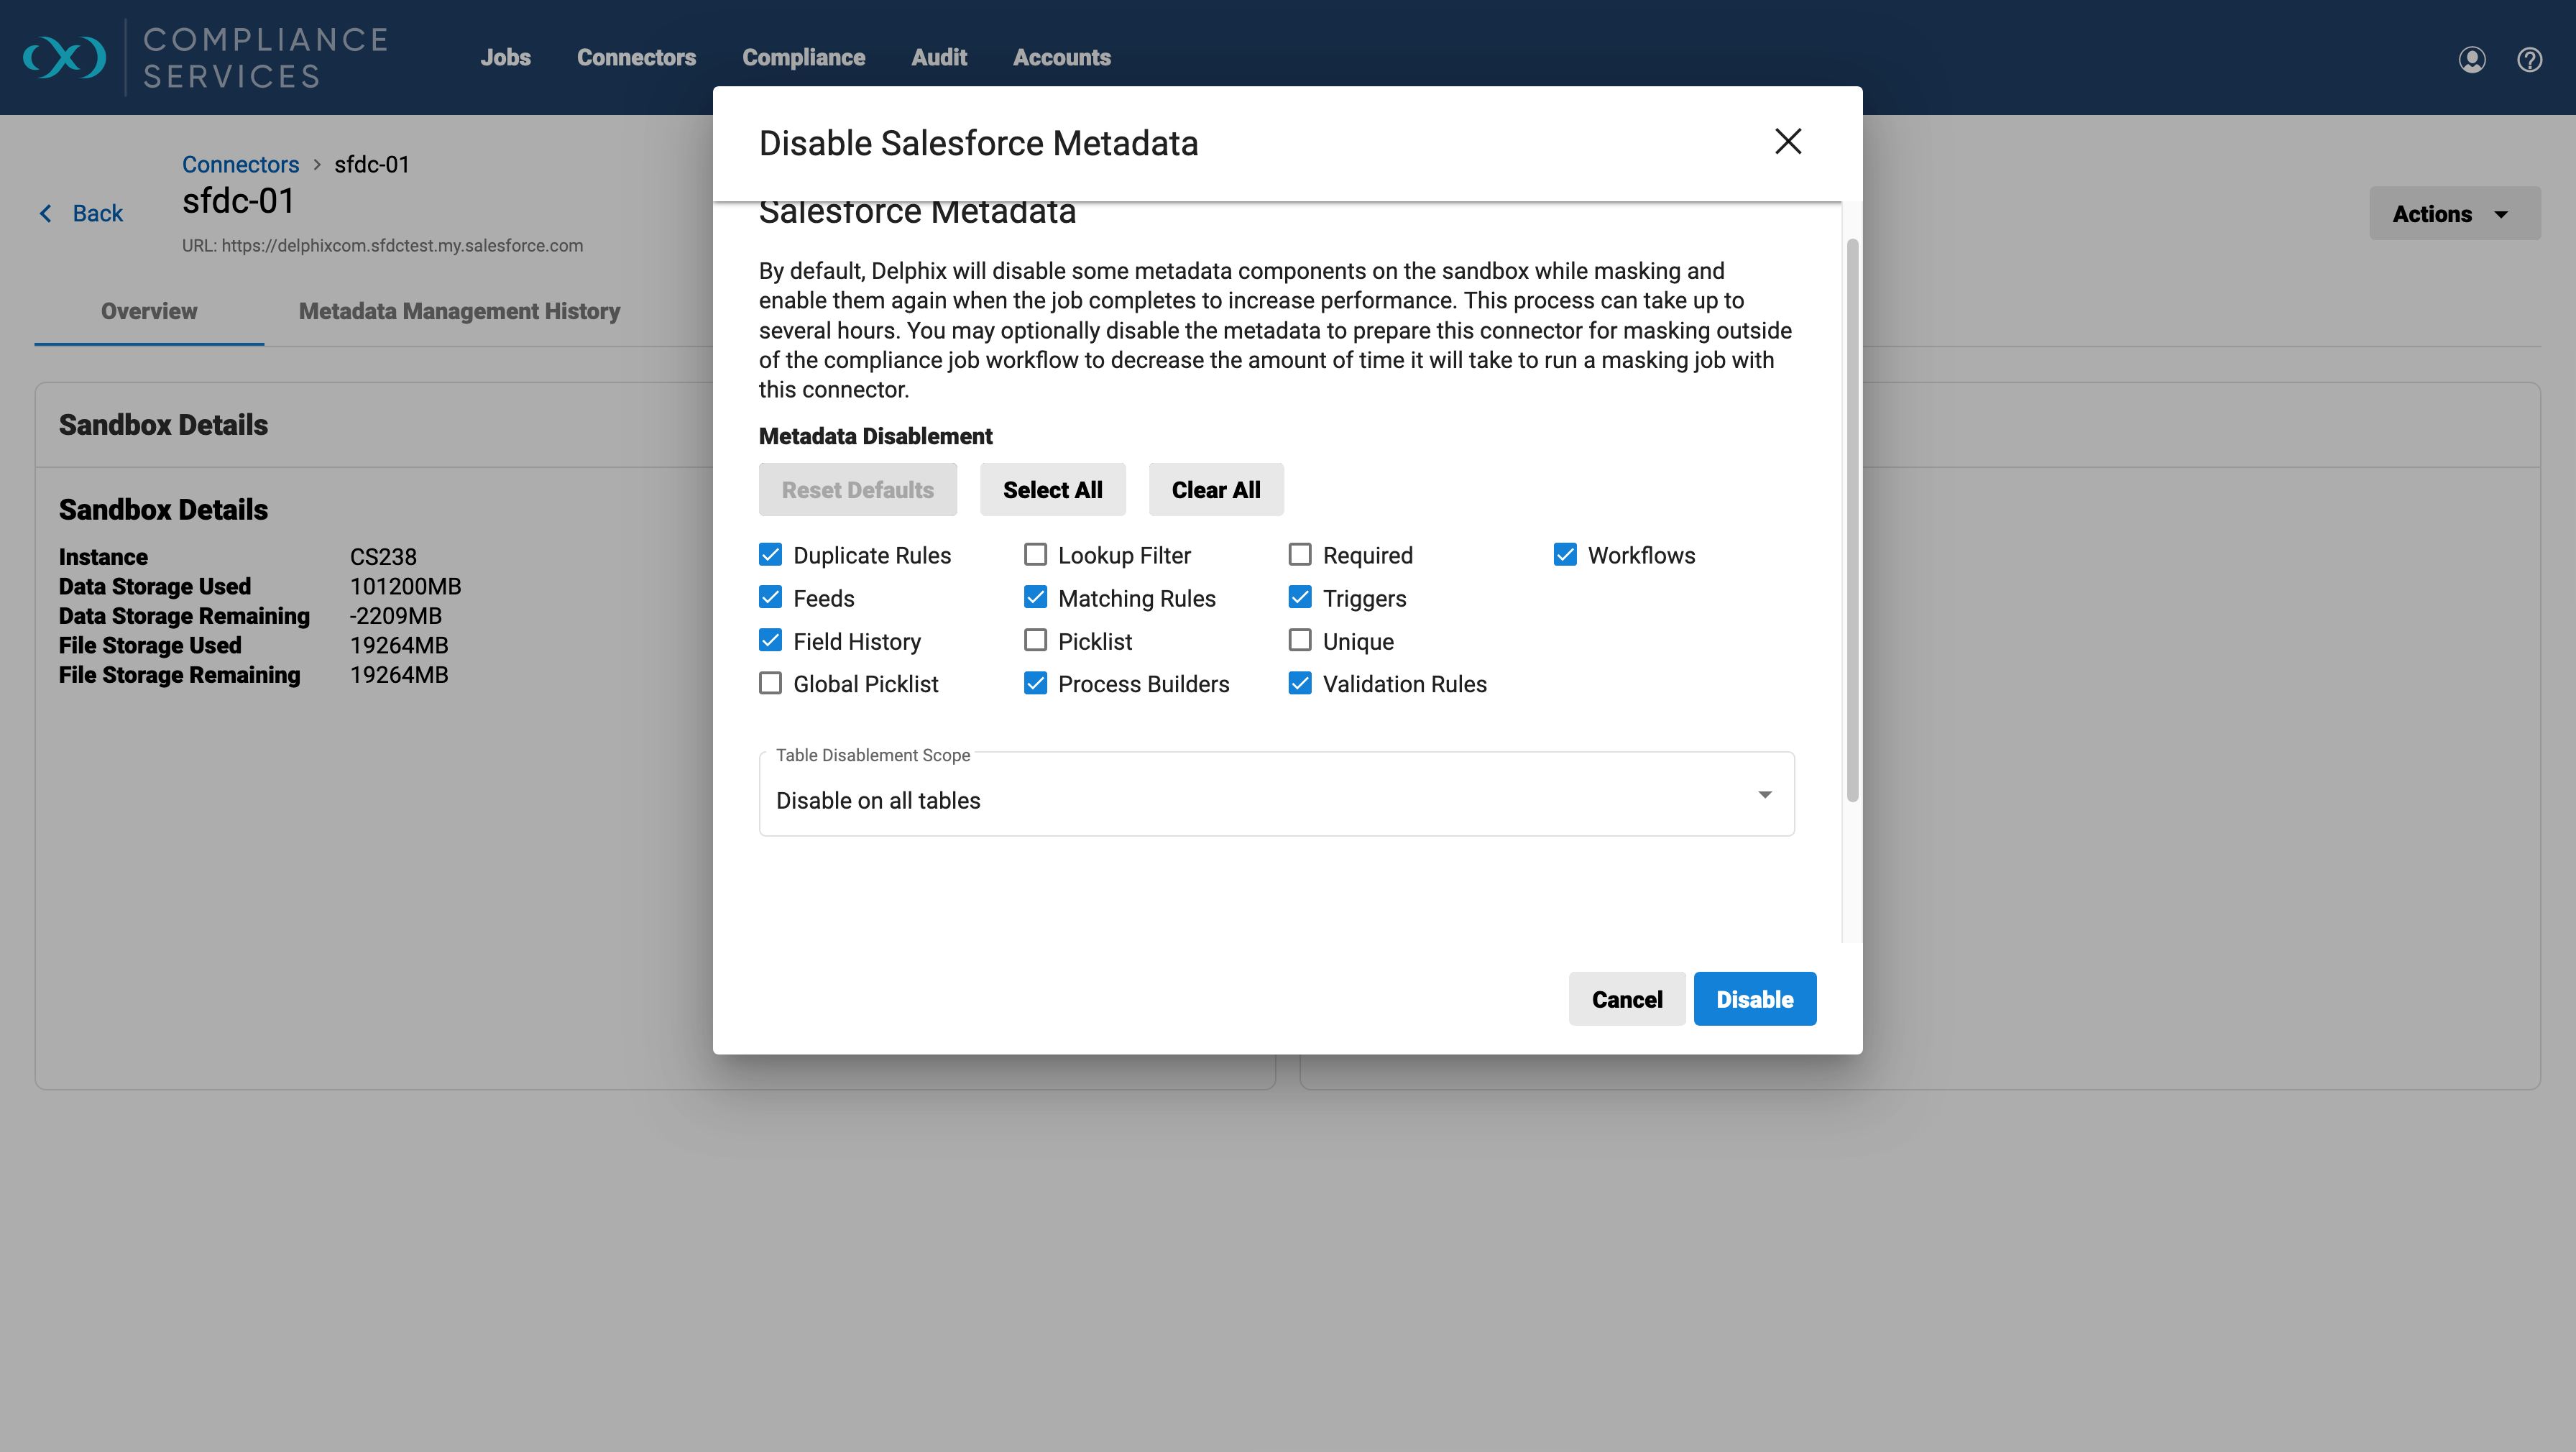
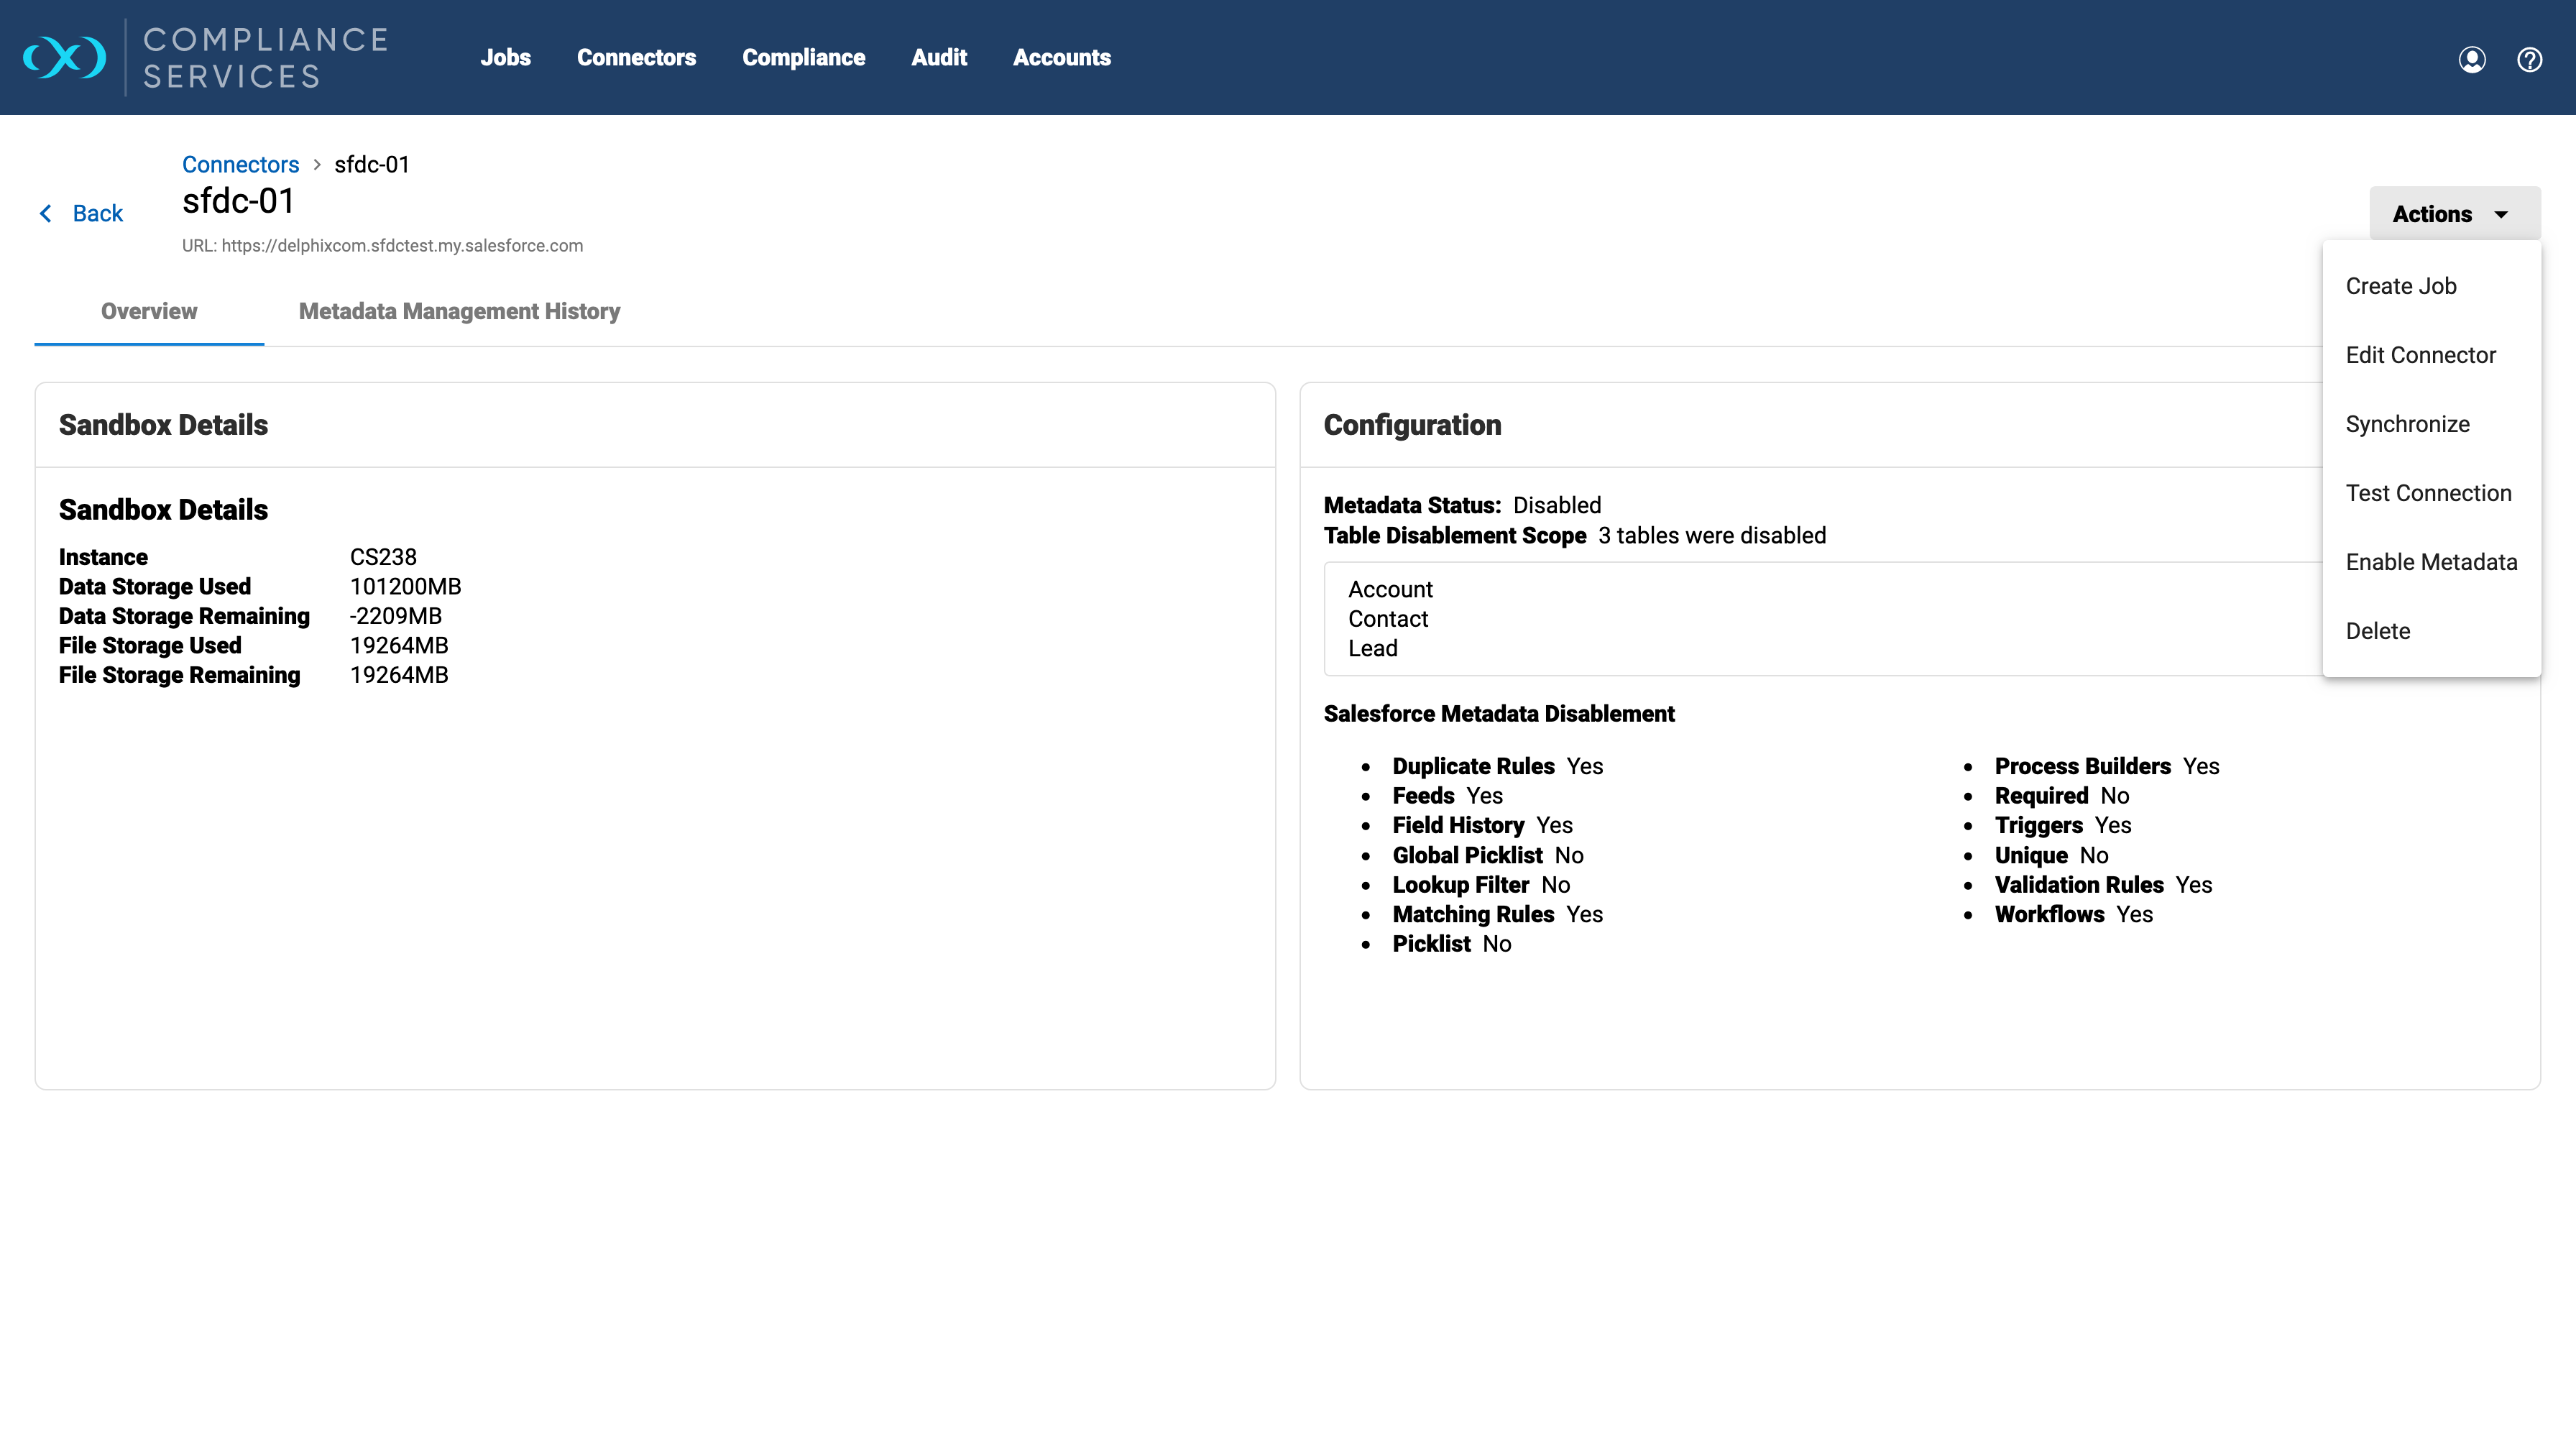
The default state is Enabled when a new connector is added. To disable this, click the Actions button and then click on the Disable Metadata menu.
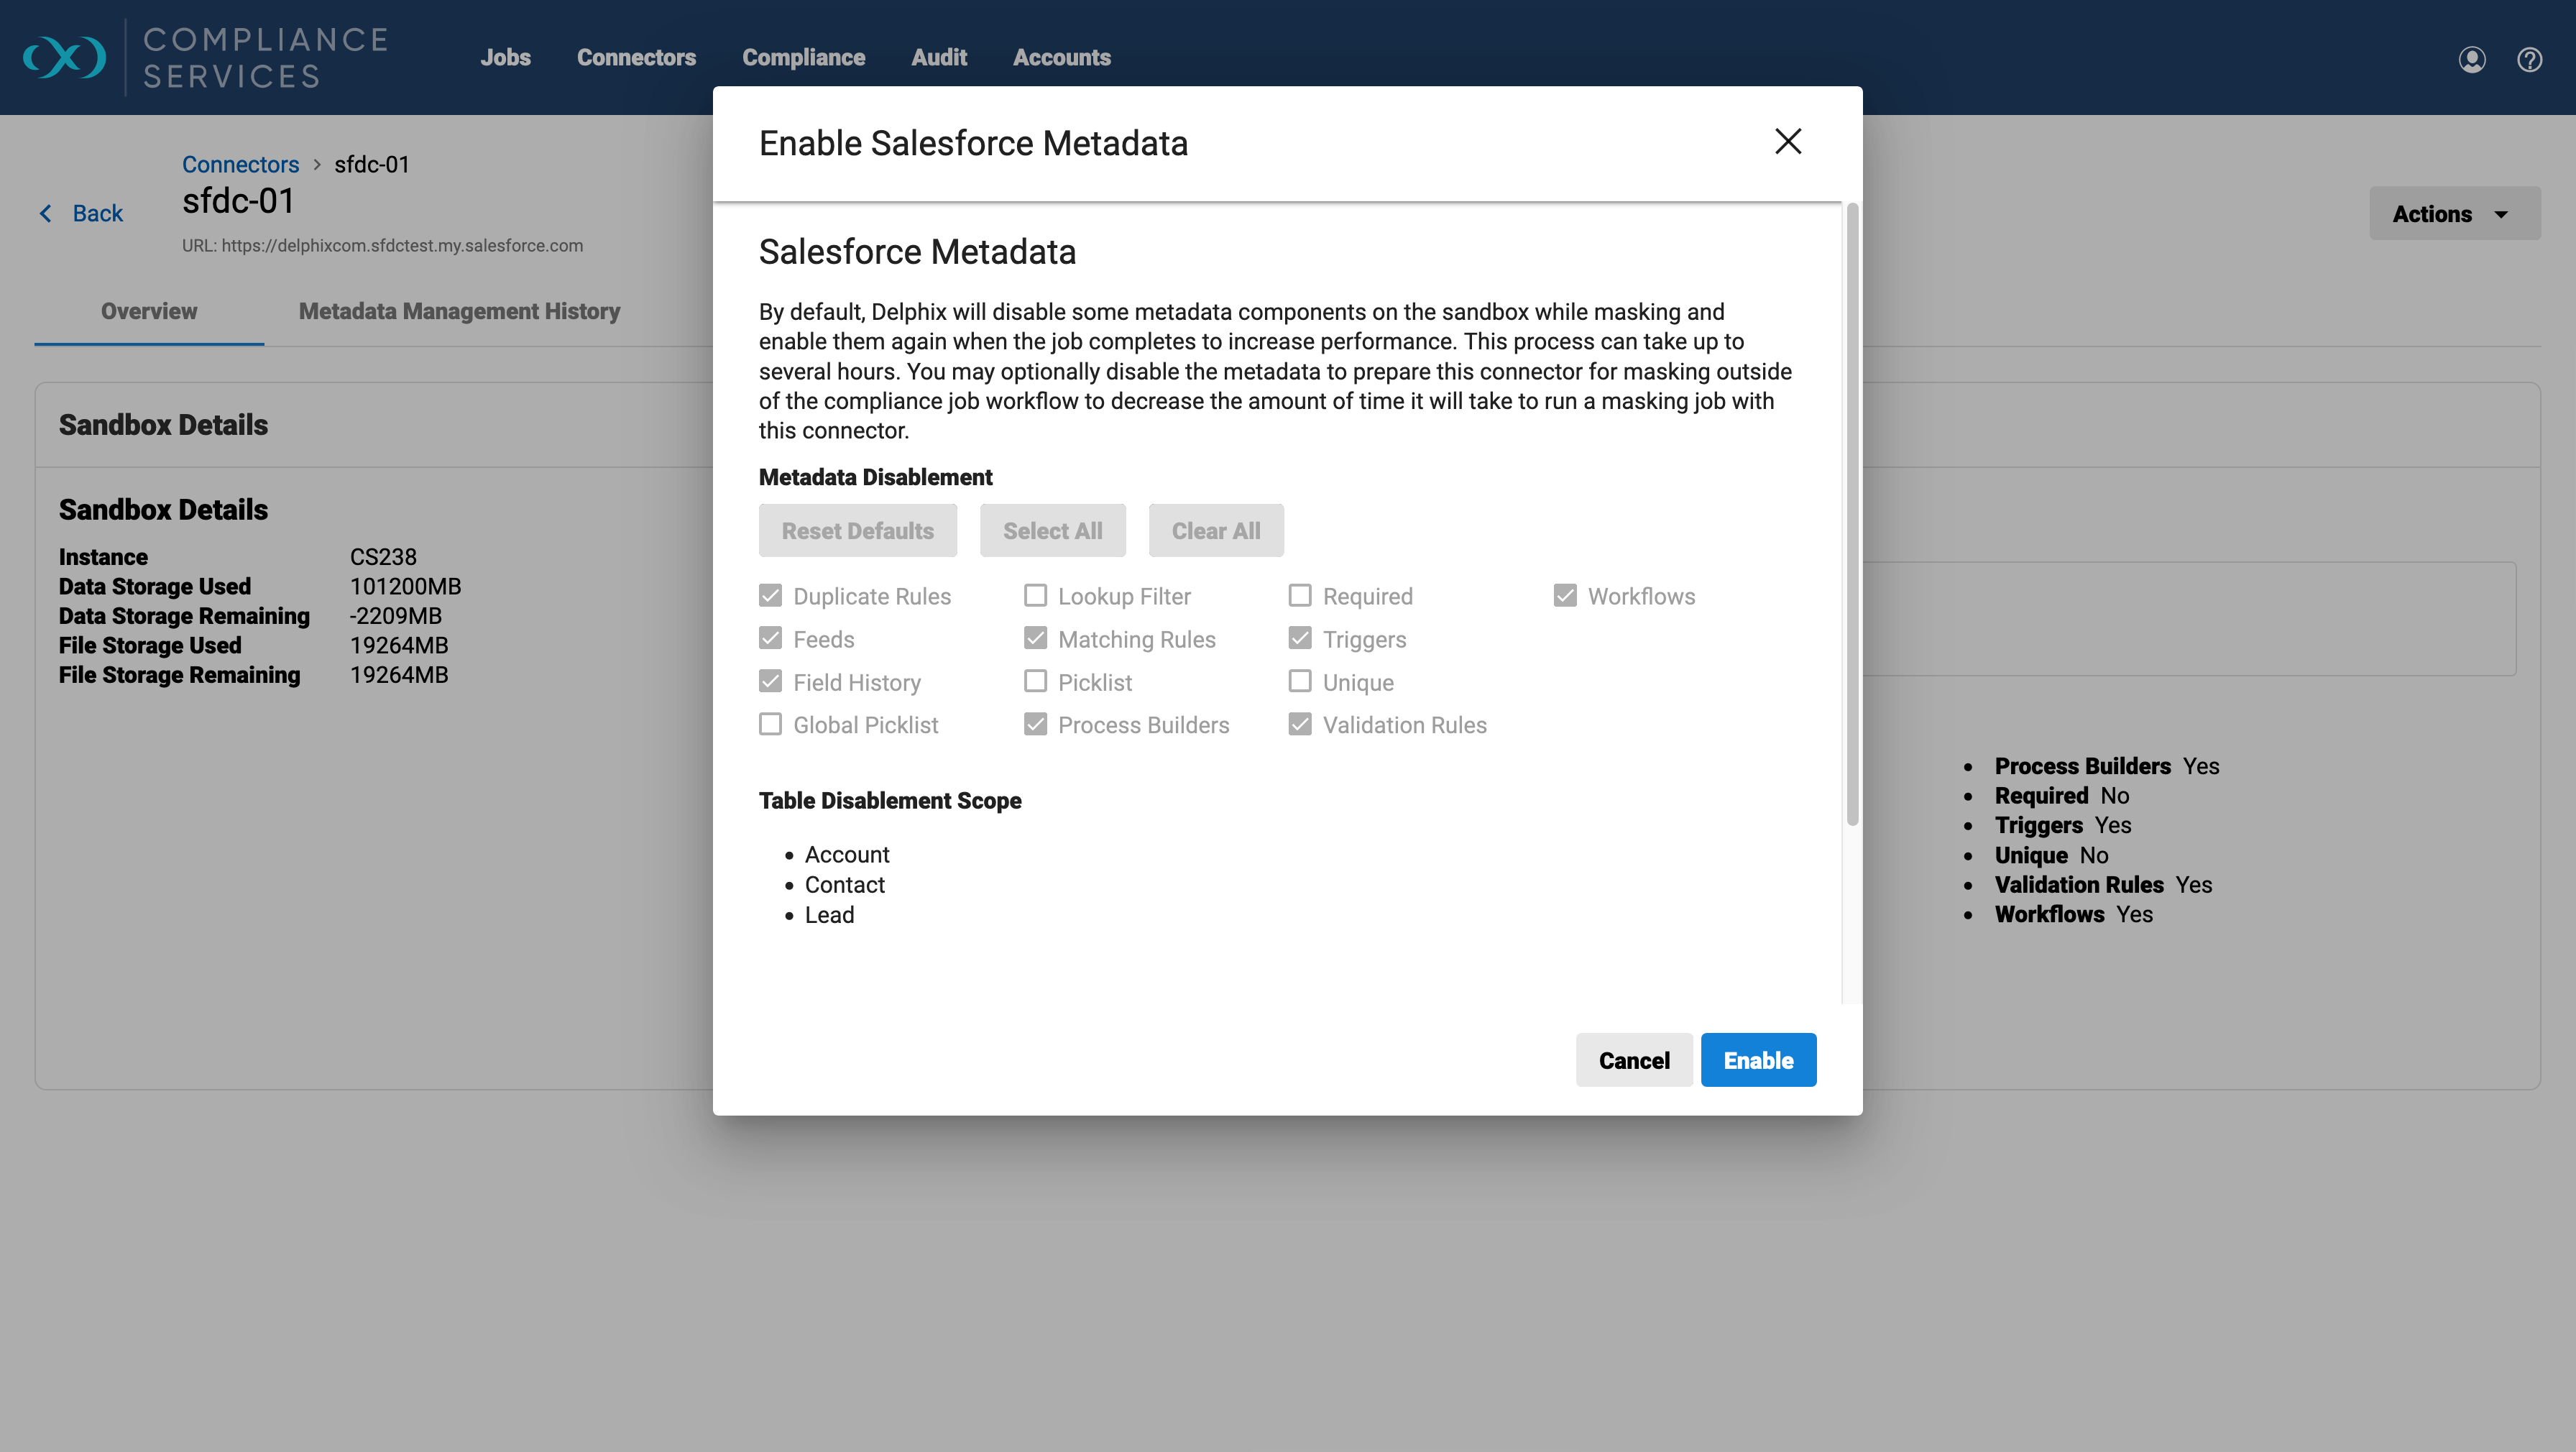
The previous action will open a window seeking input for the components and the tables to disable.
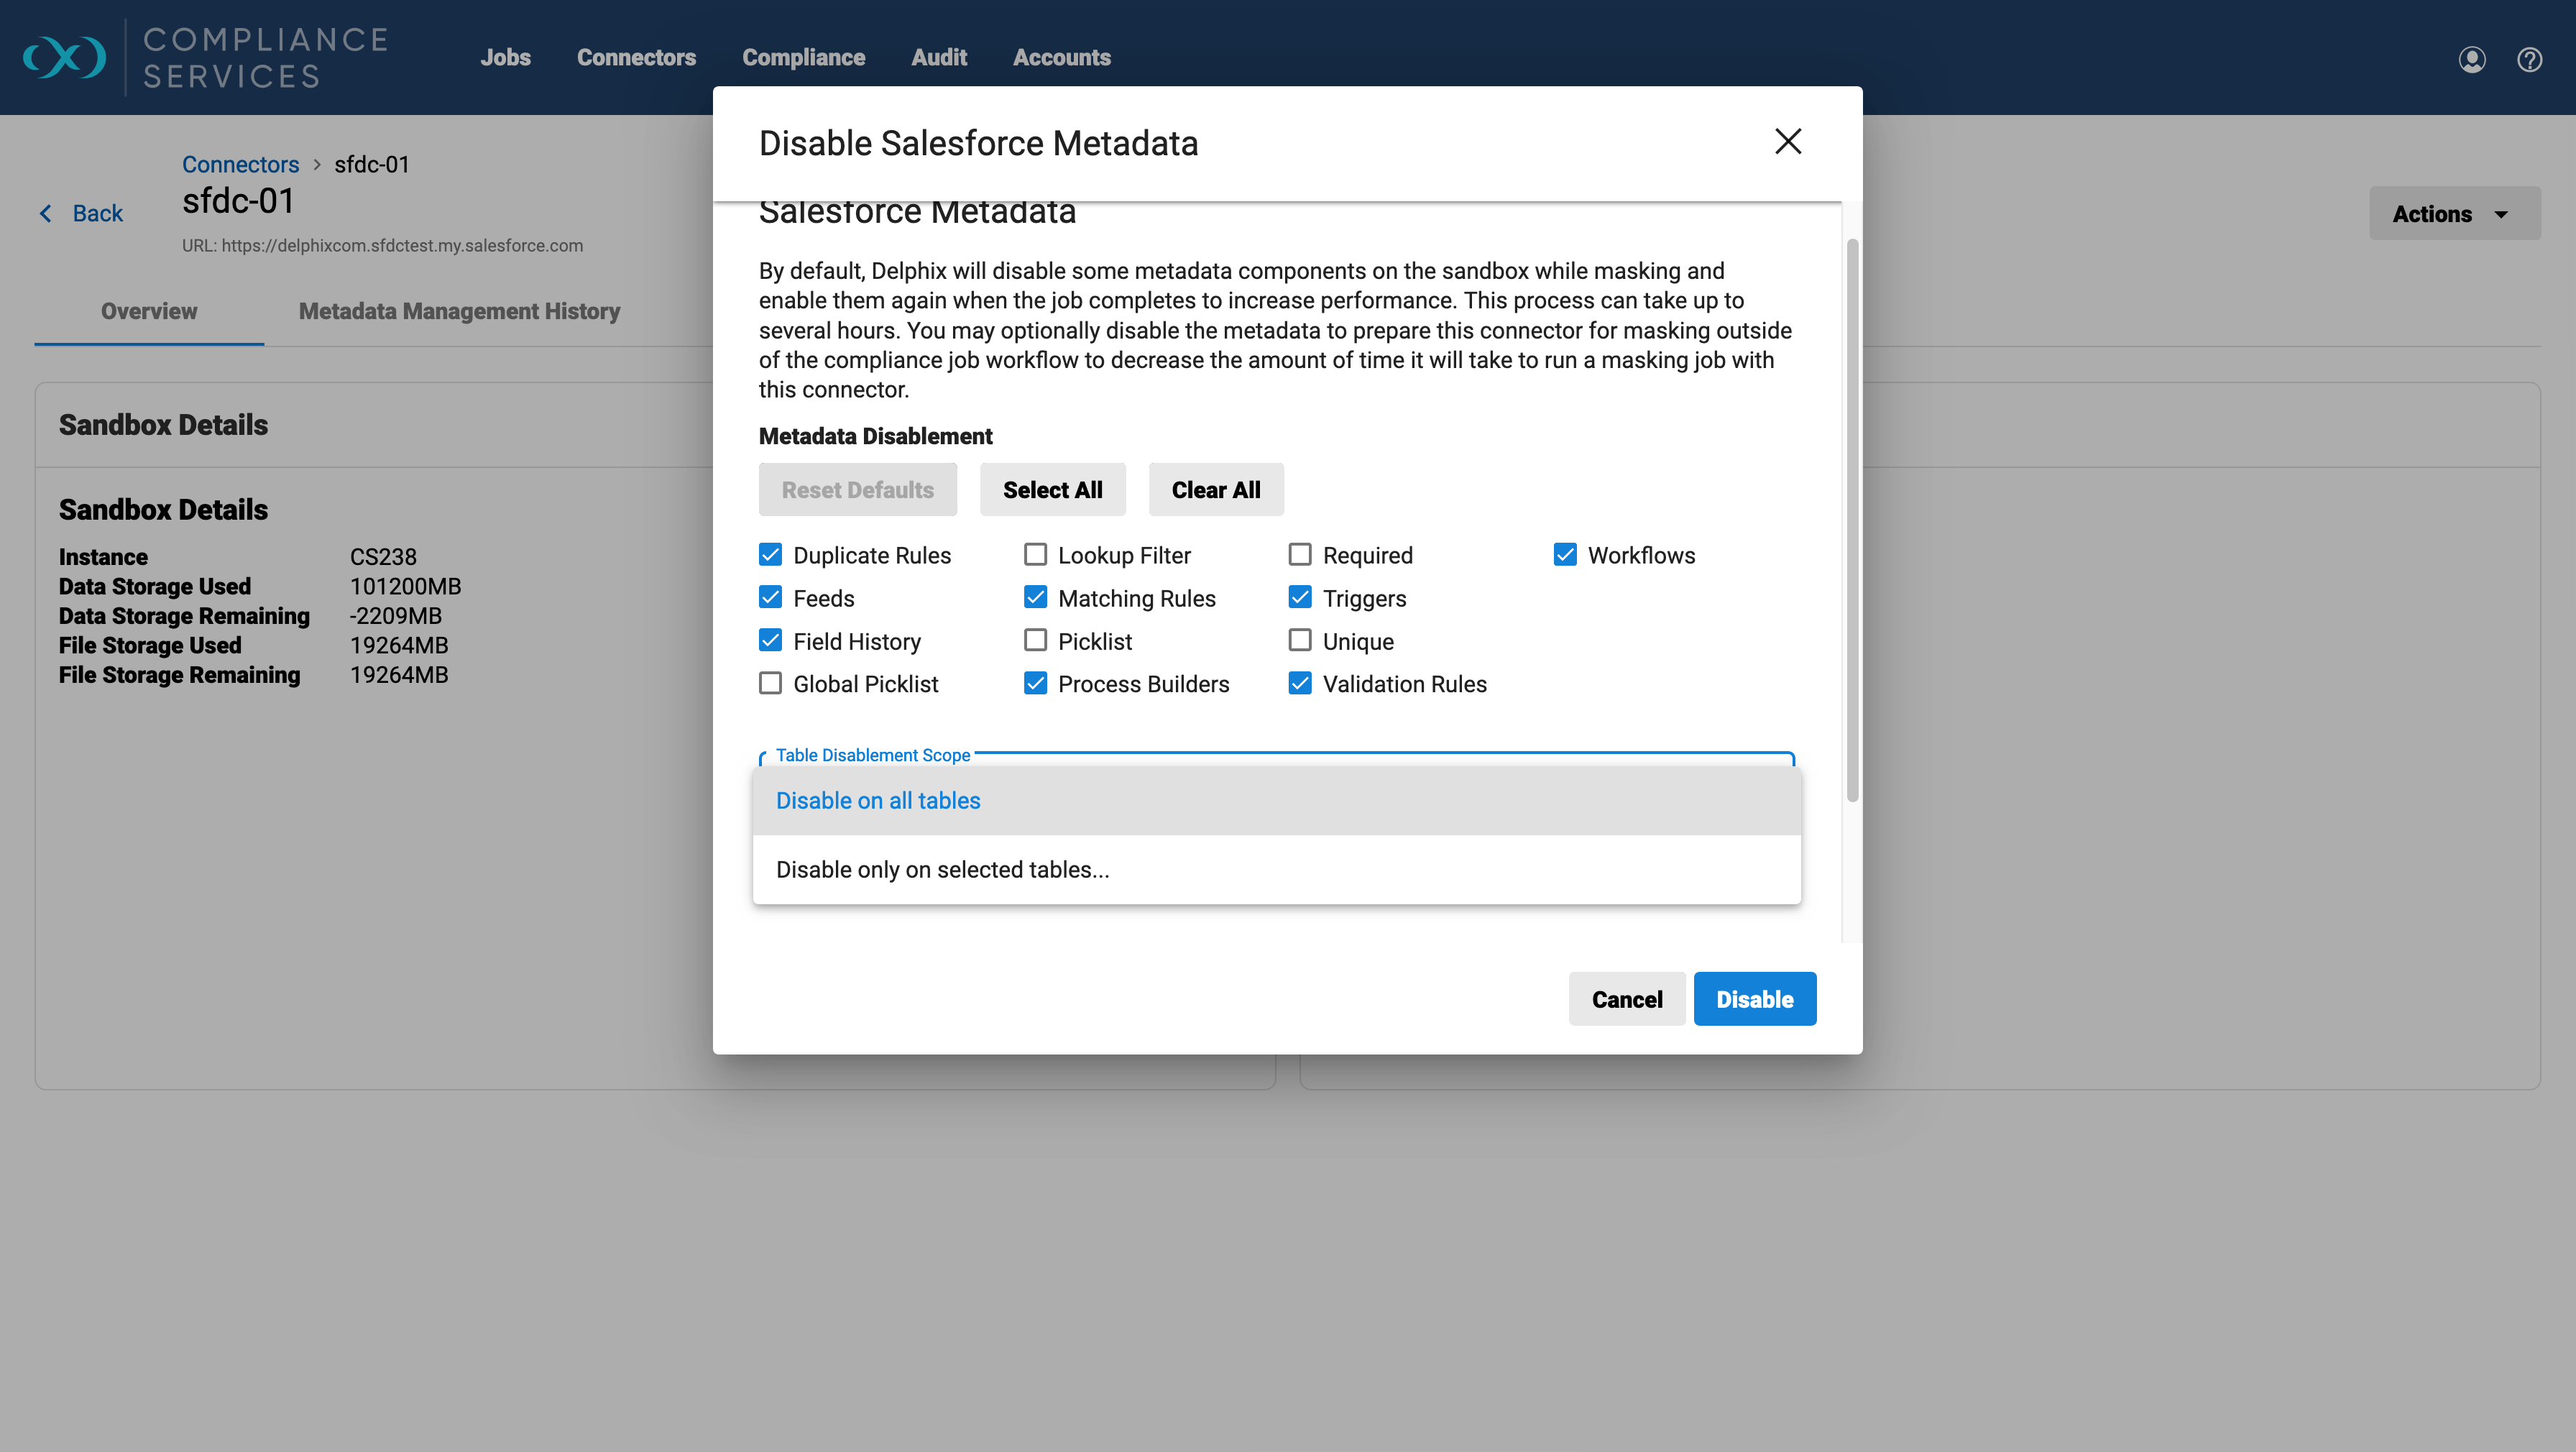
Select the components that are applicable. The recommended metadata components set at default are pre-selected by Delphix. Select additional components, or remove them by clicking on the checkboxes.
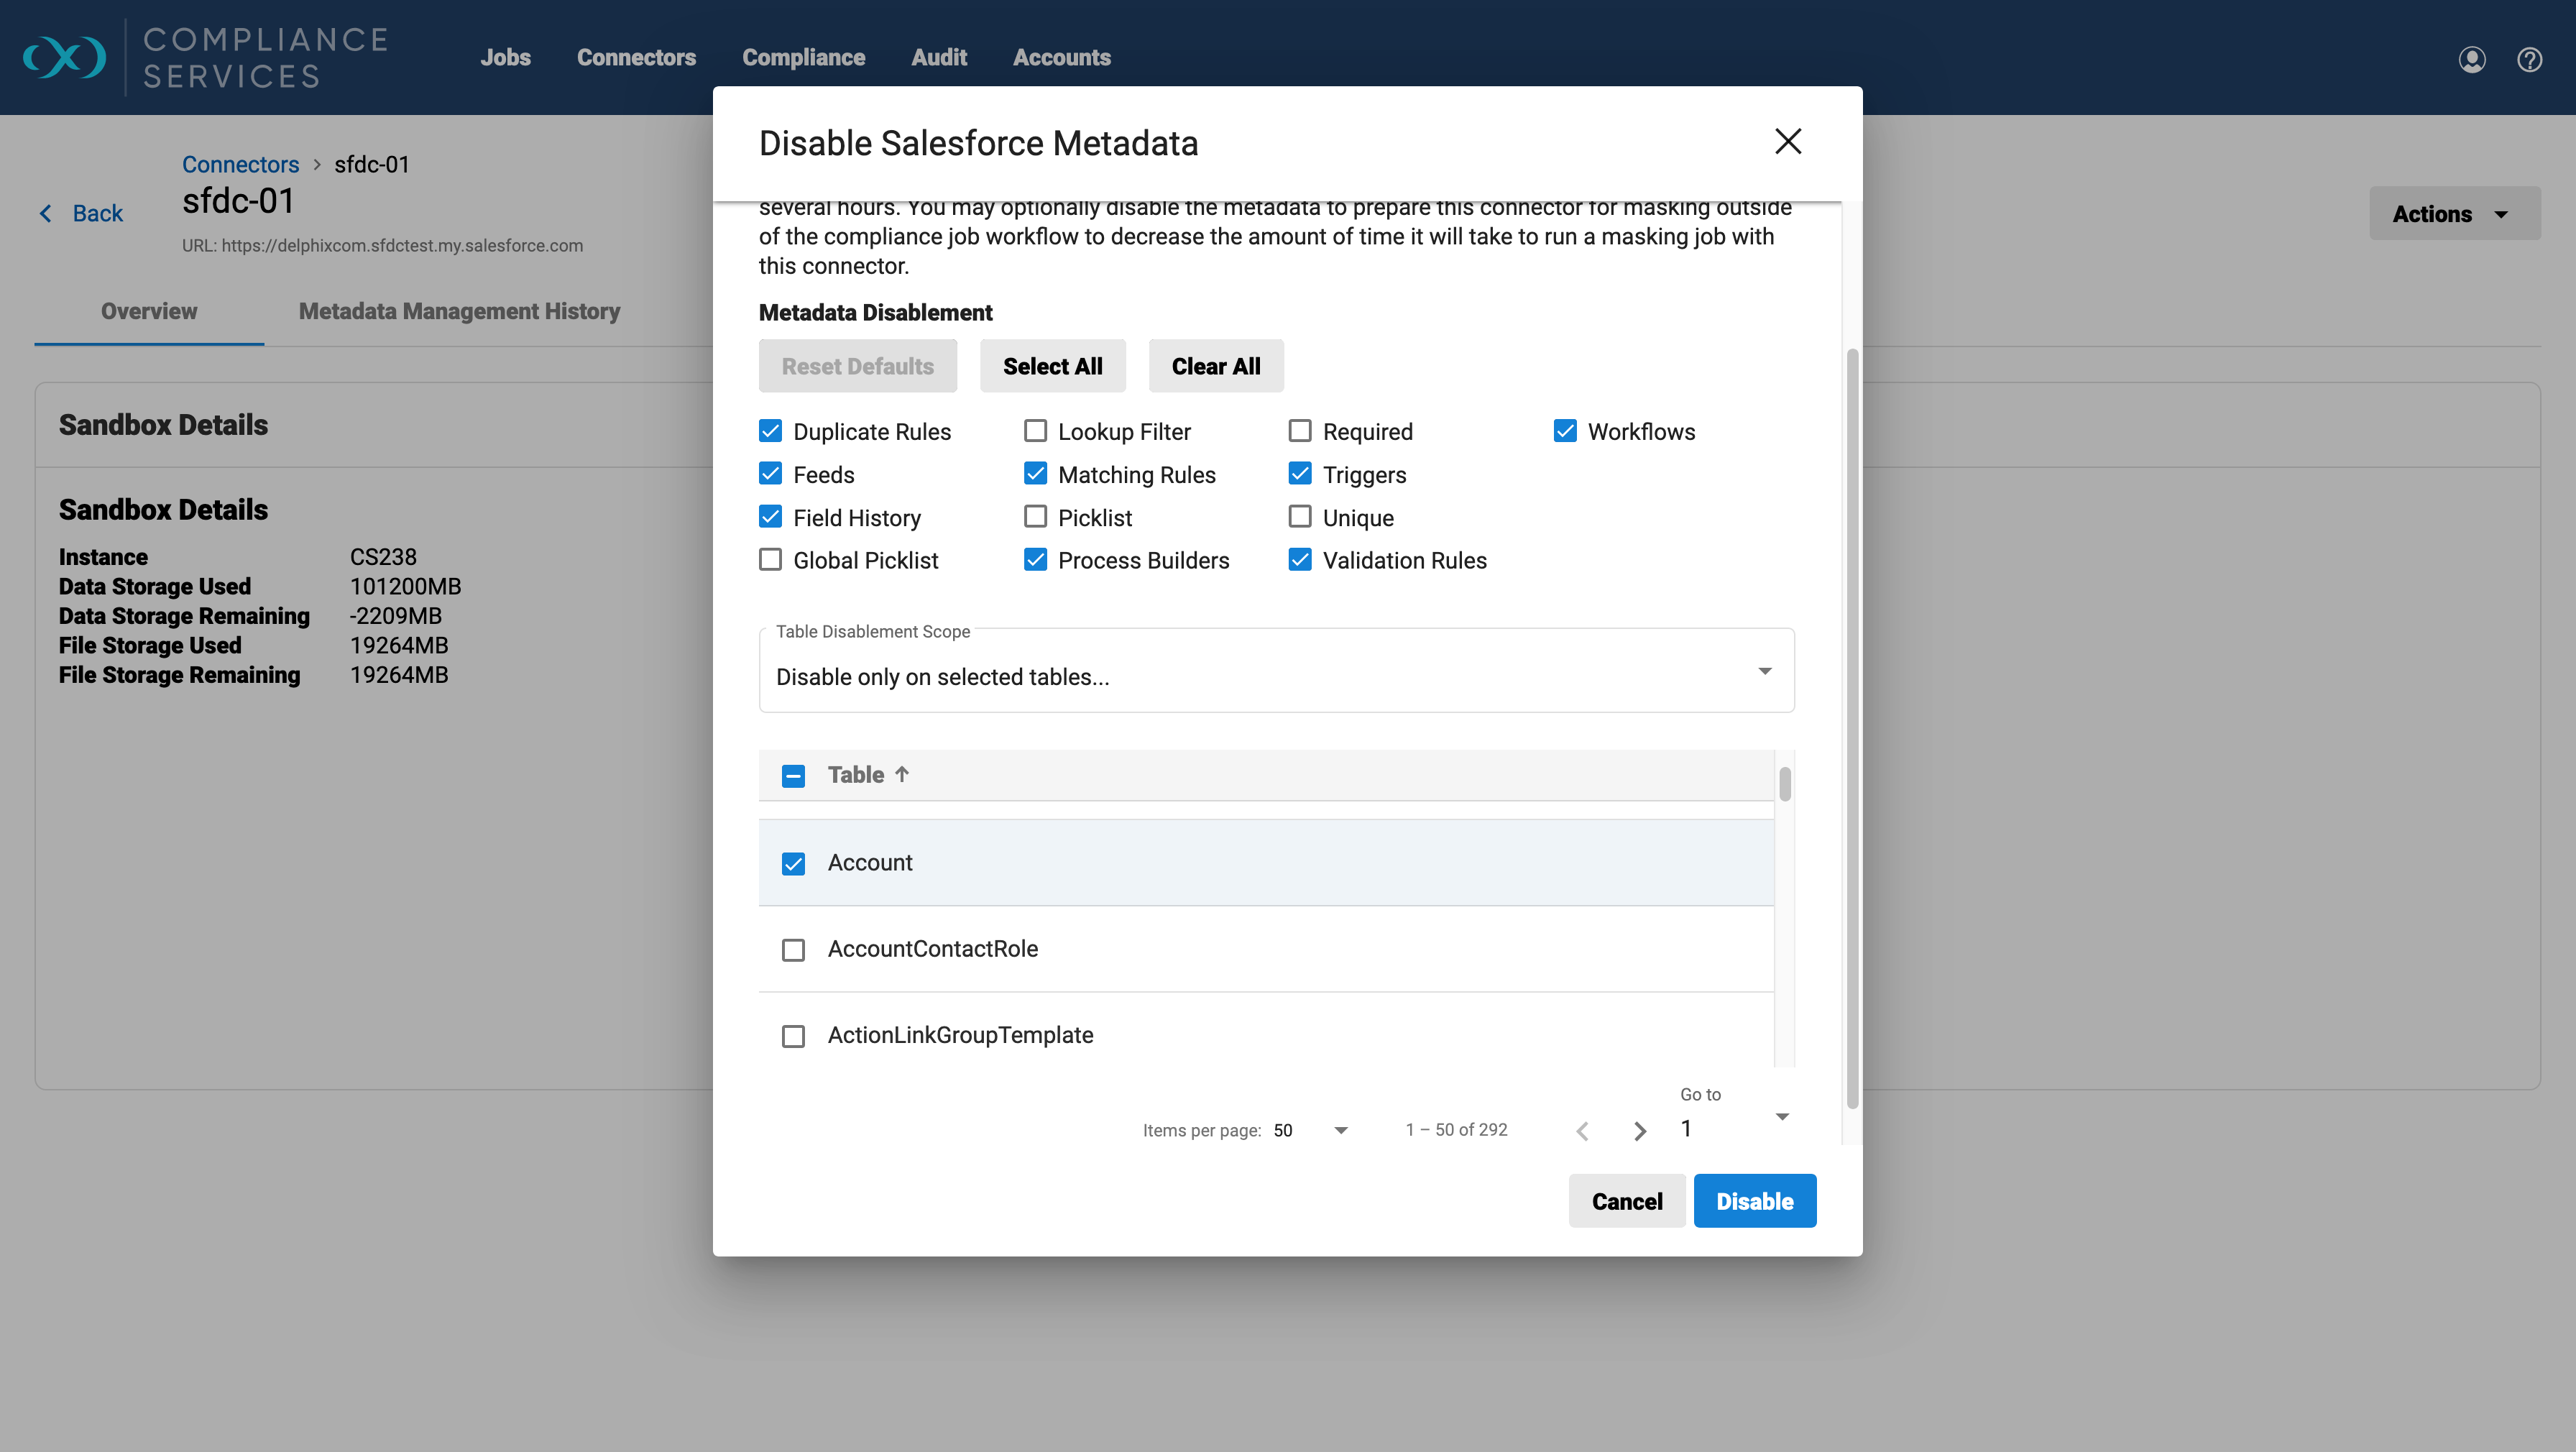
Choose to Disable on all tables or Disable only on selected tables. To disable all tables, choose Disable on all tables and click on the Disable button.
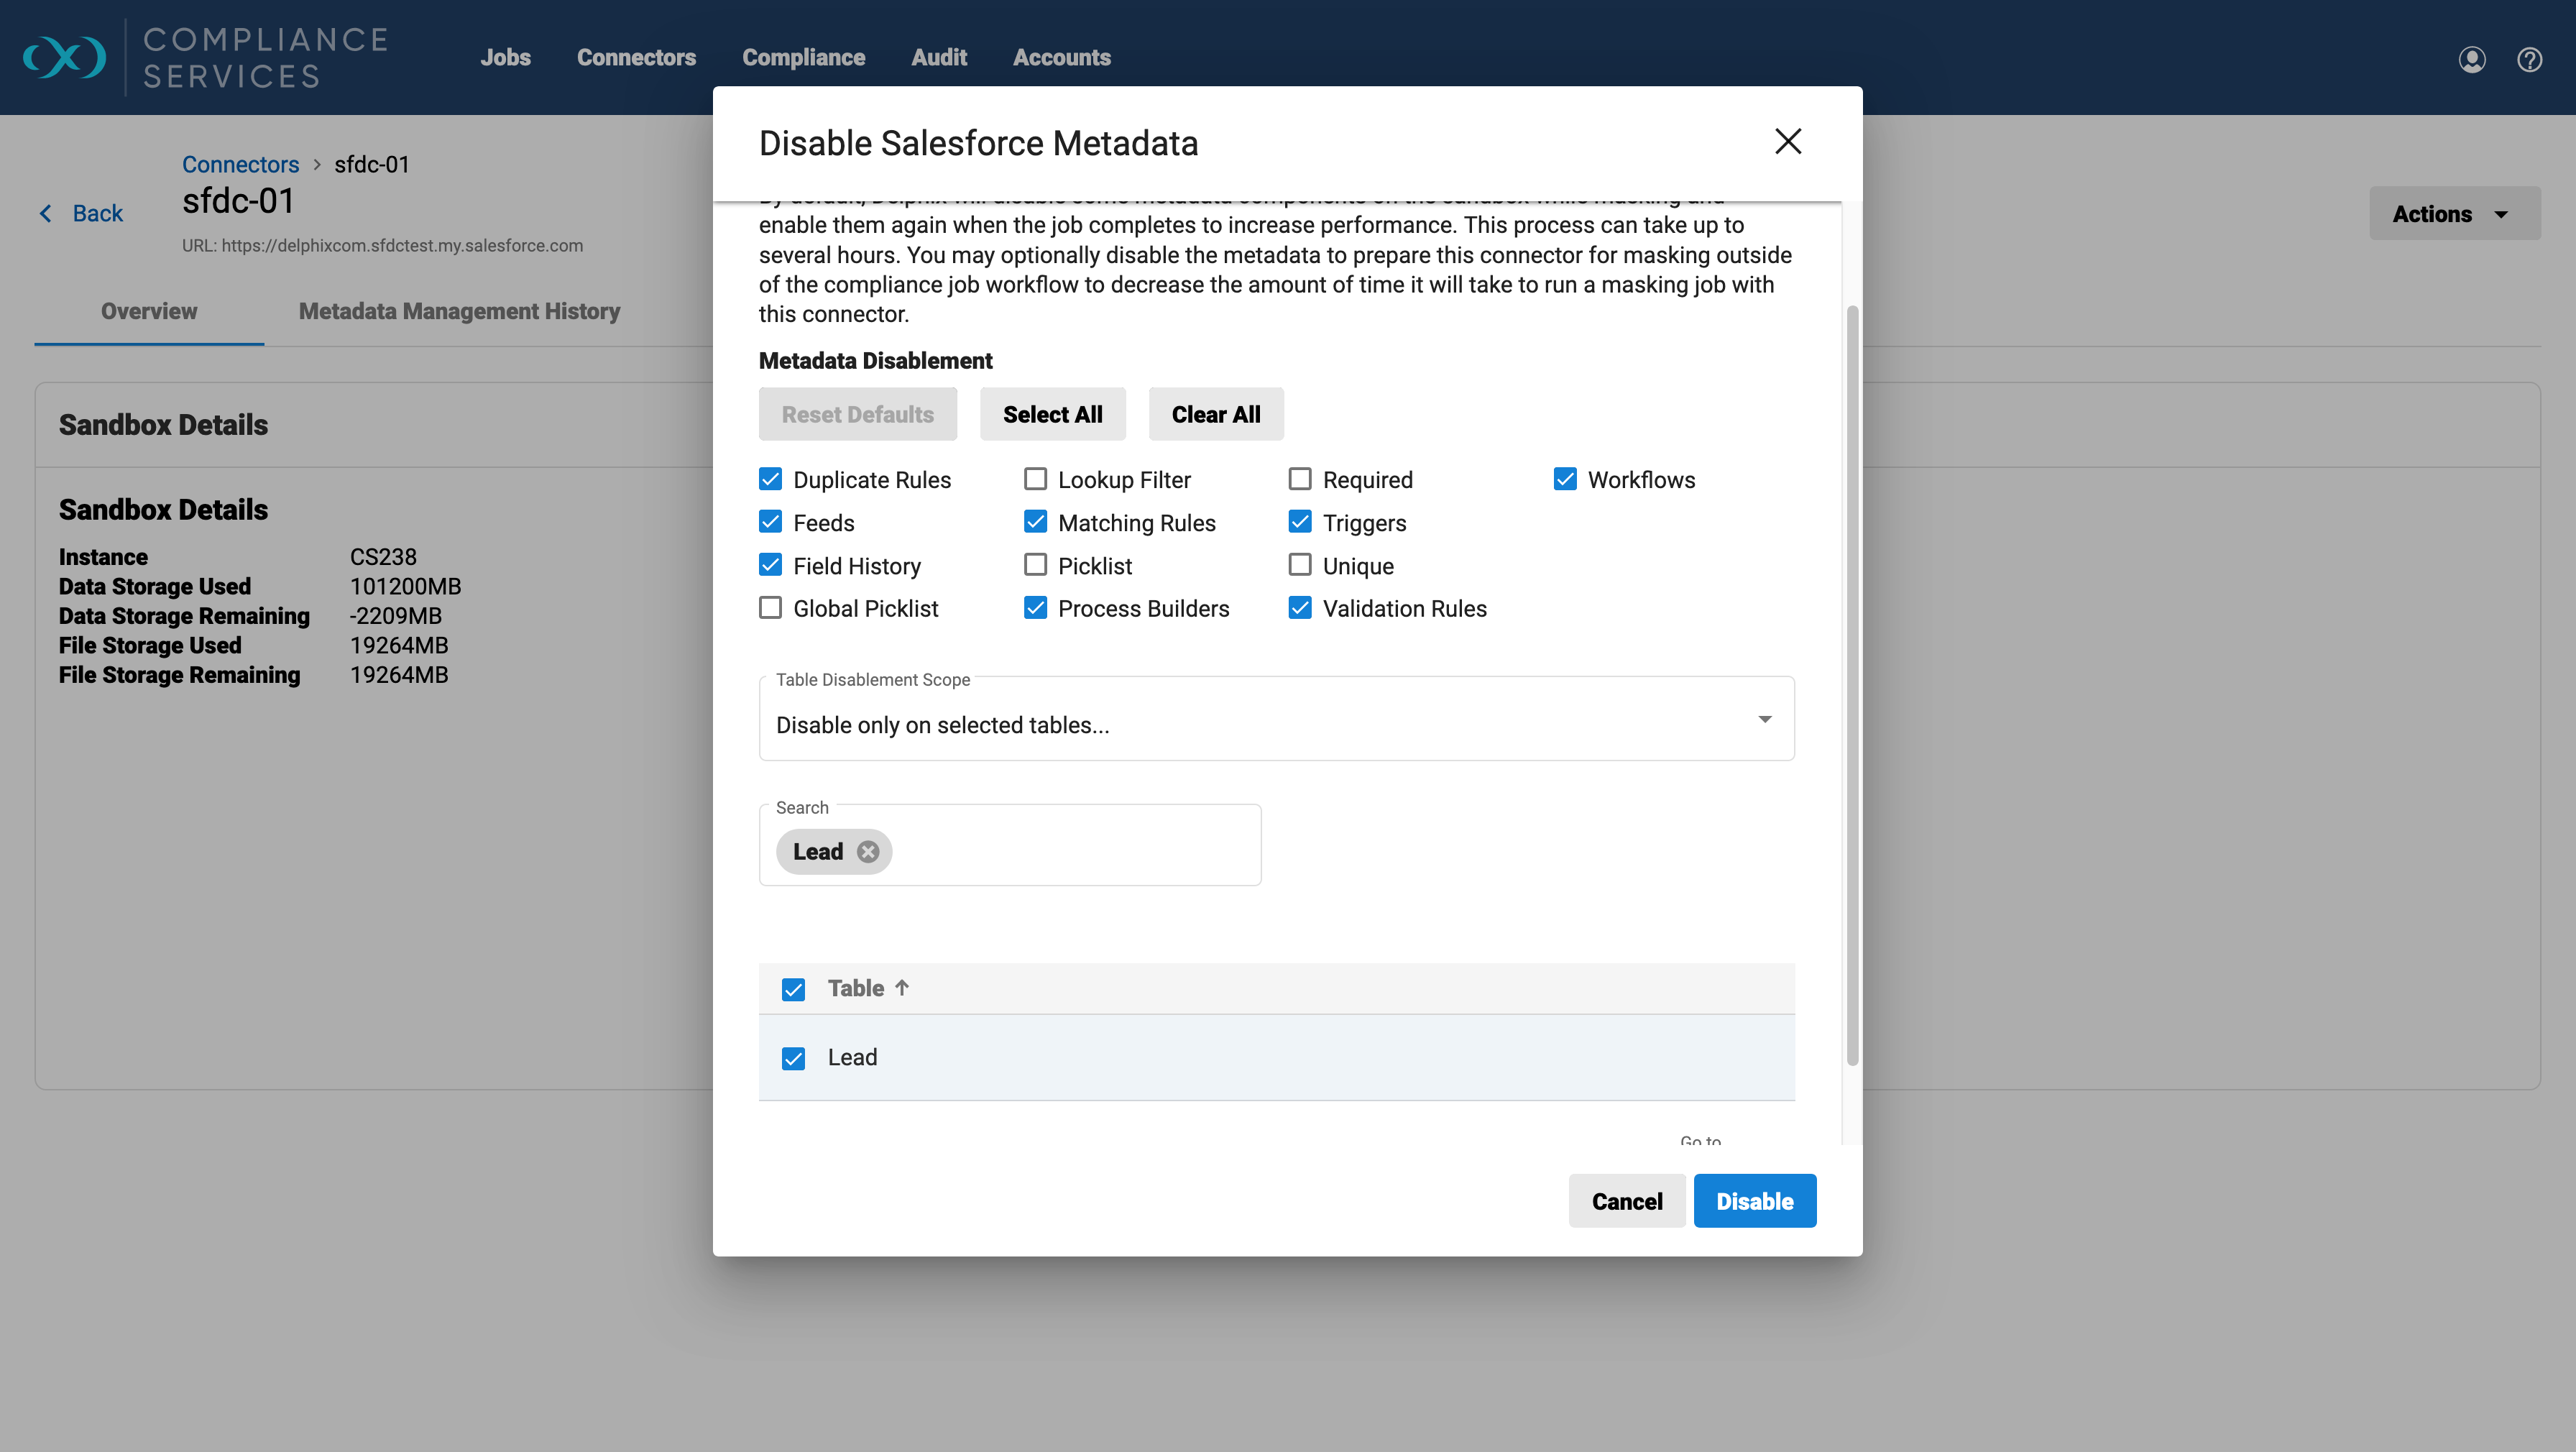
To disable selected tables, click Disable on selected tables and choose tables from the drop-down, or filter them with the search box.
Clicking on the Disable button will start a new metadata management job. The Job Status will be In Progress until the job is completed, showing a Finished or Failed state.
The Disable operation is only available when the sandbox metadata state is Enabled.
Users who have not pre-disabled specific metadata components at the connector level can opt to temporarily disable them during job execution in the wizard. This temporary disabling will be reversed upon job completion.
Alternatively, The job wizard dynamically reflects the latest metadata status of the connected Salesforce sandbox. When relevant components are already disabled, the corresponding disable option in the wizard will appear inactive (greyed out). See the Creating a masking job page for more information.
Enabling back the metadata on the connector
Selecting Enable Metadata will revert the sandbox to its pre-disabled state. This action automatically re-enables all previously disabled components.
Go to the connector's Overview page and click on the Actions button from the top right section. Choose Enable Metadata.
A window will open showing the components that were previously disabled. Click on the Enable button to enable the metadata components.
A new job will be started to enable the metadata components. The job status will remain In Progress until the job is completed with Finish or Failed Status.

The Enable option is only available if the sandbox metadata status is Disabled.
Metadata management history
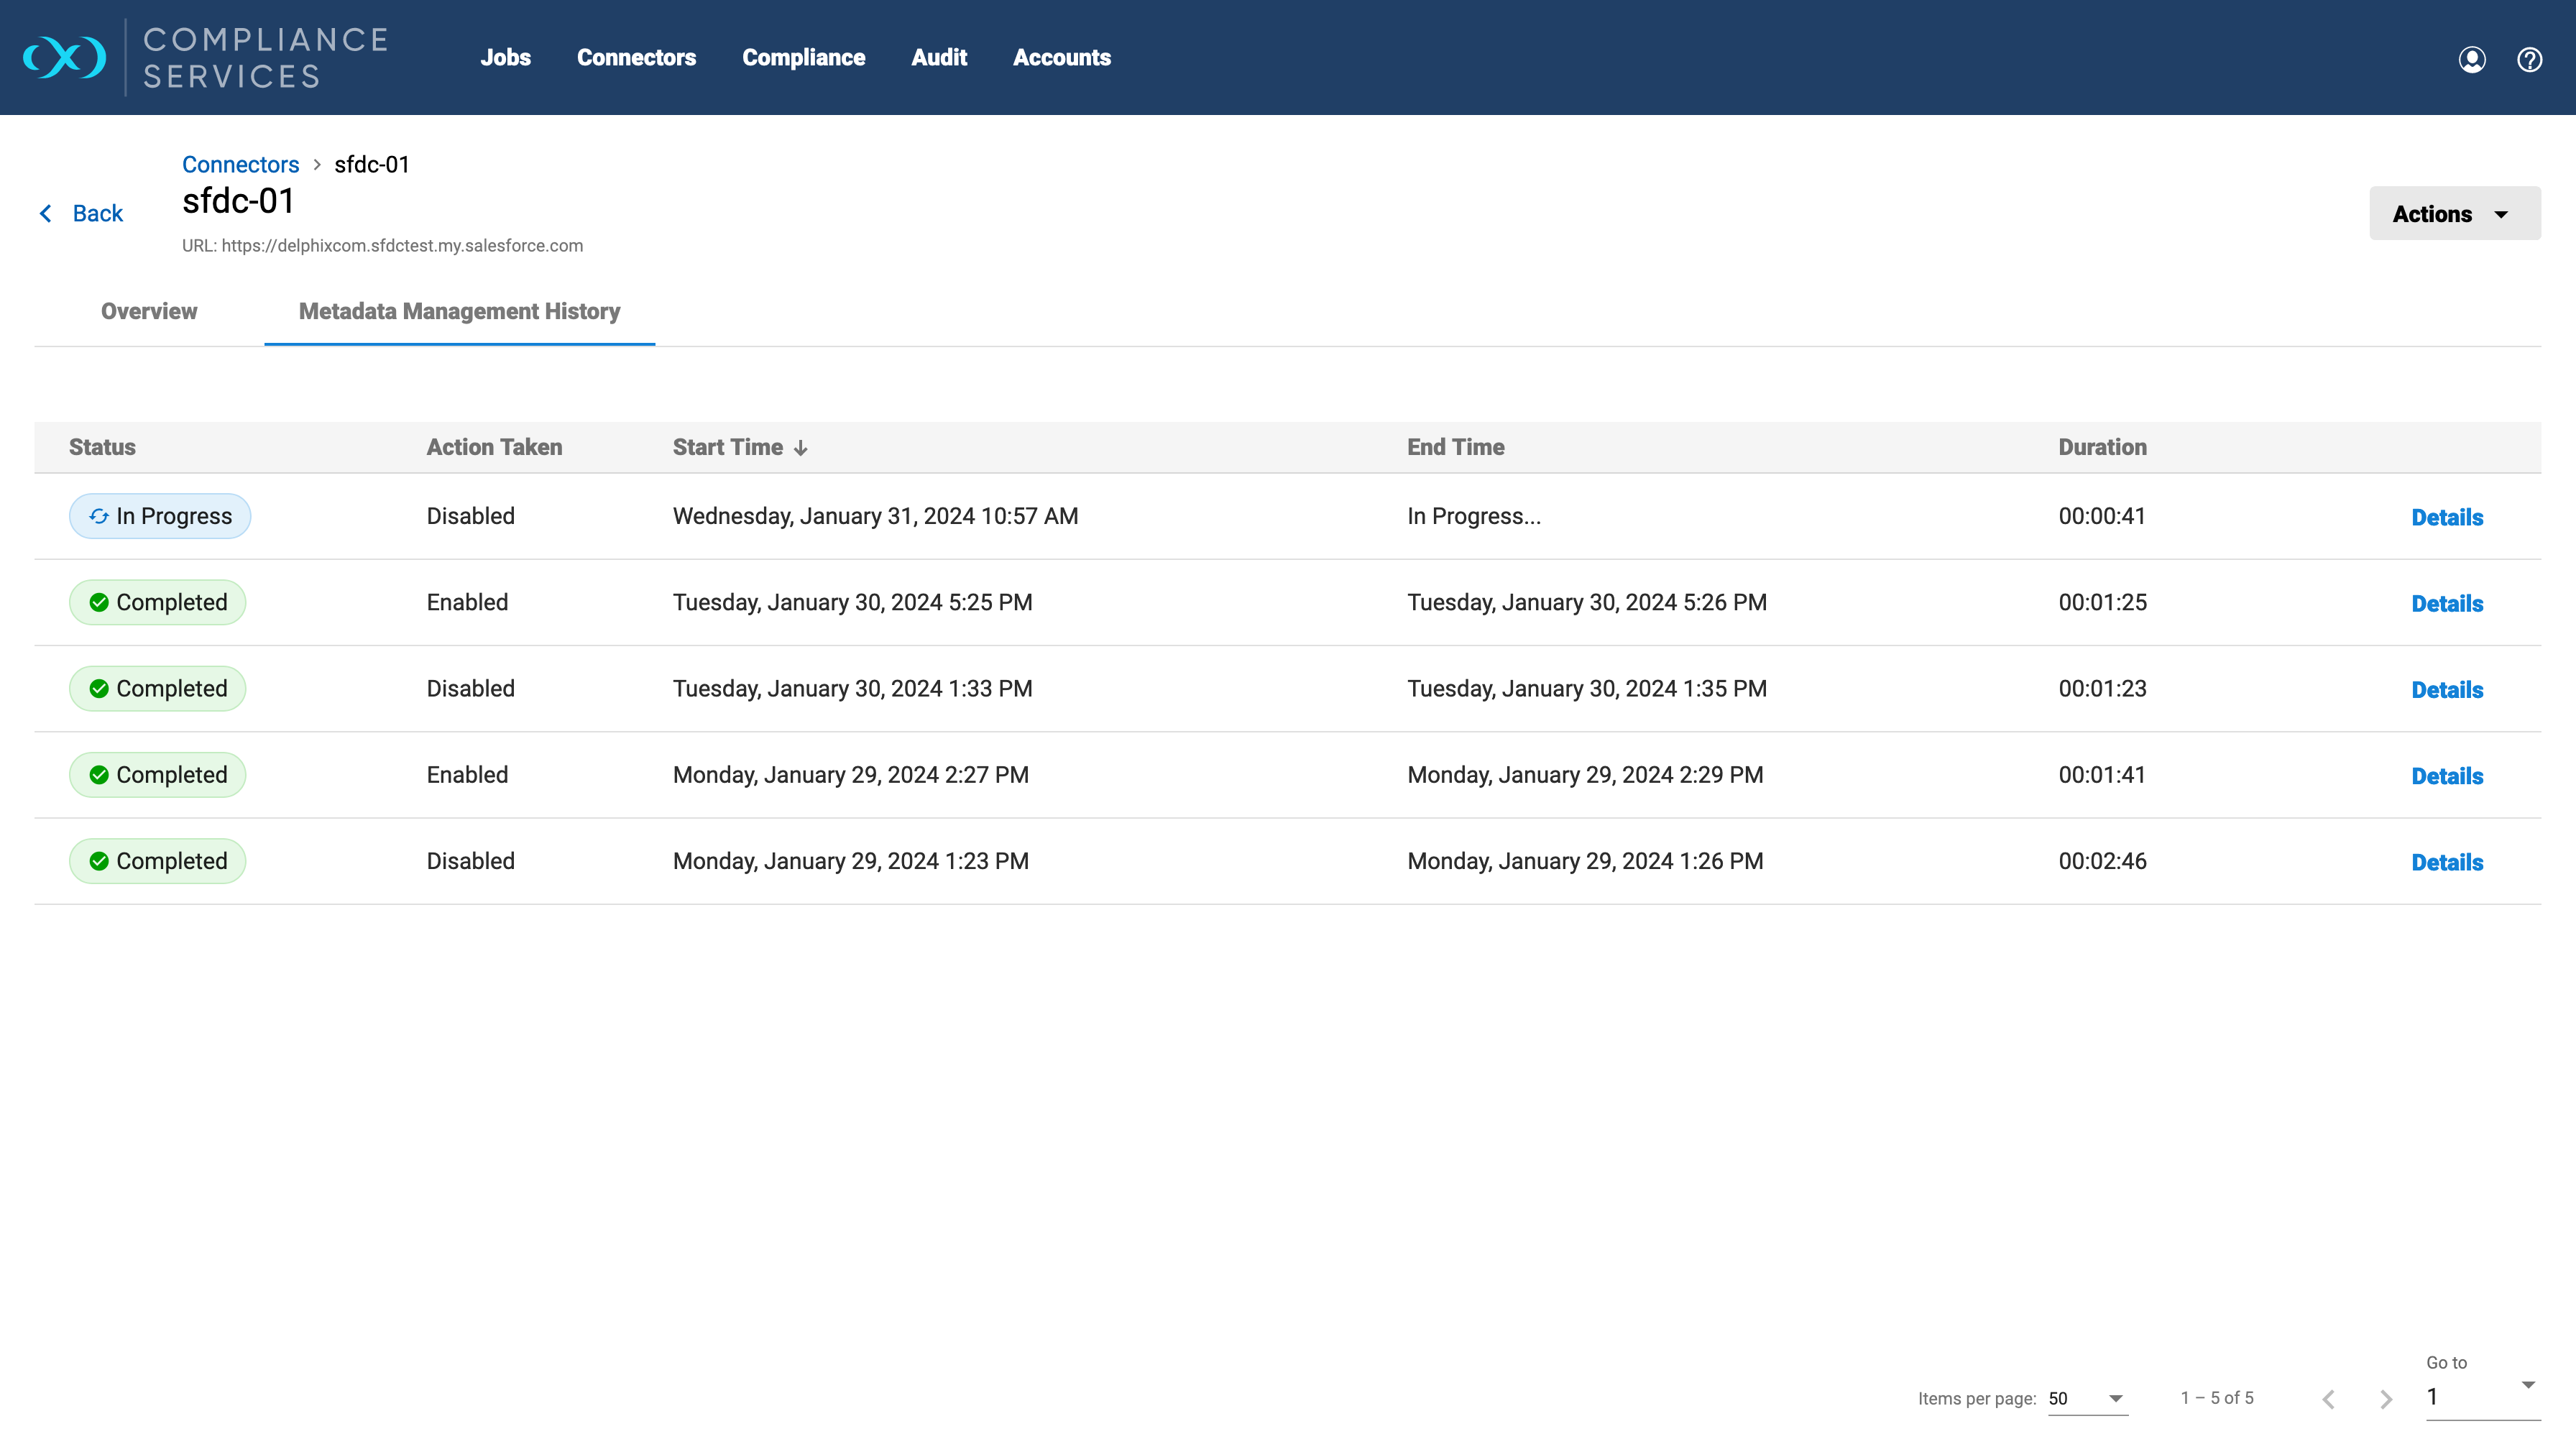
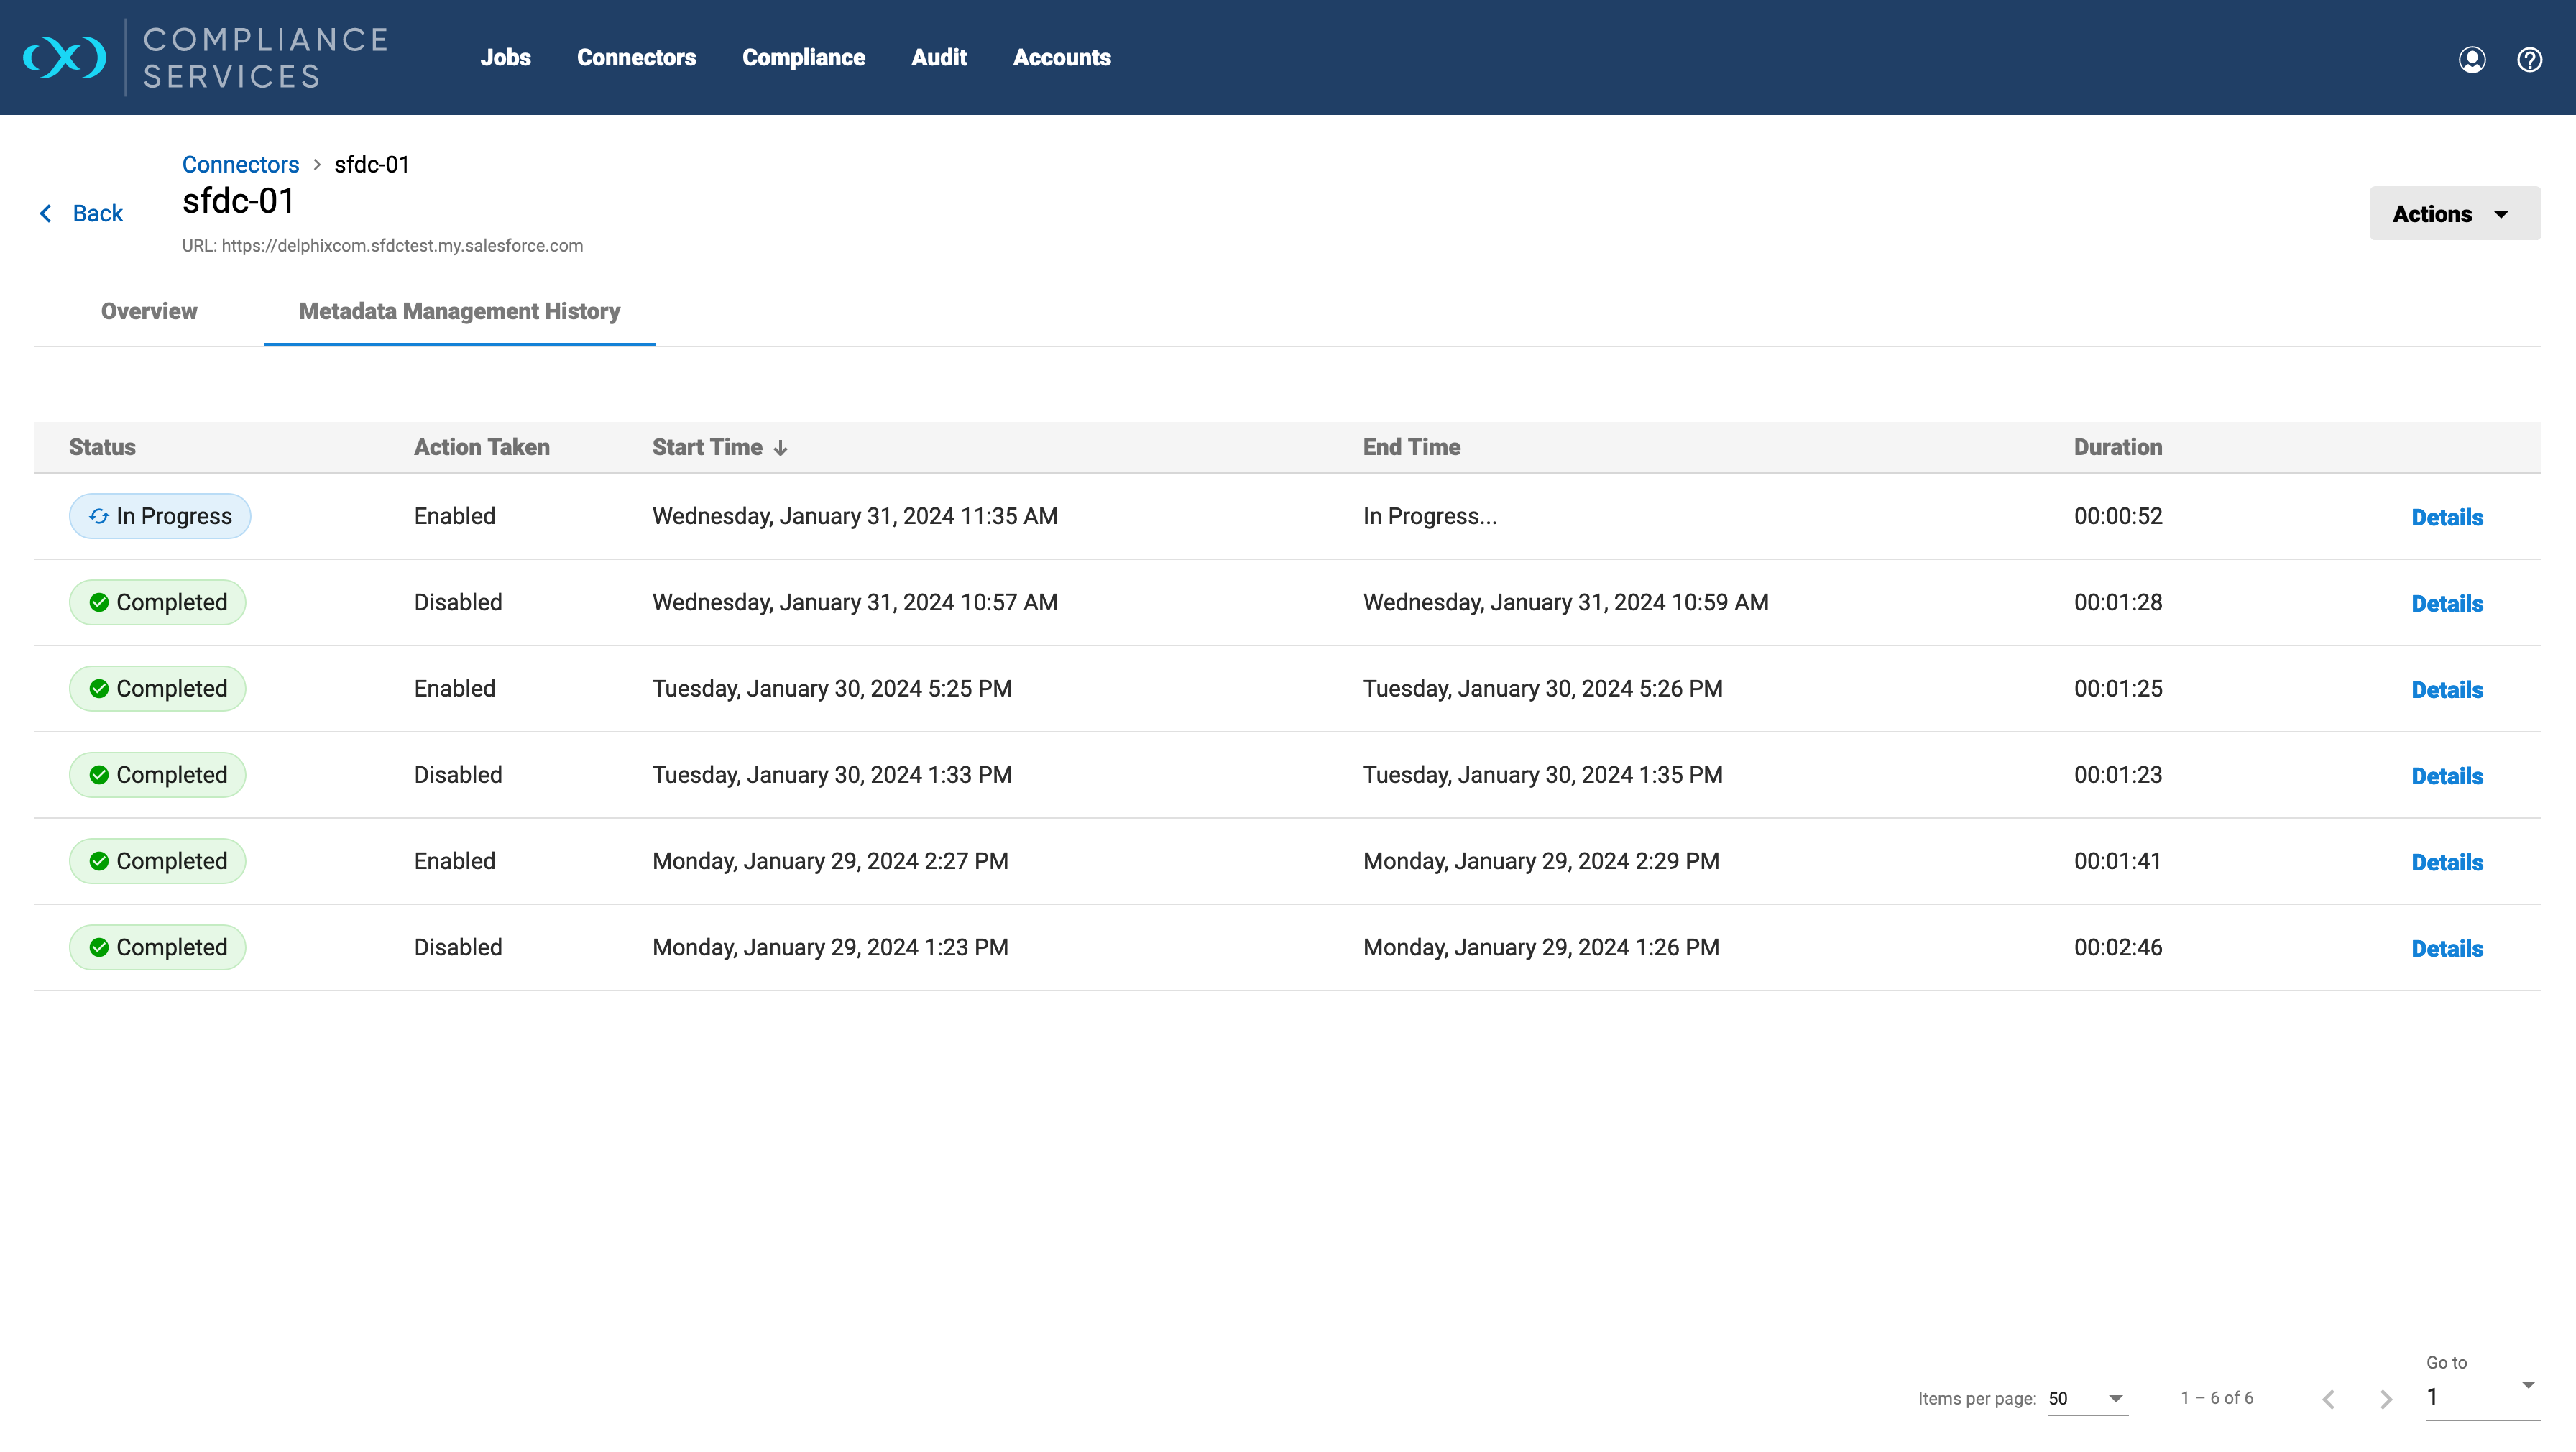
The Metadata Management History tab shows the logs of all past metadata actions performed on the connector. This allows for easy auditing and understanding of historical changes.
Open the Connector’s Overview page and click on the Metadata Management History tab.
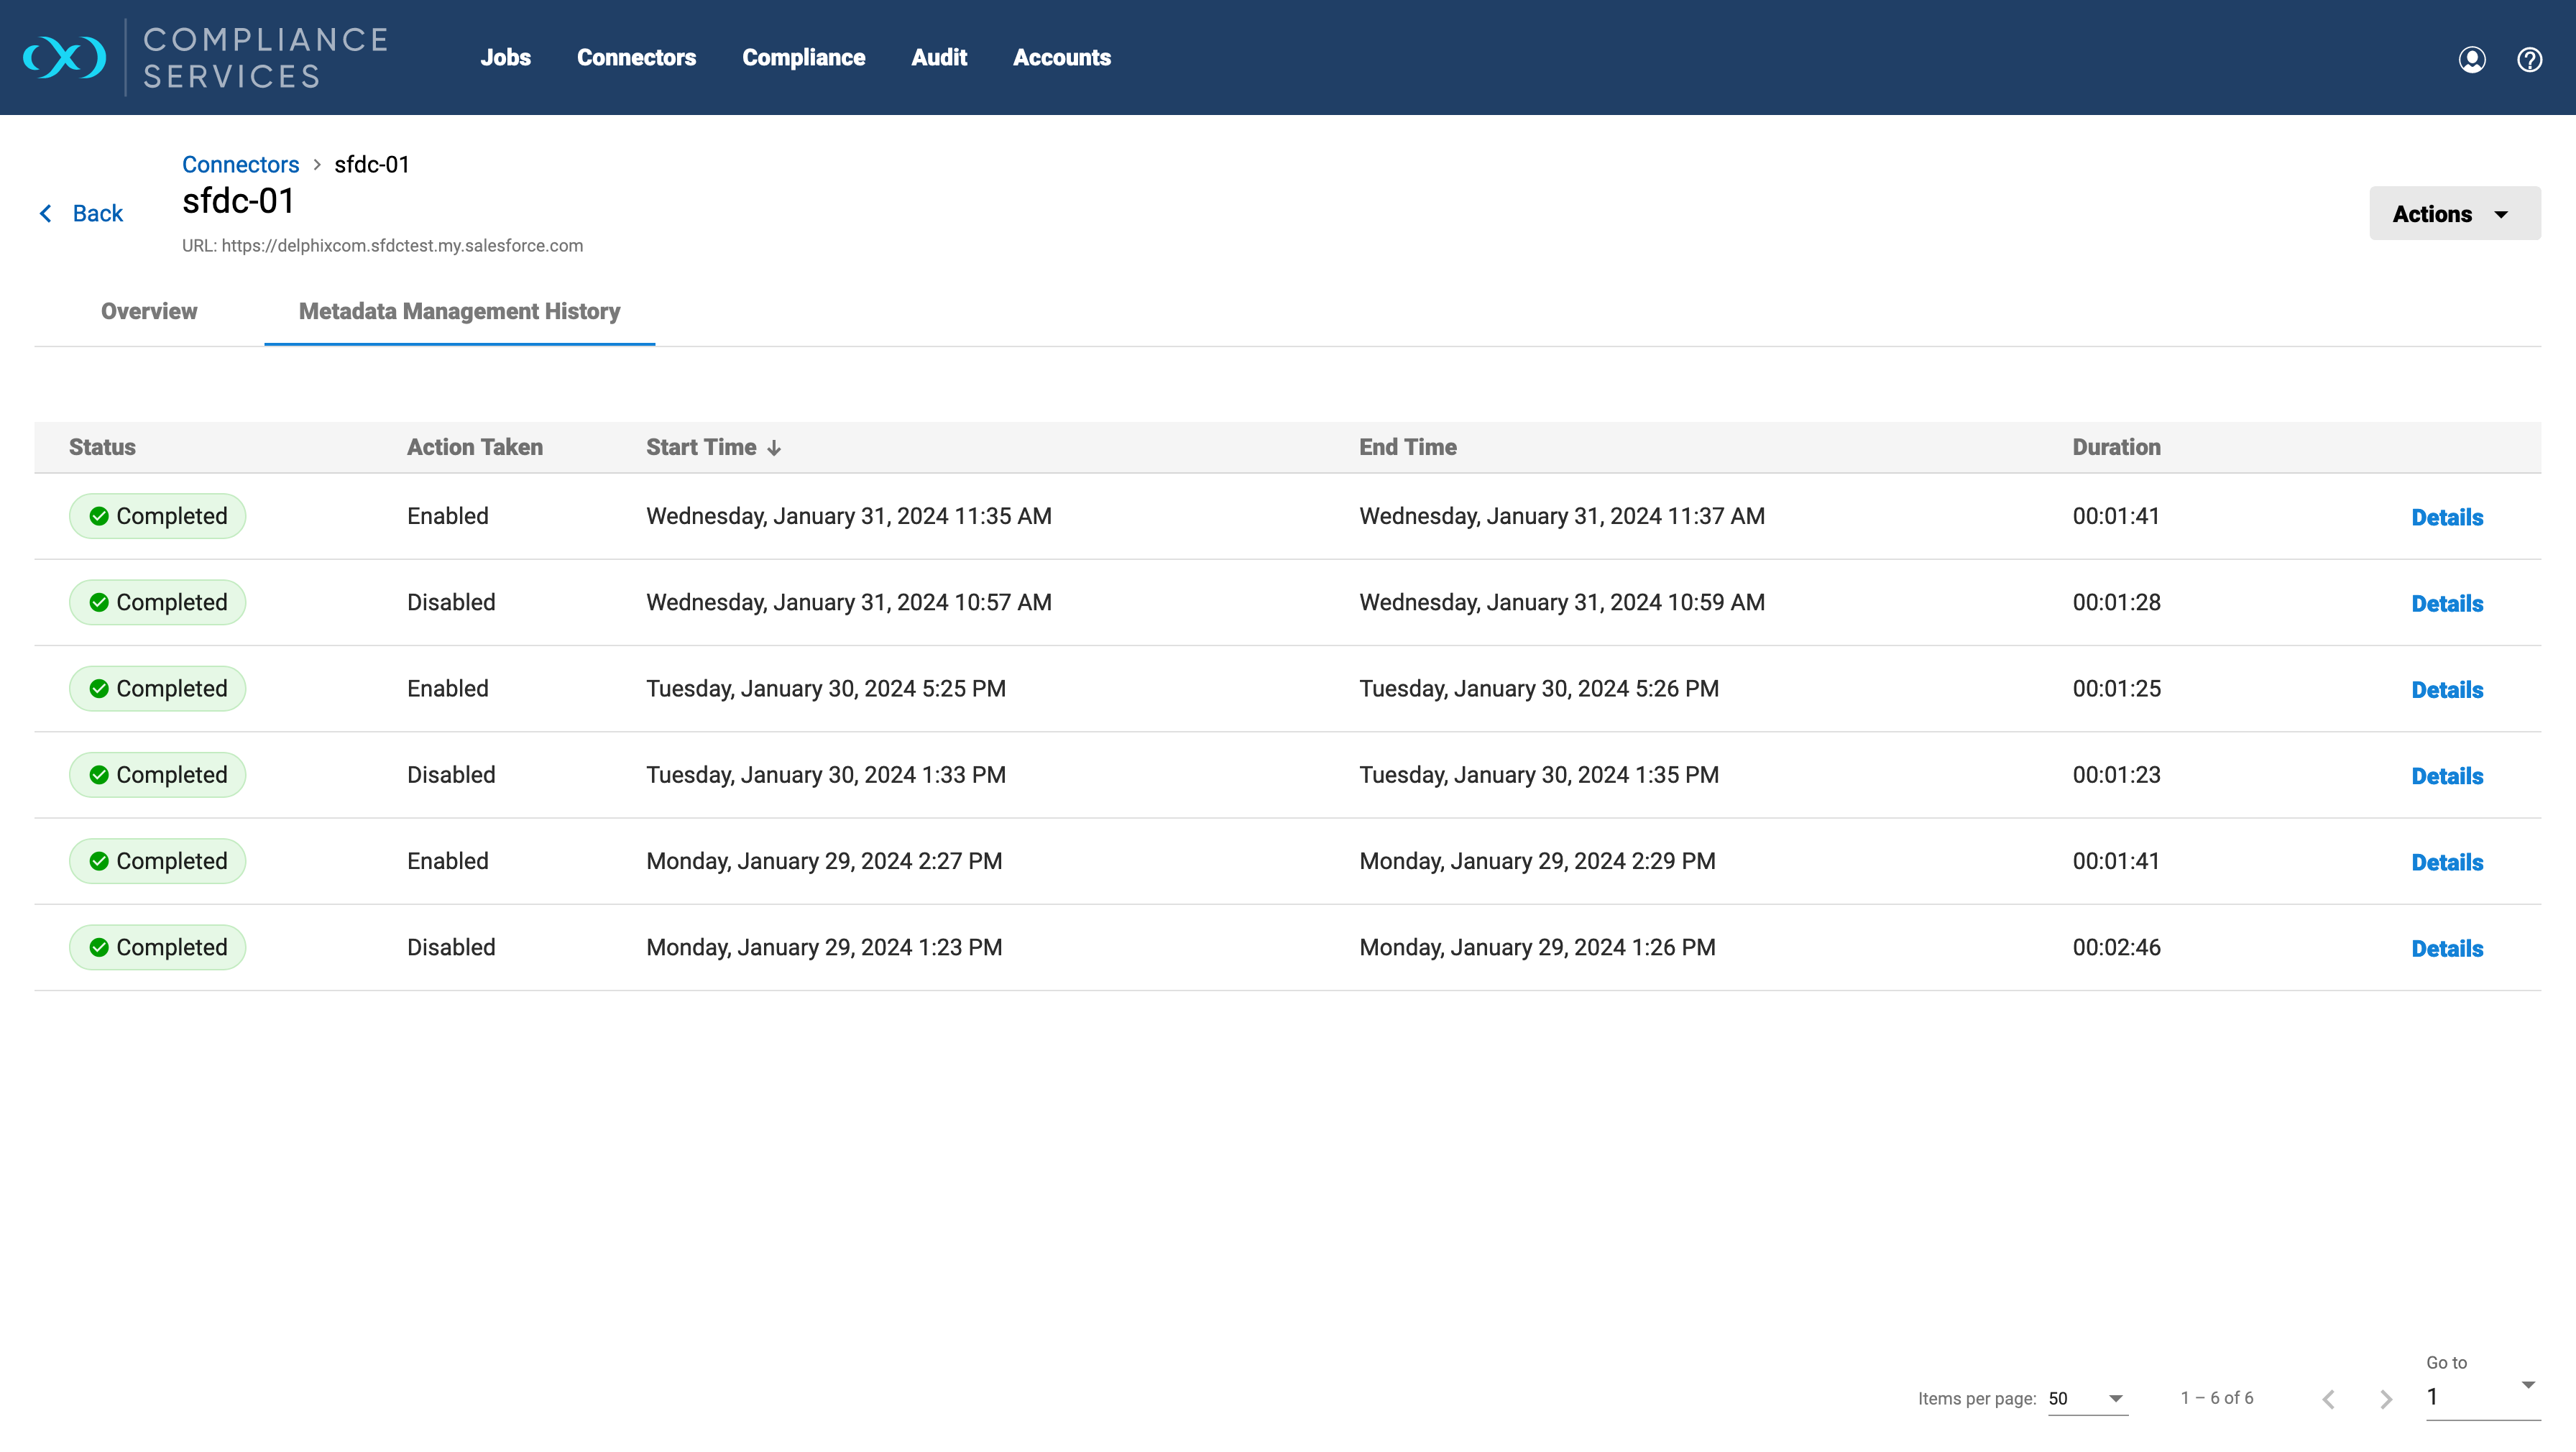
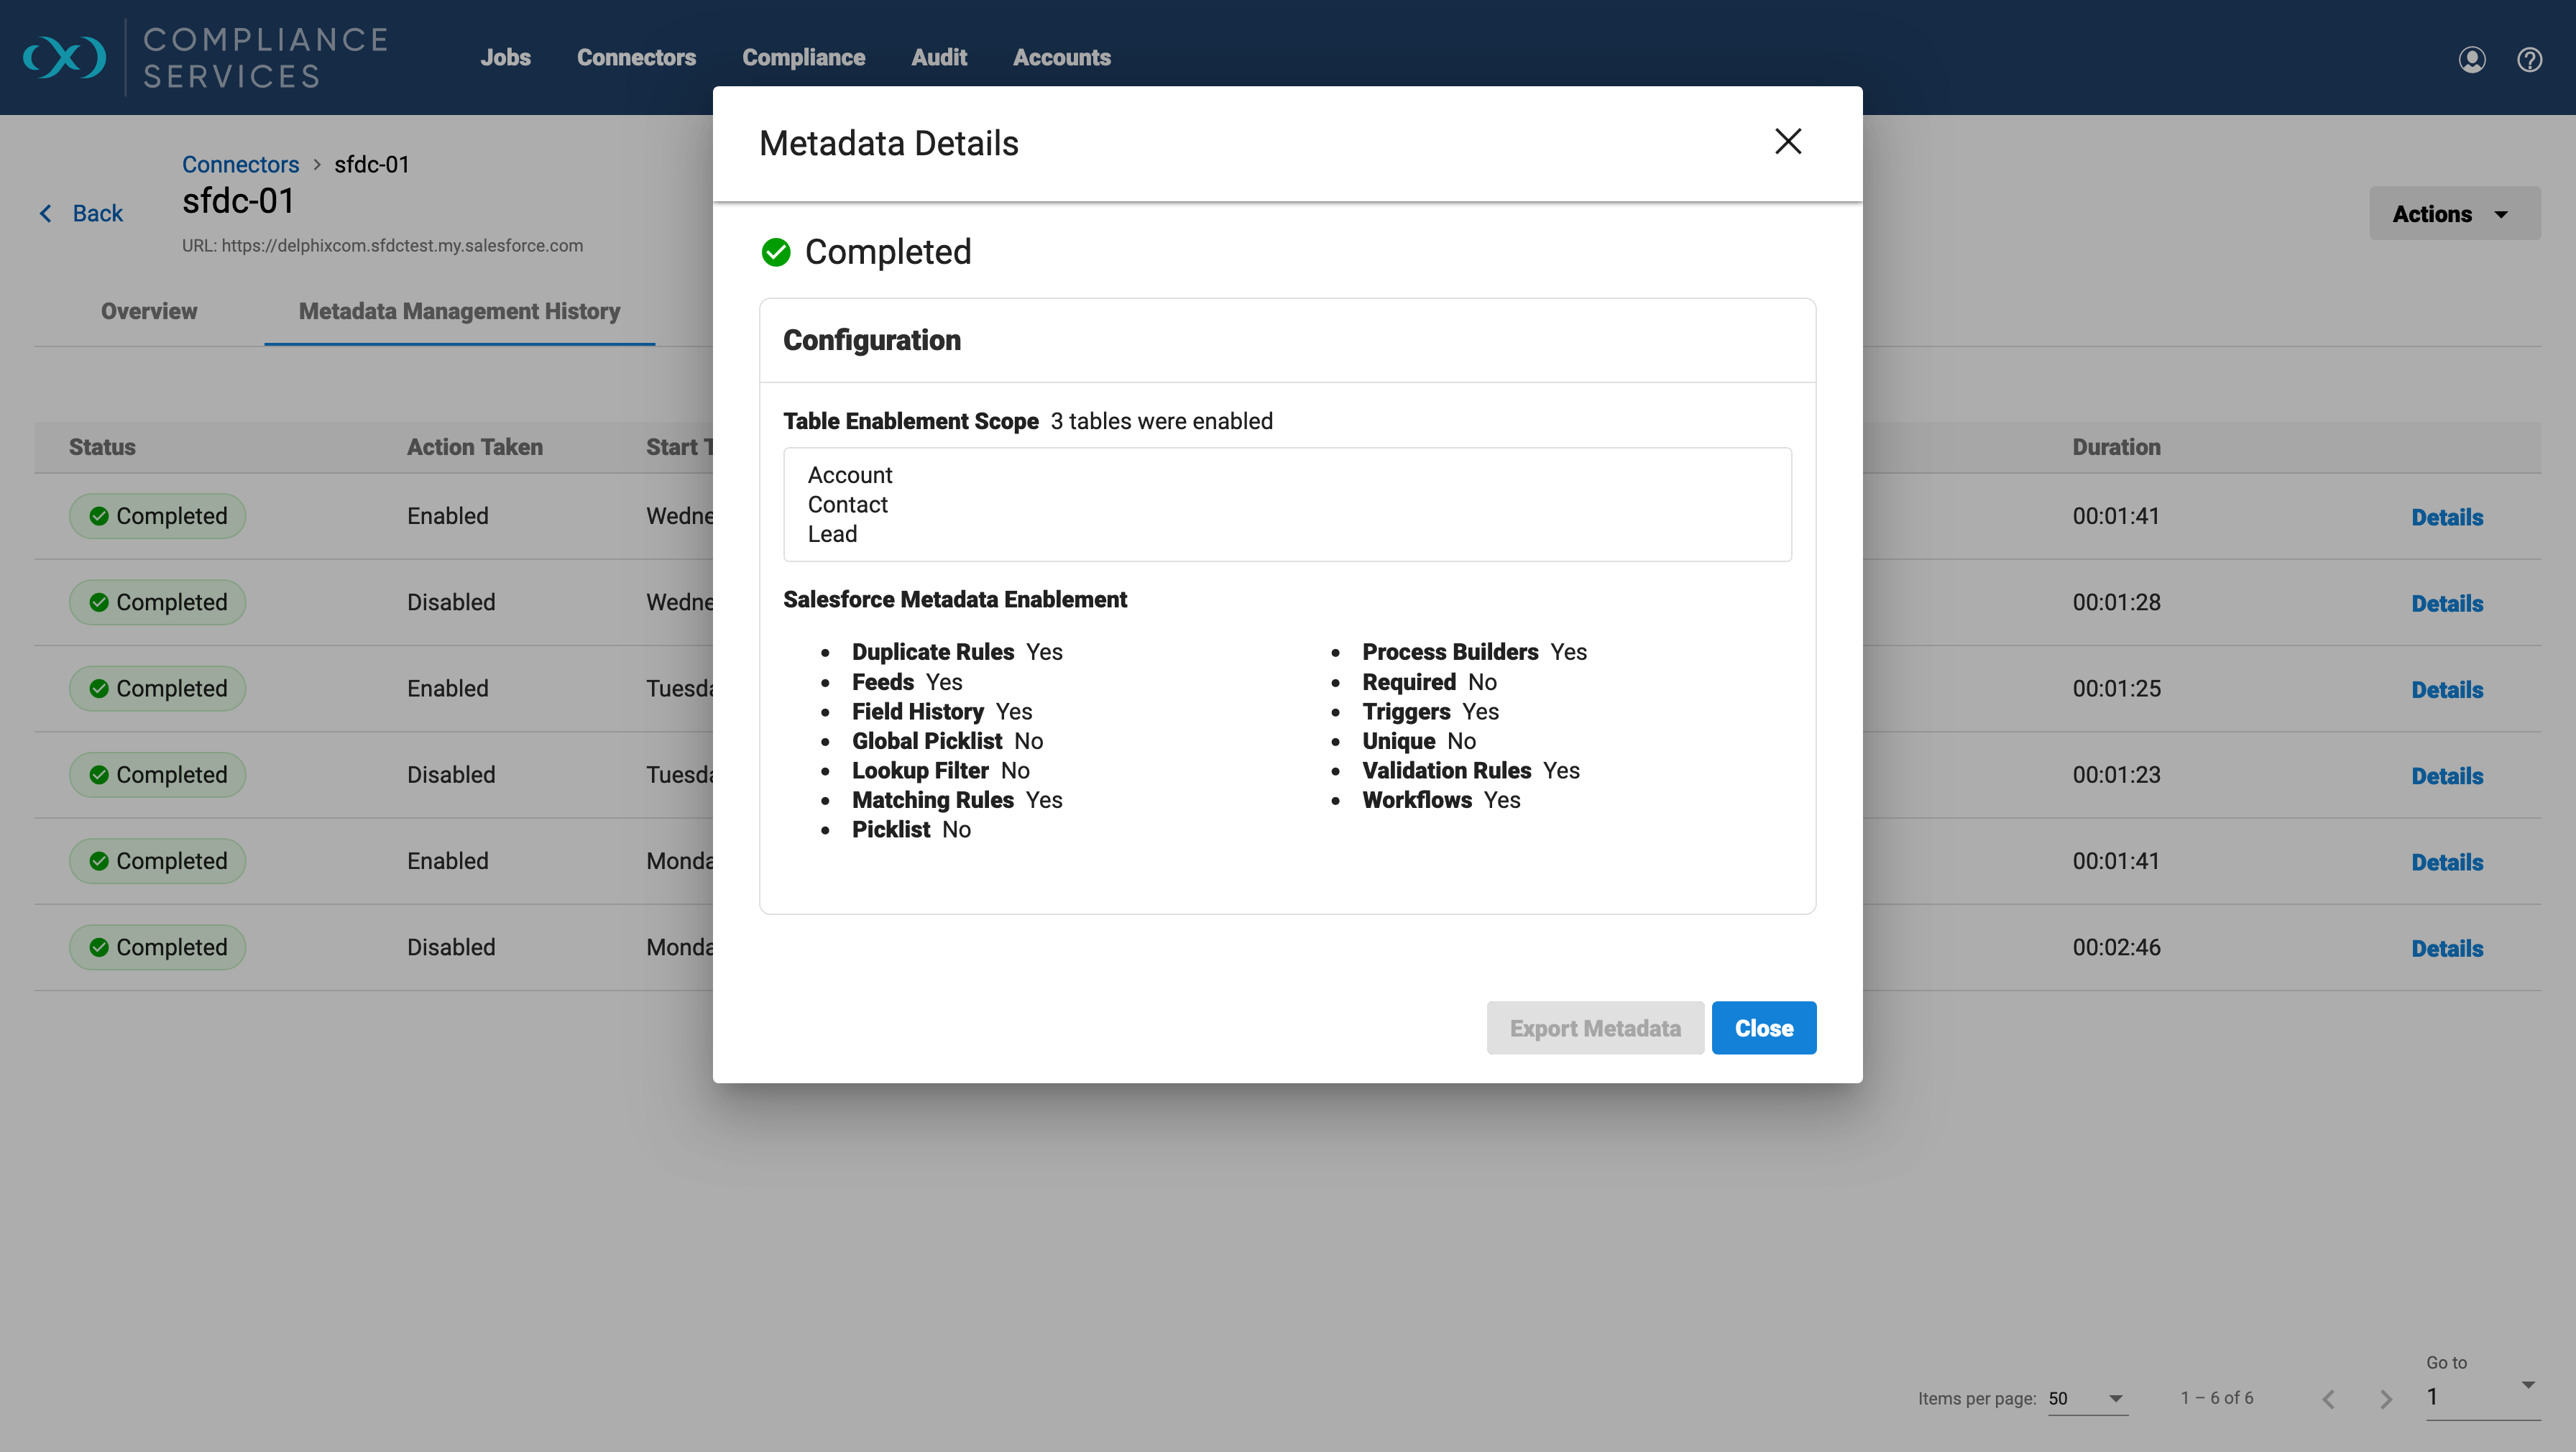
This shows the history of all the metadata actions that were taken in chronological order. To see more details on a particular action, click on the Details button.
A window will open showing the impacted tables and the objects that were disabled or enabled.
Exporting the metadata deployment zip
To troubleshoot failed deployments, the deployment zip in history offers valuable insights. This can be downloaded with the Export Metadata button.
To download the metadata deployment zip, go to the Metadata management history tab and look for changes that have the Action Taken as Disabled.
Click on the Details button to open the metadata details window and then click on the Export Metadata button.

The Export Metadata option is only available for action of type Disabled.