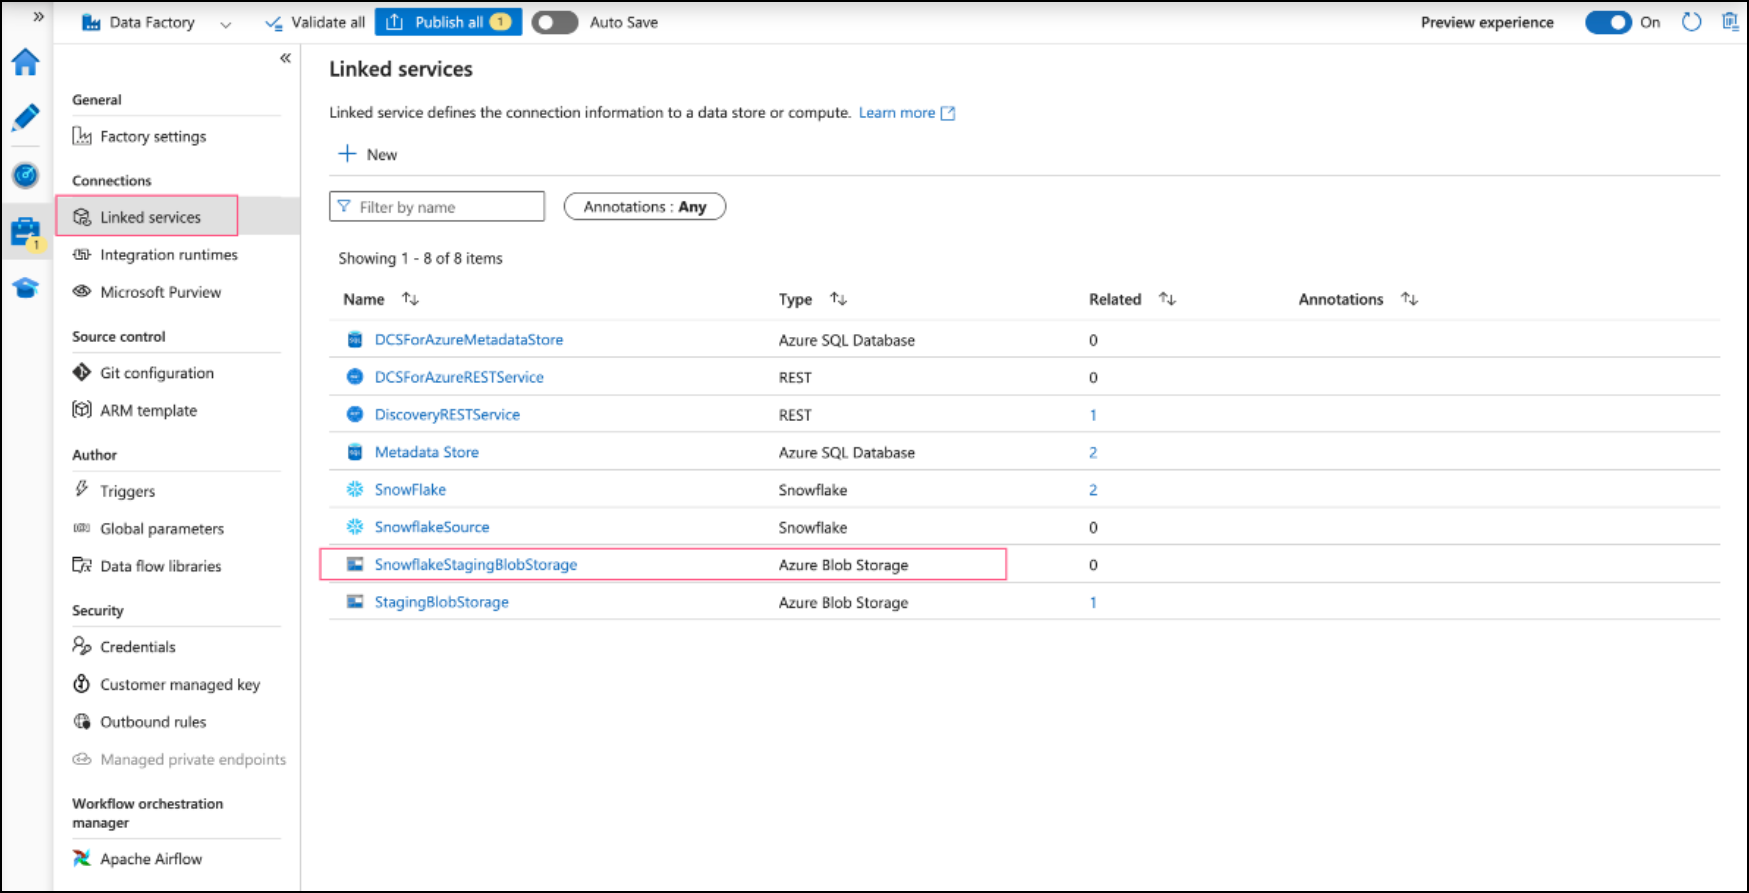
Linked service for Azure Blob Storage
To set up a linked service for Azure Blob Storage, you need to have a storage account created. Use these steps to create and configure the storage account before creating the linked service.
On the Azure portal, search for Storage accounts and navigate to the search result.
Create a new storage account by clicking on the + Create button.

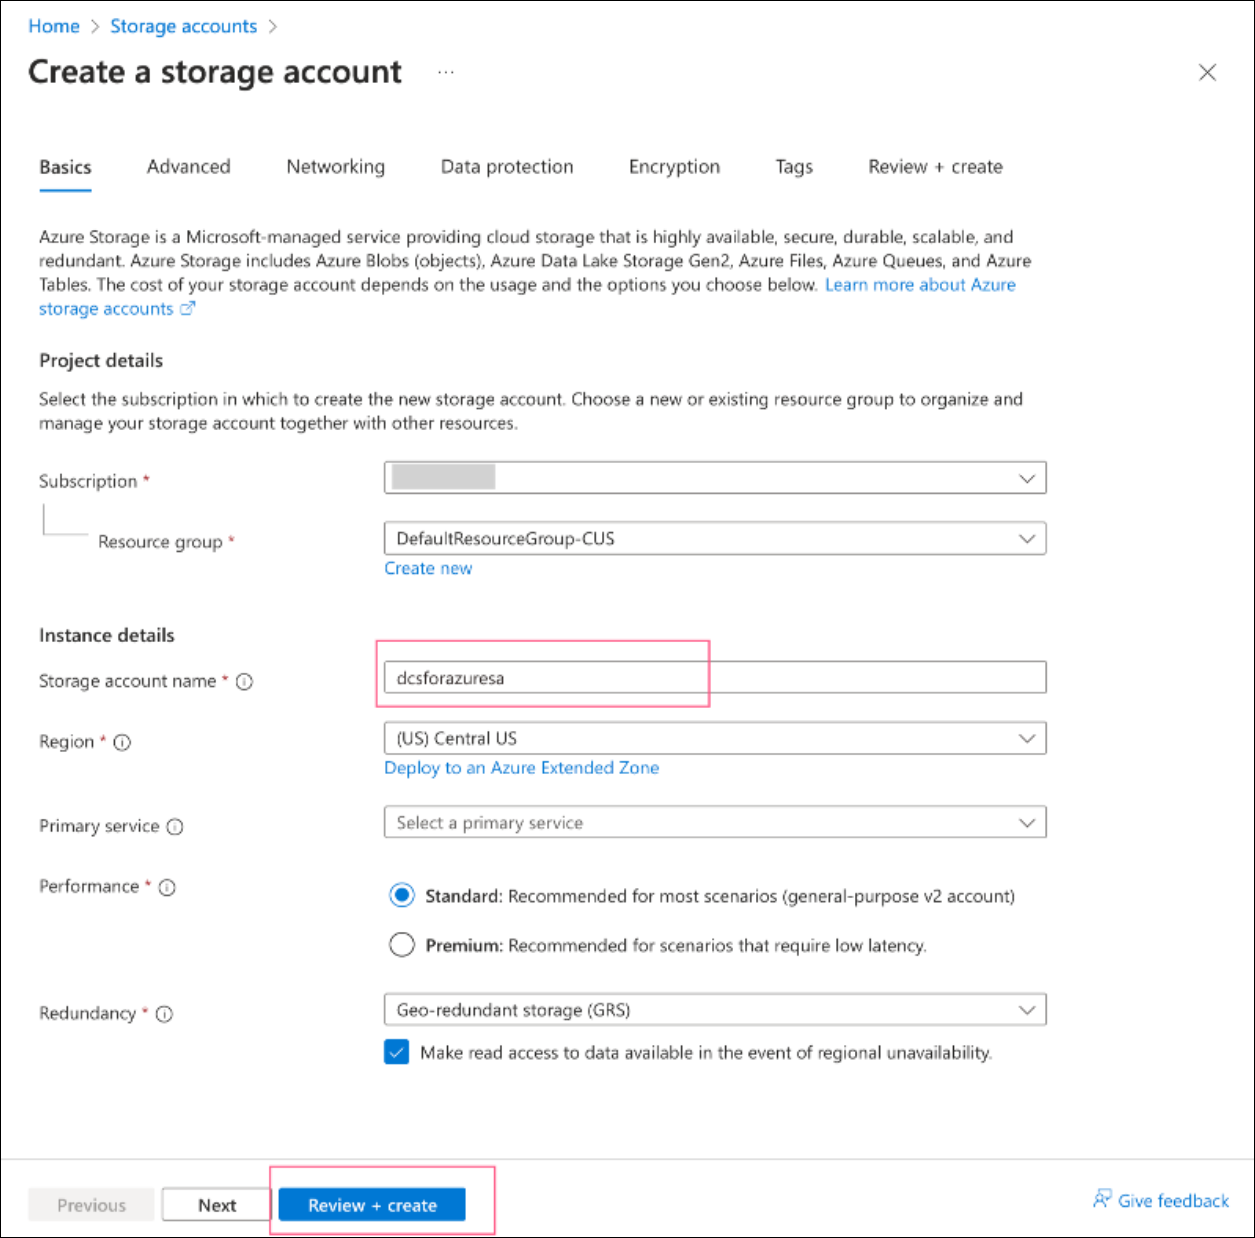
Fill in the required details:
Subscription: Your Azure subscription ID.
Resource Group: Use an existing resource group or create a new one here.
Storage account name: The name of the storage account. The name cannot contain spaces or special characters.
Click on Review + Create or click on Next to configure your storage account further.
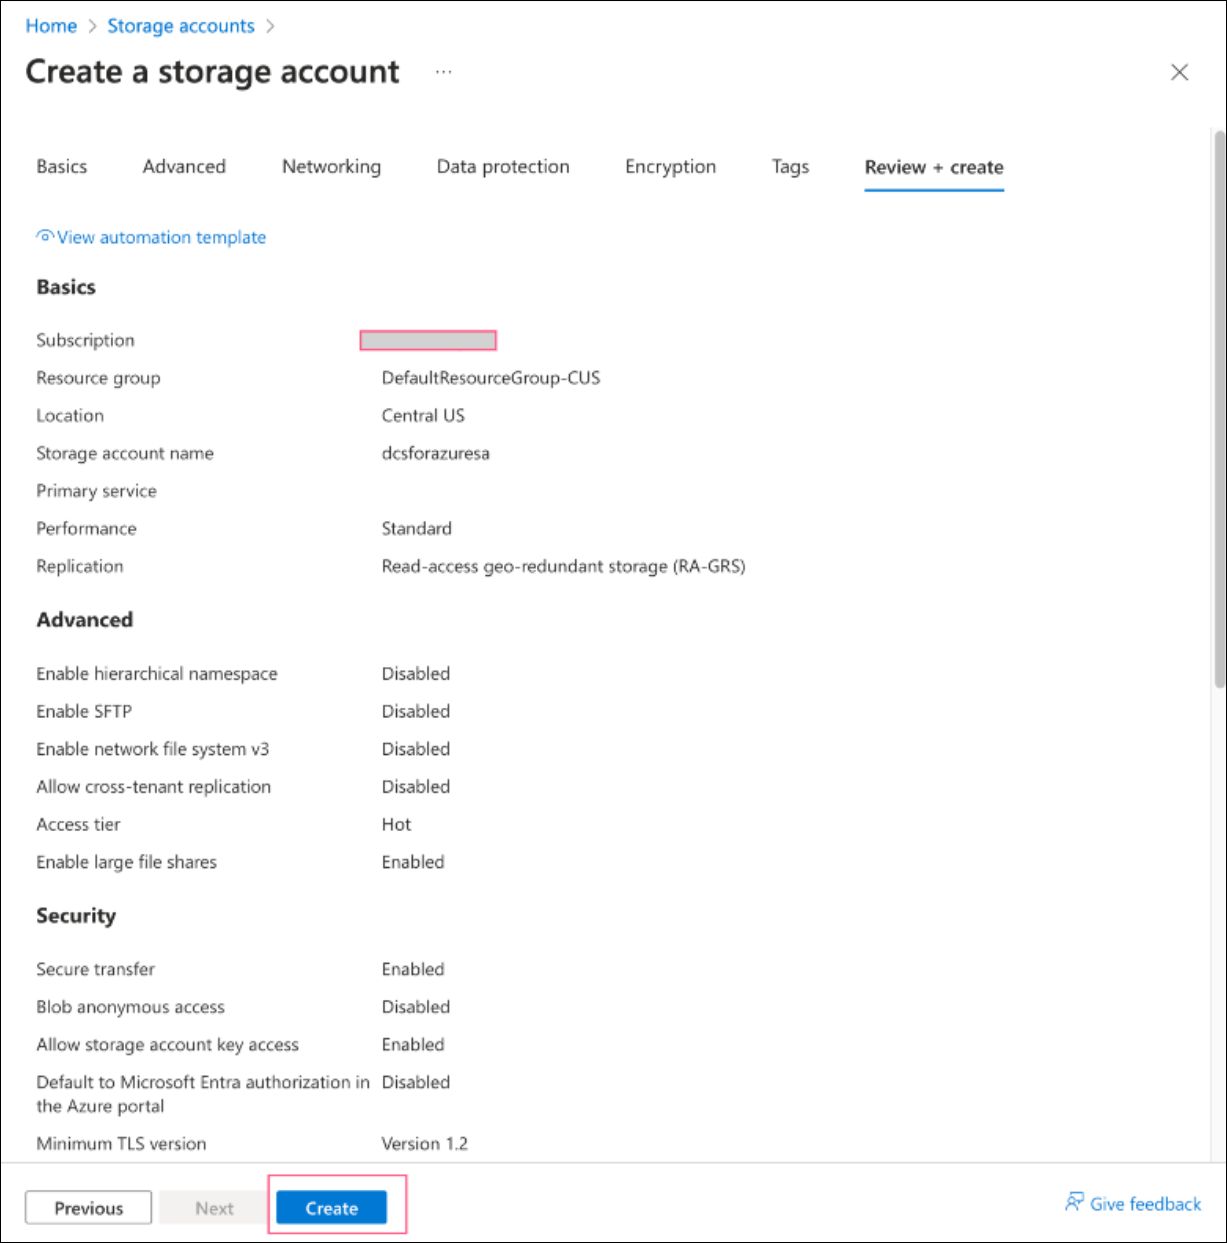
Click on the Create button, this action will take some time. Once this is done you will be directed to the post storage account creation page. Click on Go to resource to open your storage account.
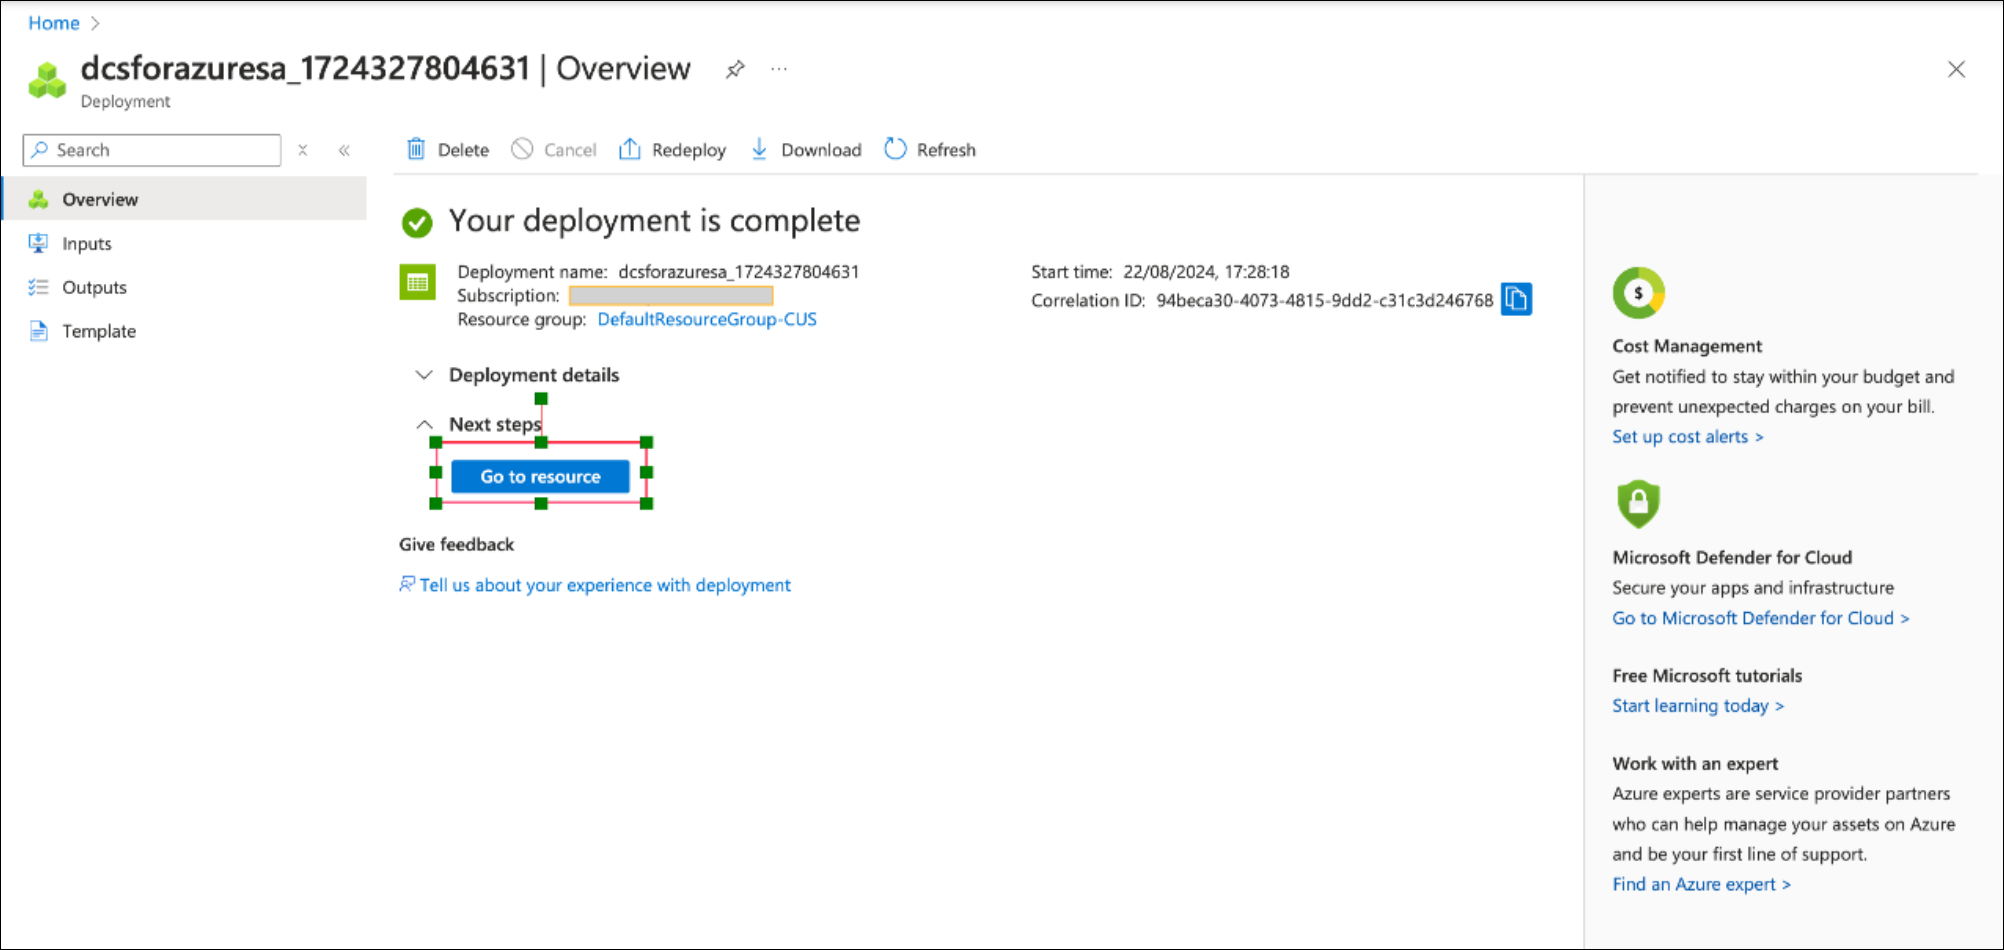
Click on Go to resource to open your storage account.
Create a new blob container:
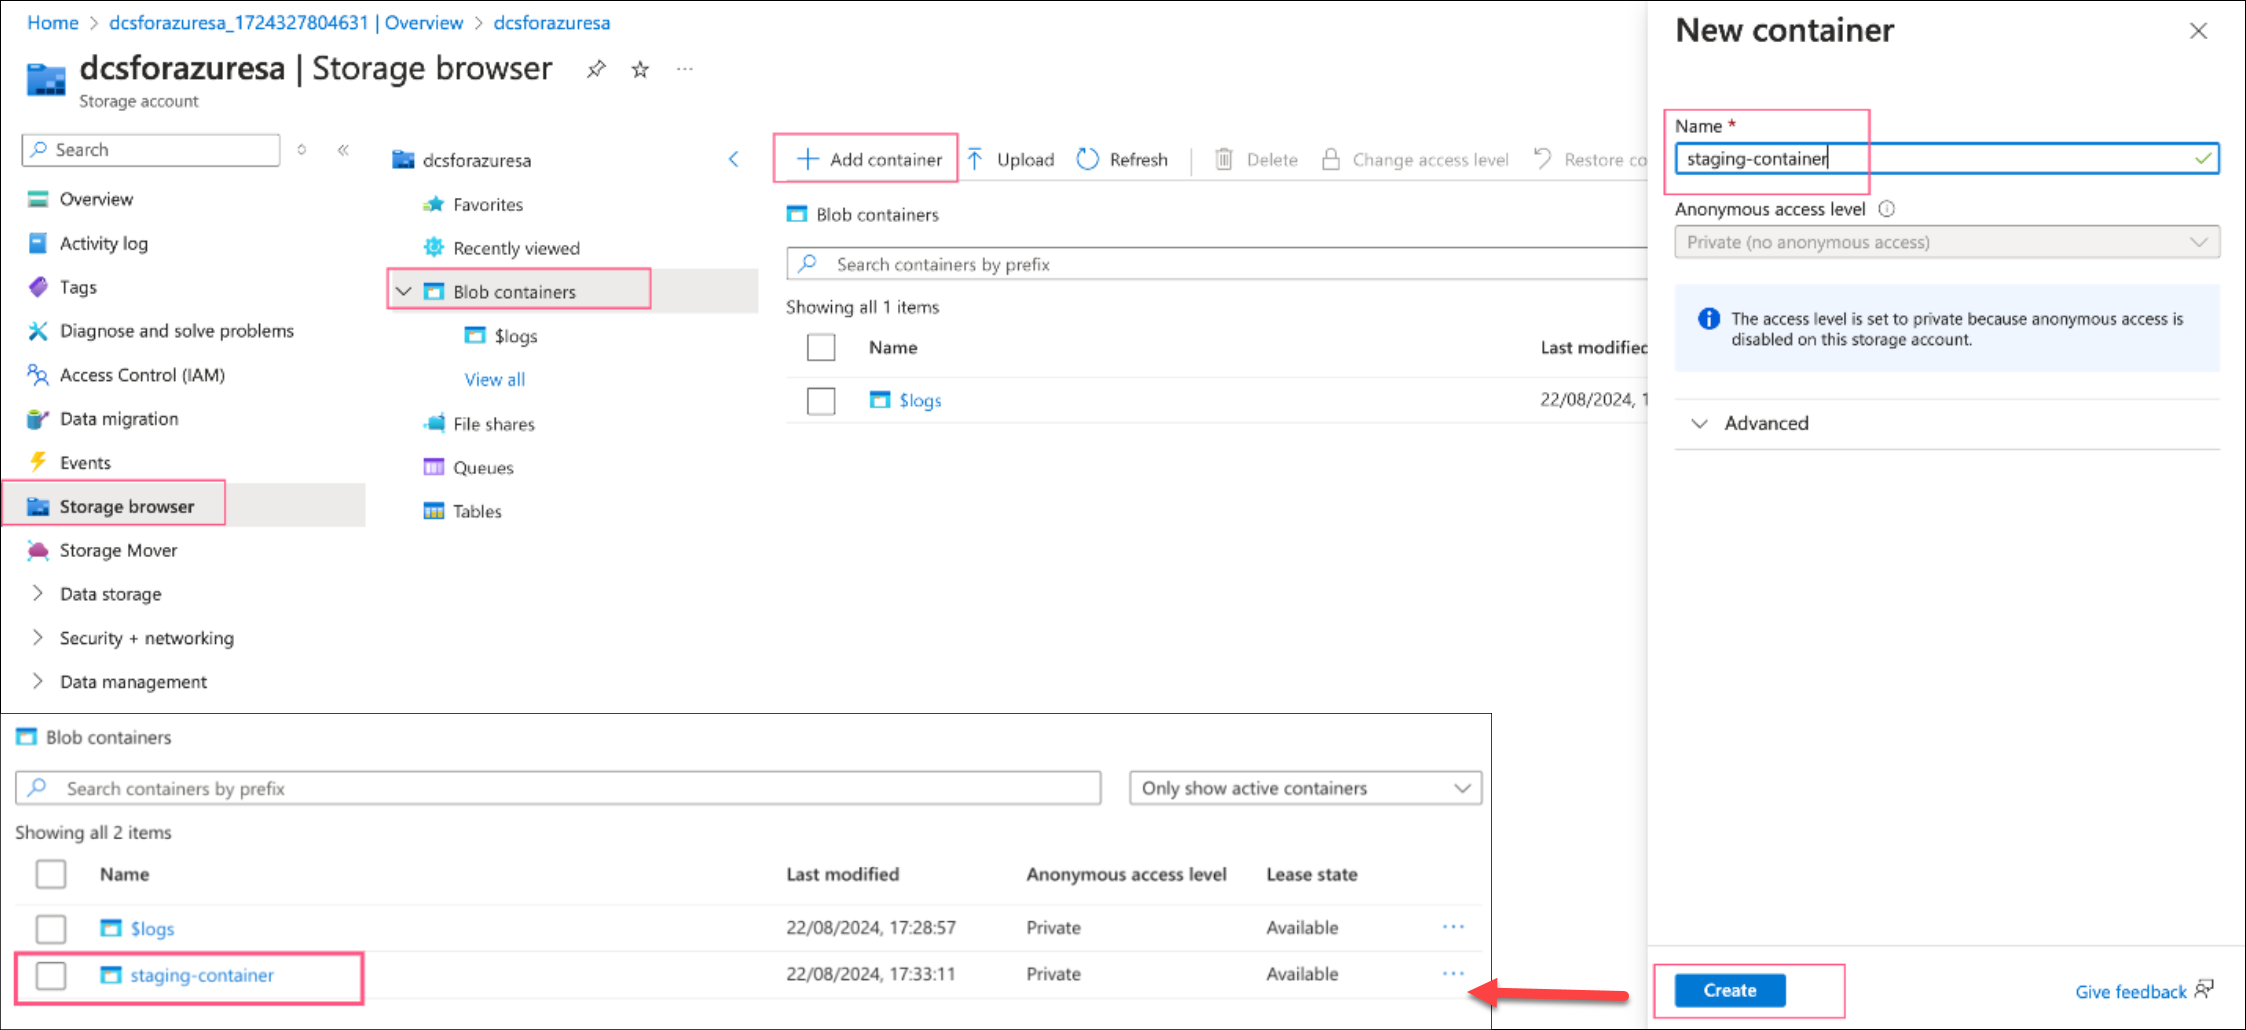
Click on Storage accounts.
Click on Blob containers.
Click on + Add container button.
Name your container staging-container in the sidebar dialog.
Click on Create to add the new container.
The newly created container can now be seen in the list.
Generating the SAS (Shared Access Signature)
A shared access signature (SAS) is a URI that grants restricted access rights to Azure Storage resources.
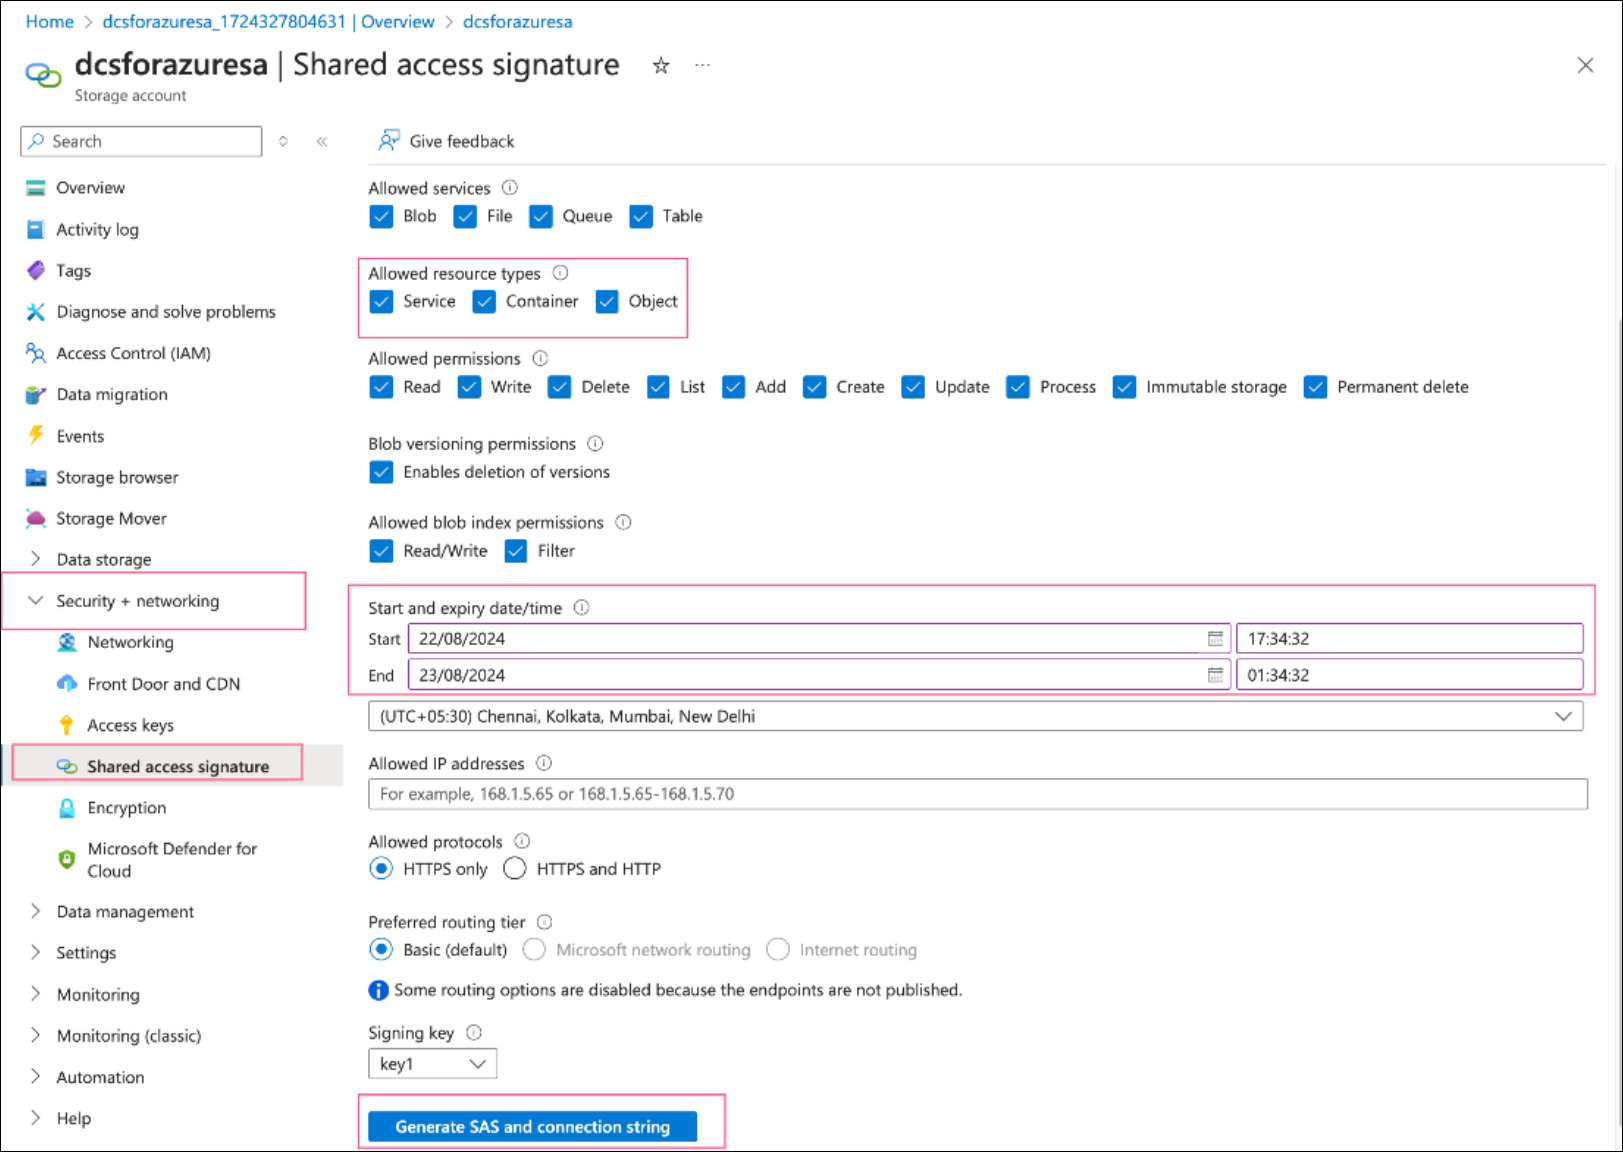
Click on Security + Networking.
Click on Shared Access Signature.
On the Allowed resource type, check all three of them:
Service
Container
Object
Select the start and expiry date/time. The default is 1 day, but access will be lost when the SAS expires, and a new SAS will need to be generated. Use an expiry that aligns with your company’s security and compliance guidelines.
Click on Generate SAS and connection string.
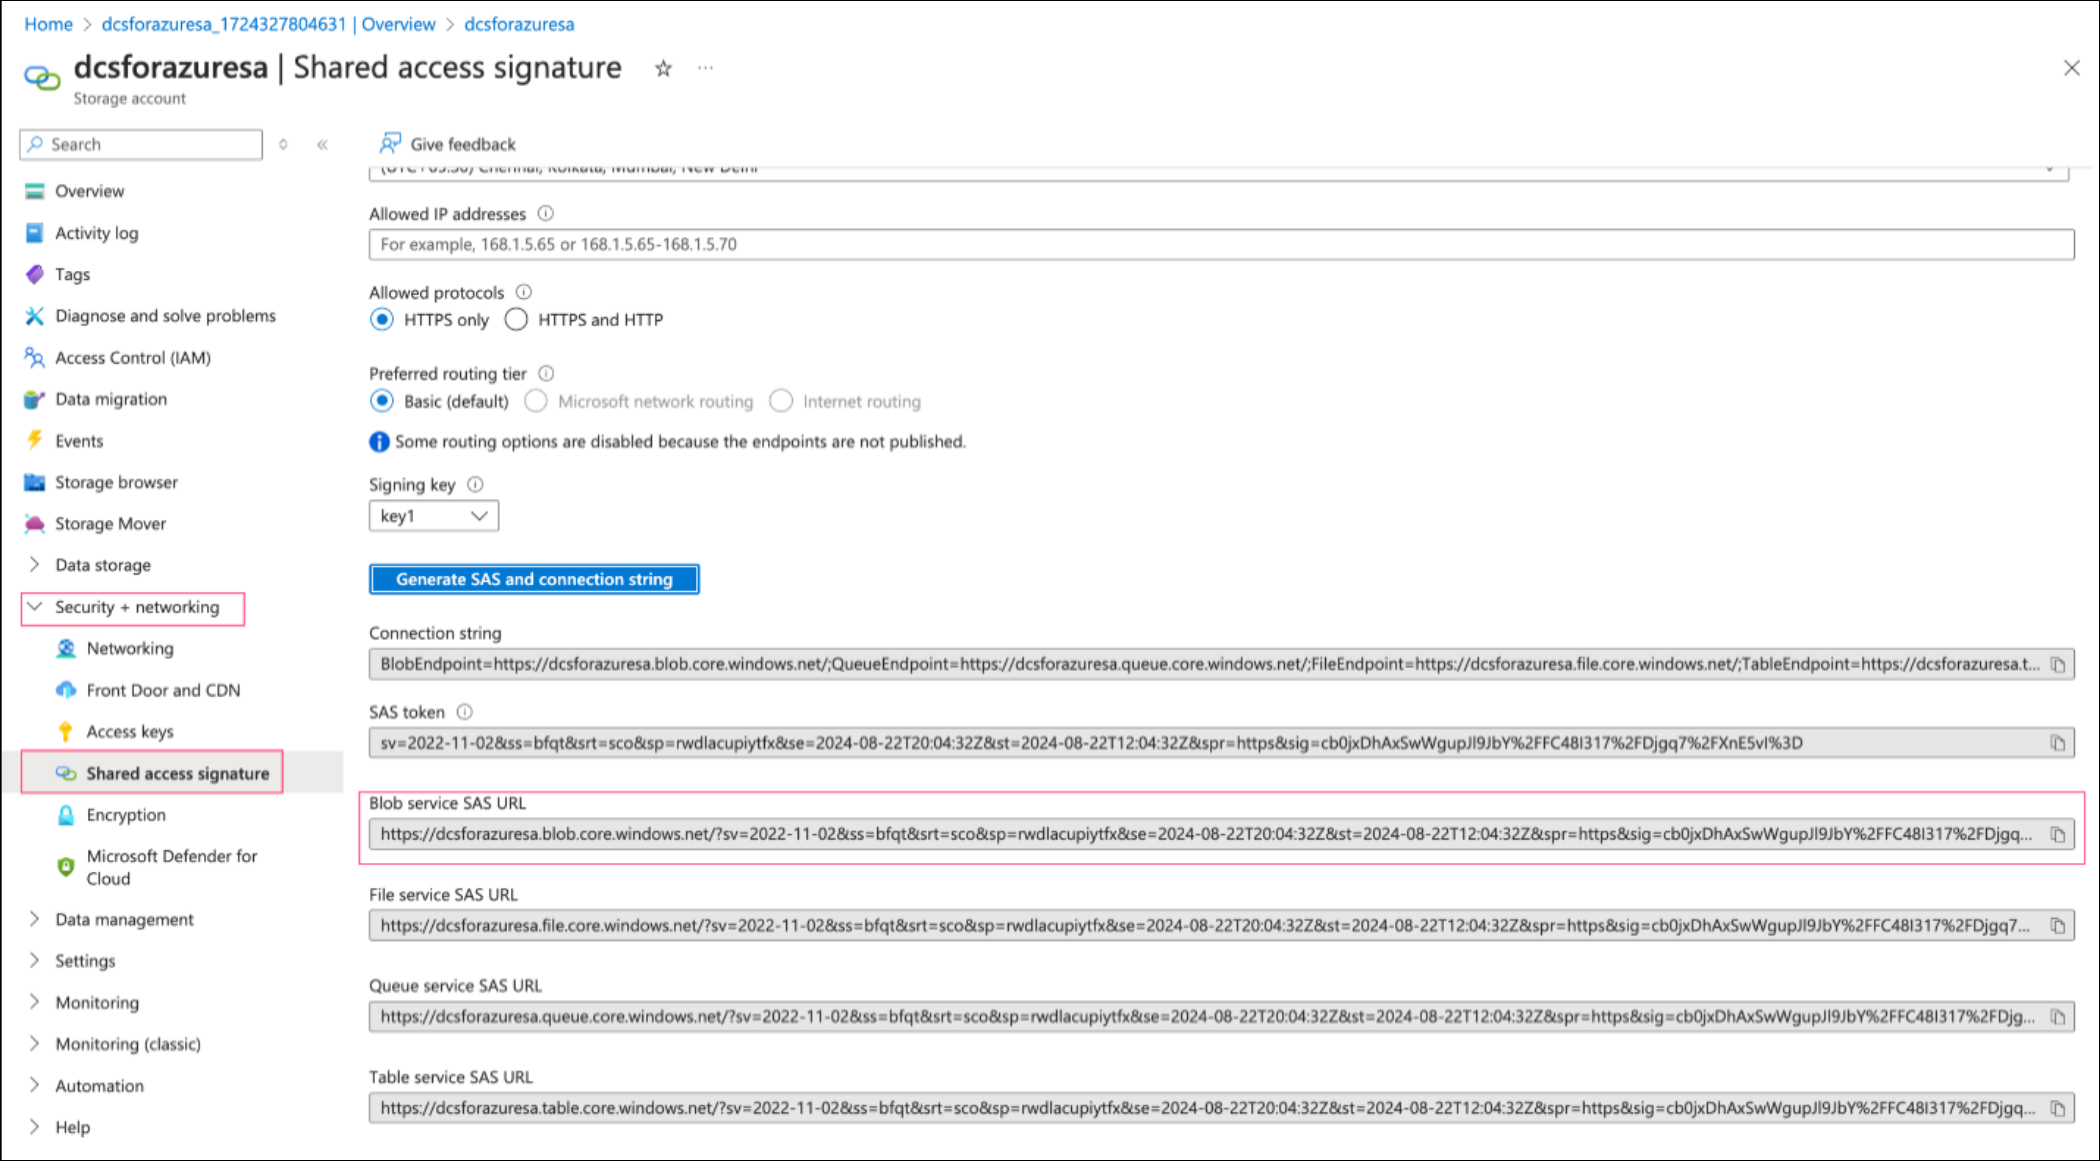
Note down the Blob Service SAS URL, which will be needed during the linked service creation.
Setting up the Linked Service
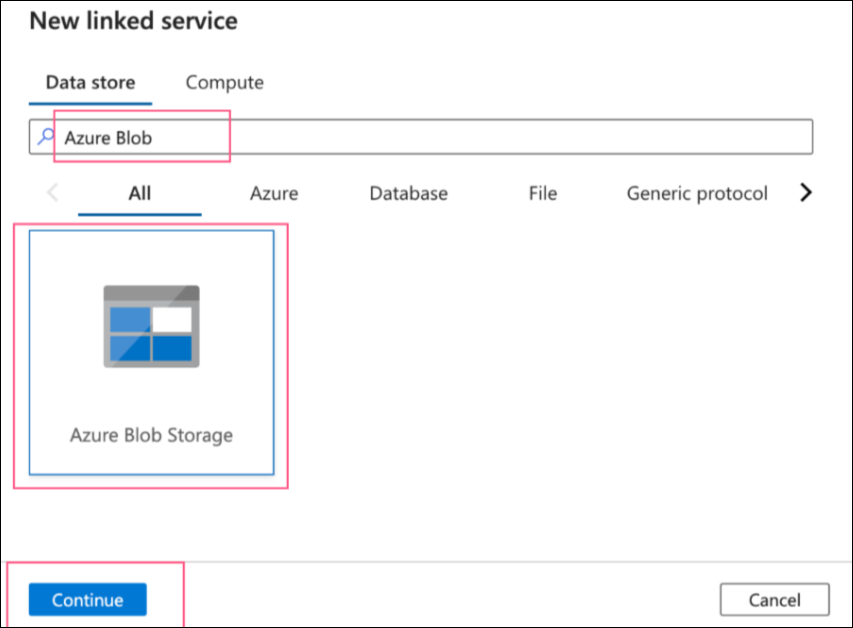
Click on the New button to create the linked service. Search for Azure Blob and click on the Continue button.
Fill in the required details:
Name: A name to identify this service.
Authentication type: SAS URI. Paste the SAS URL copied from the previous step.
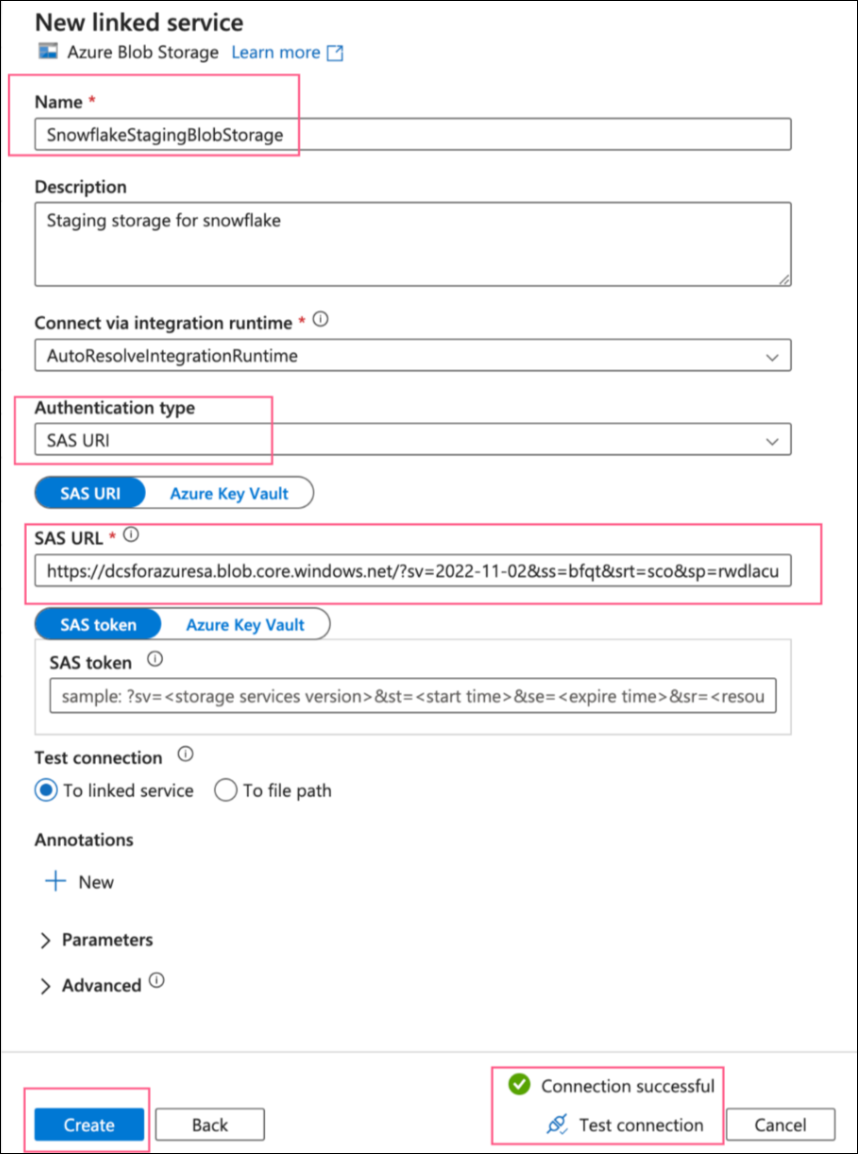
Once you click on the Create button, the linked service will be created and be displayed in the list of existing linked services.
