Setting up DCS for Azure
This page will cover the Delphix Compliance Services setup for Azure.
Generate algorithm field assignment
The first step of the DCS for Azure setup is determining the schema of the source database table that will be masked. This can mean determining what type of data the fields are or how that data would best be categorized.
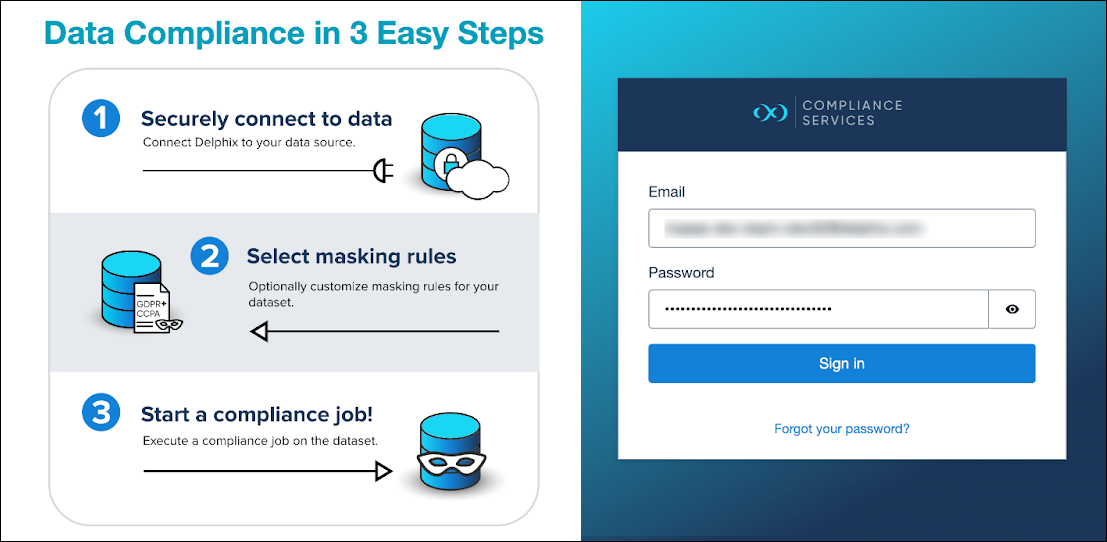
To begin, login to the Delphix Compliance Services website with your credentials.
Go to the Algorithms page by selecting the corresponding button at the top.
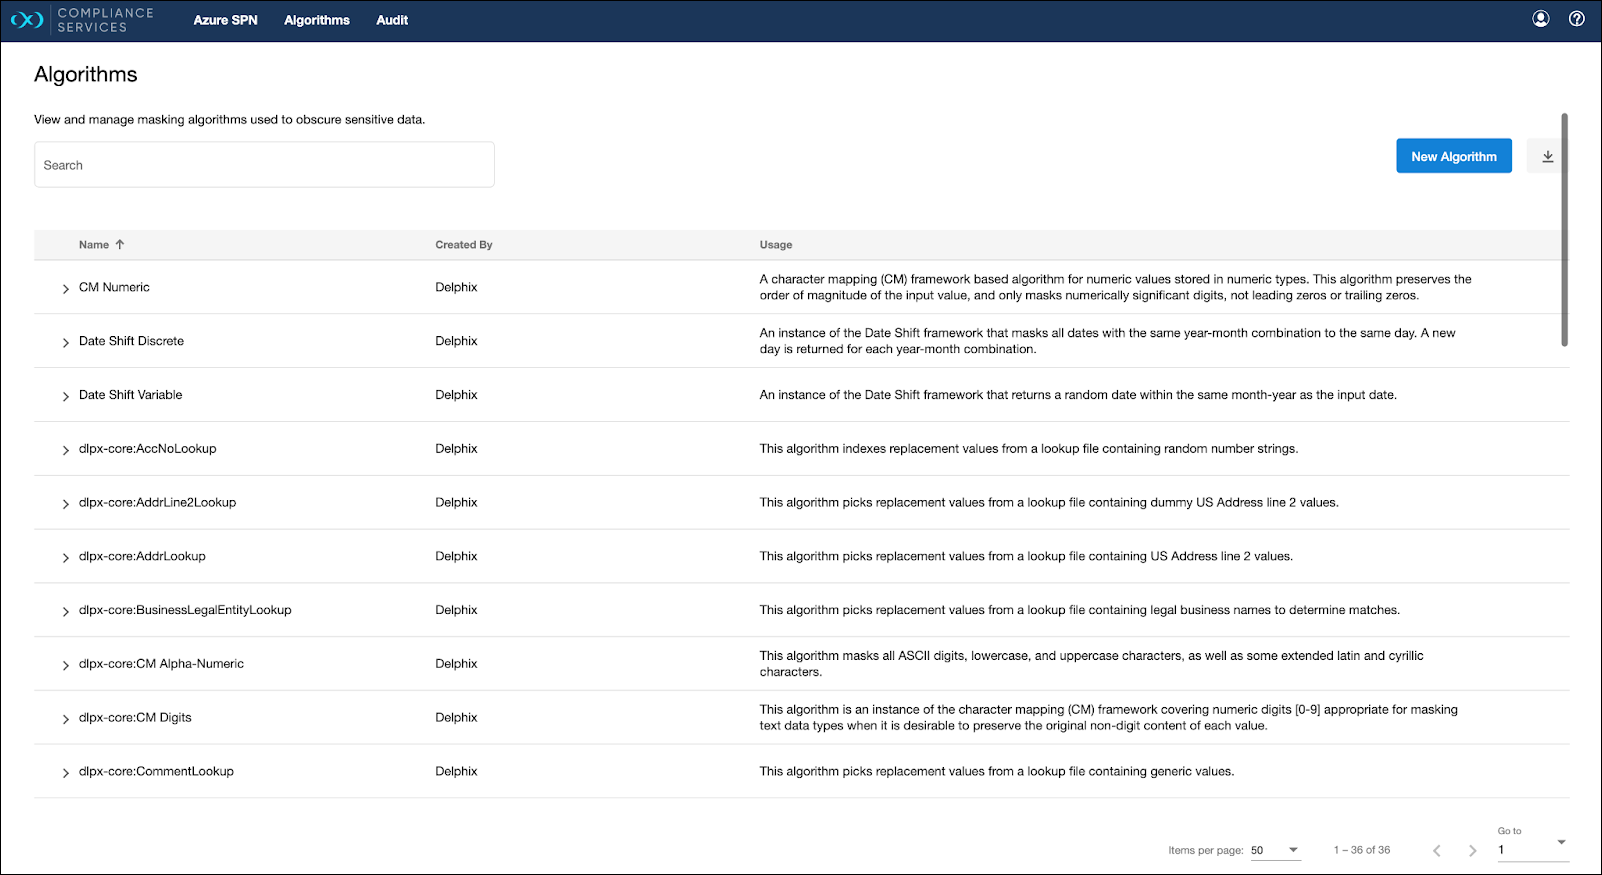
Using the algorithms in the account (or custom algorithms that you can add), determine which algorithm should be used based on the different fields in the source table.
Generate mappings (field name to algorithm name) and format the map into a JSON block, as shown below. This will be the algorithm field assignment.
Field name | Algorithm name |
|---|---|
FirstName | dlpx-core:FirstName |
MiddleName | dlpx-core:Legacy FirstNameLookup |
LastName | dlpx-core:LastName |
EmailAddress | dlpx-core:Email SL |
Phone | dlpx-core:Phone US |
rowguid | dlpx-core:CM Digits |
ModifiedDate | Date Shift Variable |
For example:
{"FirstName":"dlpx-core:FirstName","MiddleName":"dlpx-core:Legacy FirstNameLookup","LastName":"dlpx-core:LastName","EmailAddress":"dlpx-core:Email SL","Phone":"dlpx-core:Phone US","rowguid":"dlpx-core:CM Digits","ModifiedDate":"Date Shift Variable"}Create data factory
Navigate to the Azure portal and access the Data factories page from the home page. Click on Create in the top left and follow the steps to make a new data factory.

Wait for the deployment to complete, then go to the resource.
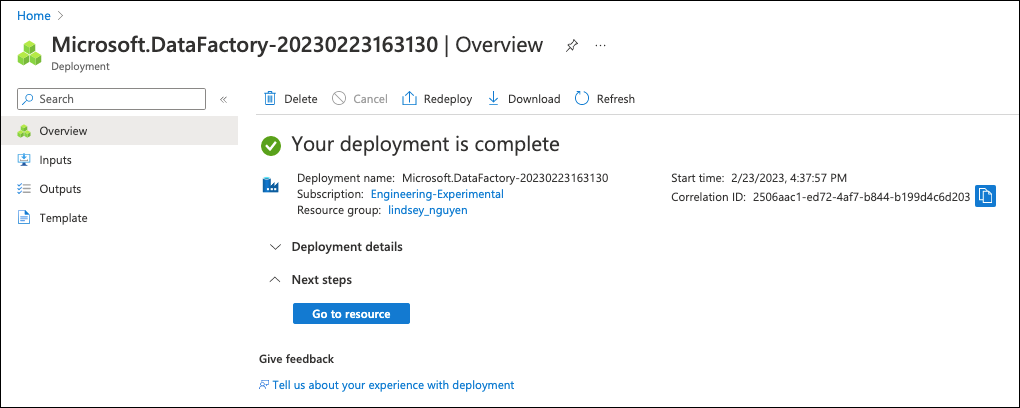
Click on Go to resource, then Launch Studio.
Create REST linked service
Click the briefcase and wrench icon to access the Manage page, then navigate to Connections → Linked services.
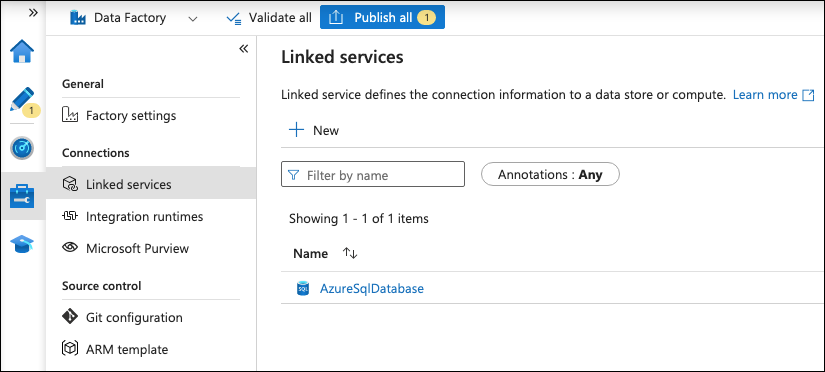
Click on + New and search for REST, then add the linked service by providing these configurations:
Base URL: https://azure.apps.delphix.io/
Authentication type: Service principal
Service principal ID, Service principal key, Tenant, and AADresource should be relative to what was setup during Getting started with DCS for Azure.
Once this has been completed, click Create to create the REST linked service.
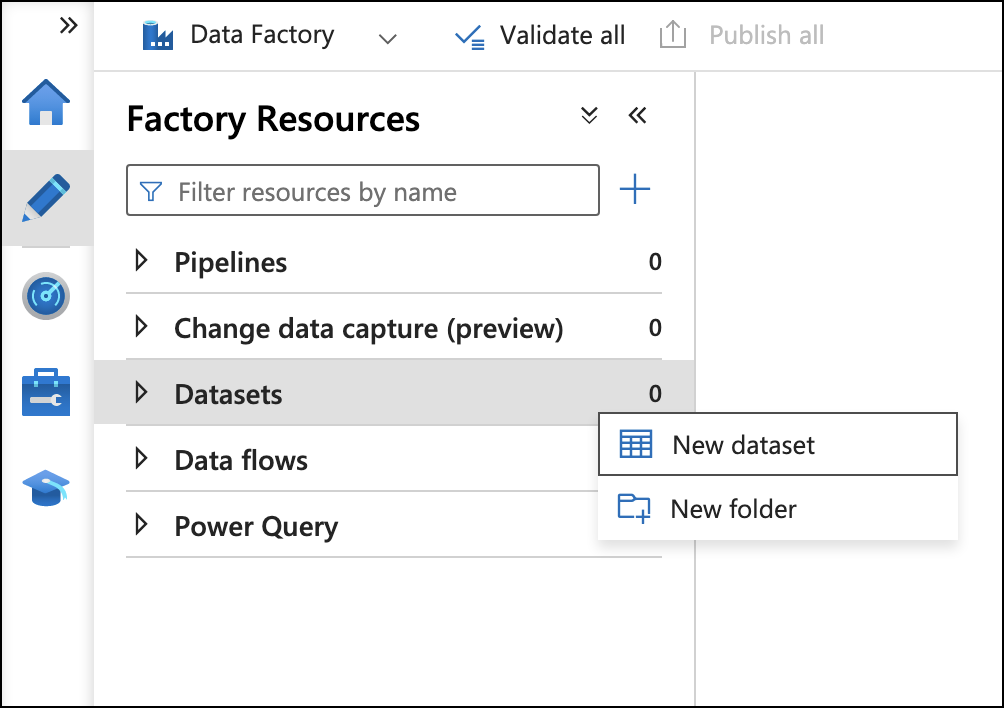
Add datasets
Click the pencil icon to access the Author page. For both source and sink databases, use the steps in the Create data factory section to add them to the data factory. Navigate to Datasets → New dataset.
Click on the source or sink database type. In the Set properties window for adding the database, set the Name and add a new Linked service.
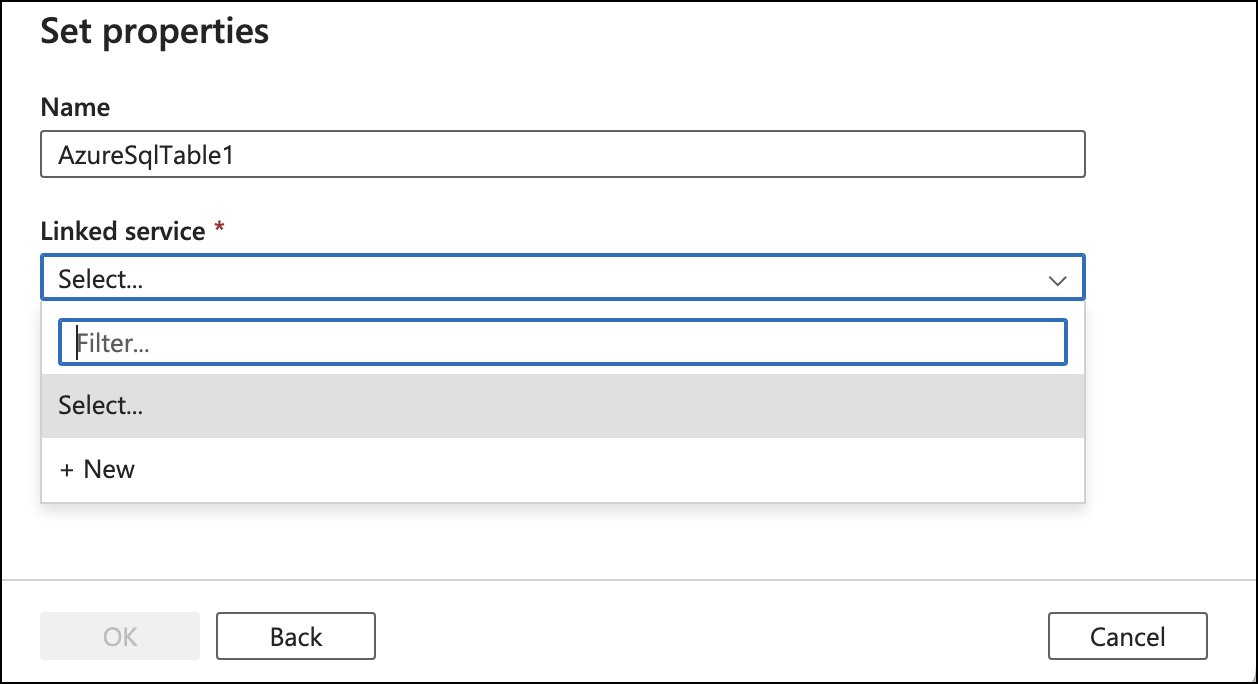
Add the linked service by providing the appropriate configurations. Select the Table name after the service was successfully added, then click OK.
Once the datasets being used for the data flow have been added to the data factory, they can then be used.
Between any steps that create any services, it is safer to publish the data factory to save any changes made.
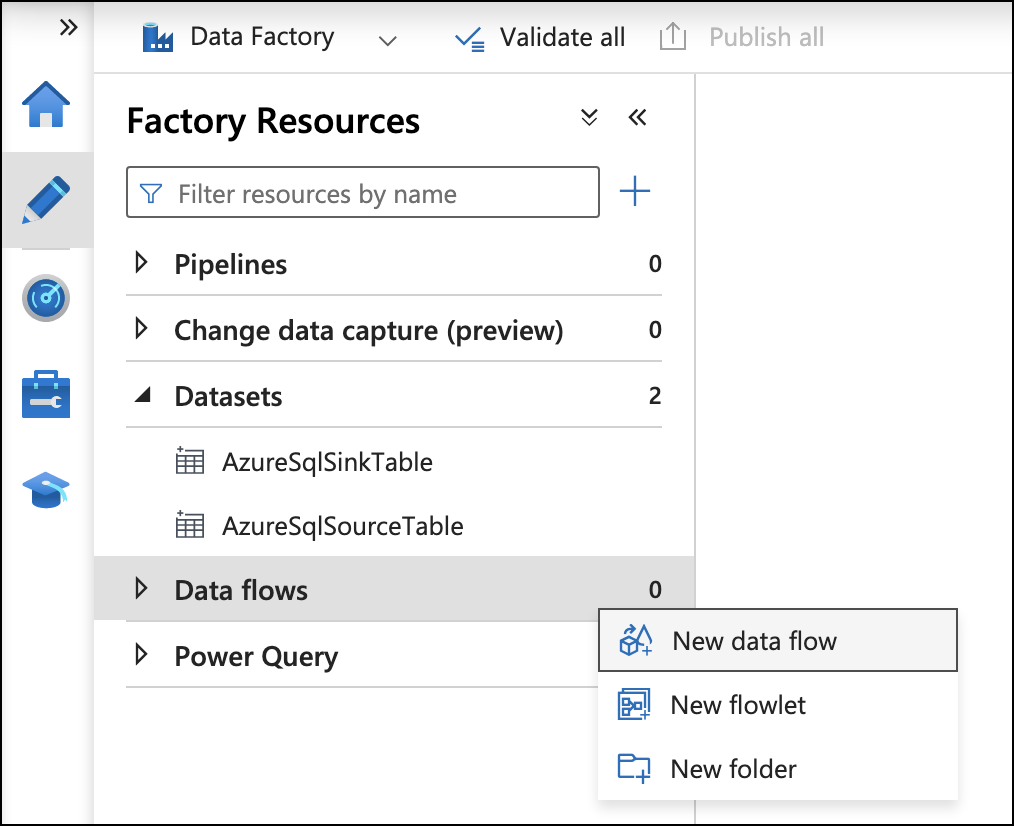
Setup data flows
In the Data Factory Studio, navigate to Data flows → New data flow.
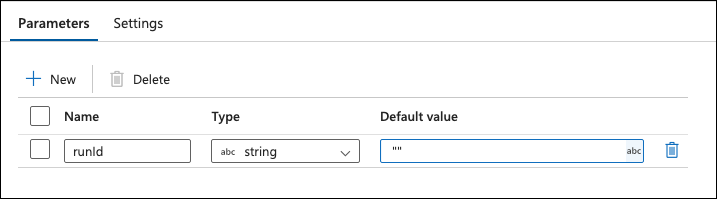
On the Parameters setting for the new data flow, click + New and set Name to runId and Default value to "".
Under the dataflow tab, select Add Source to add the data source and set the dataset as the source dataset that was previously added.
.png?inst-v=942e5947-3a58-4eab-ad74-a2a39c8e2f06)
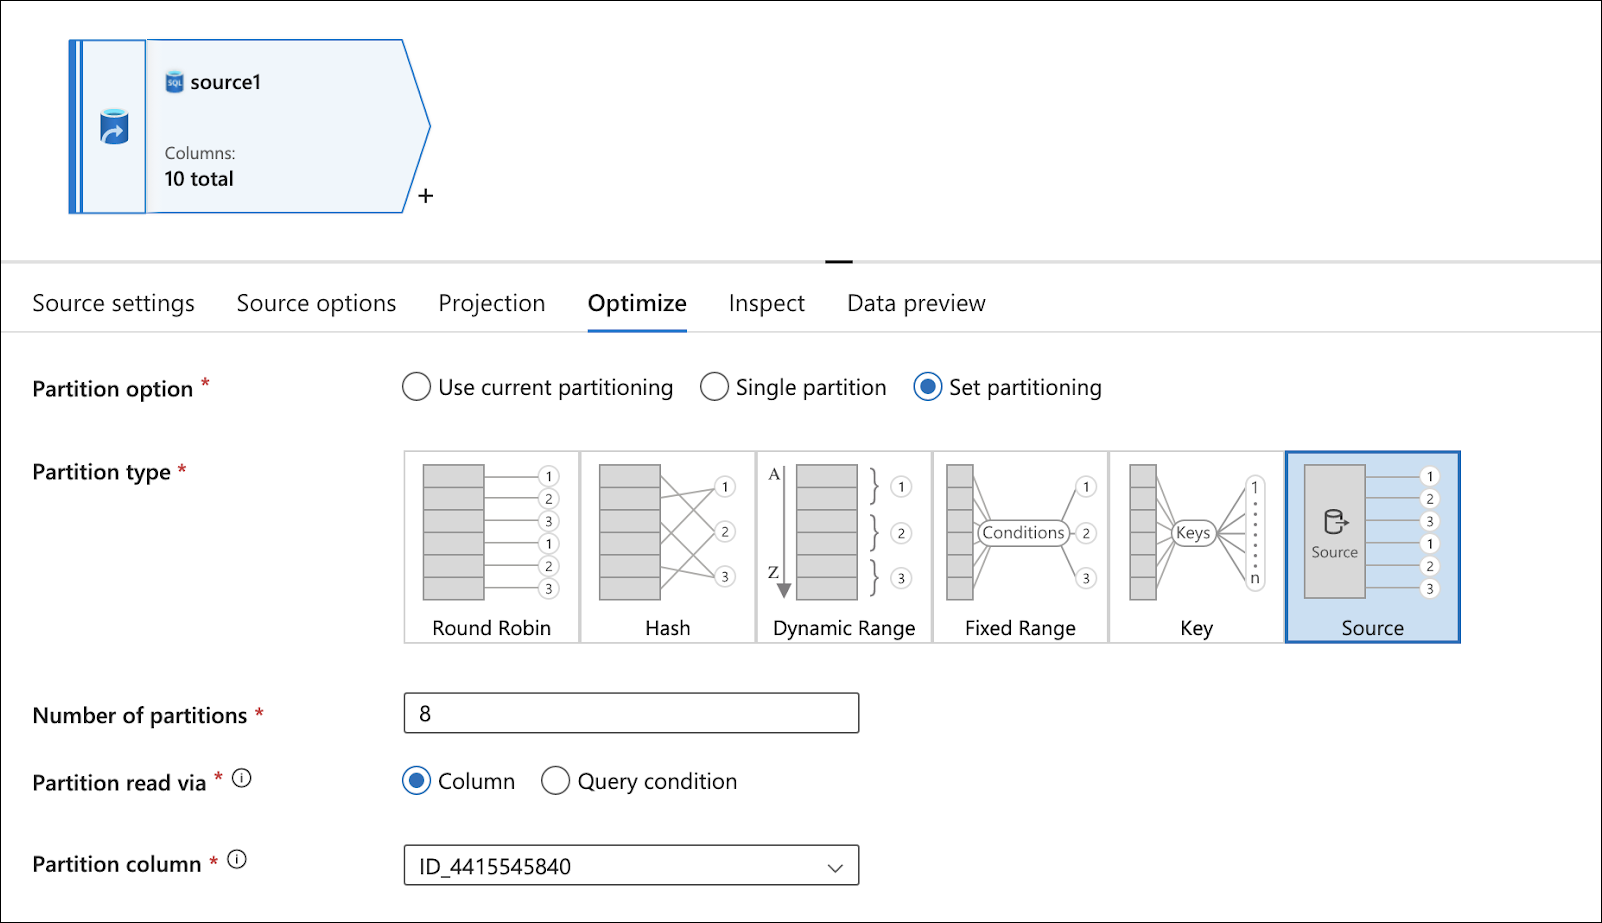
For SQL Databases, go to the Optimize tab and change the Partition option to Set partitioning, change the Partition type to Source, but change the Number of partitions to the same number of worker nodes in the IR Spark cluster.
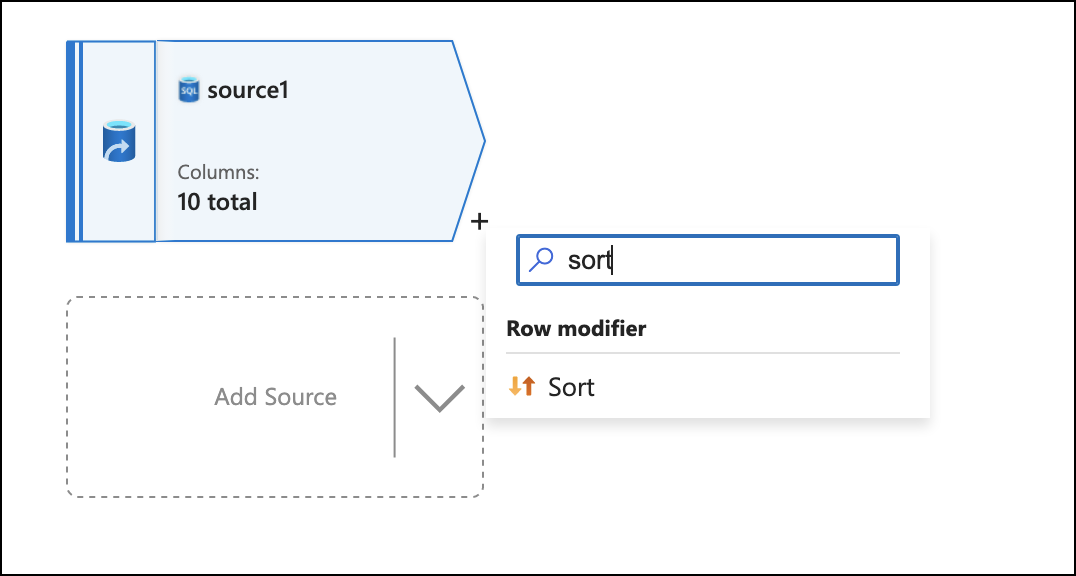
Click on the + to the bottom-right of the source box and add a Sort flow step.
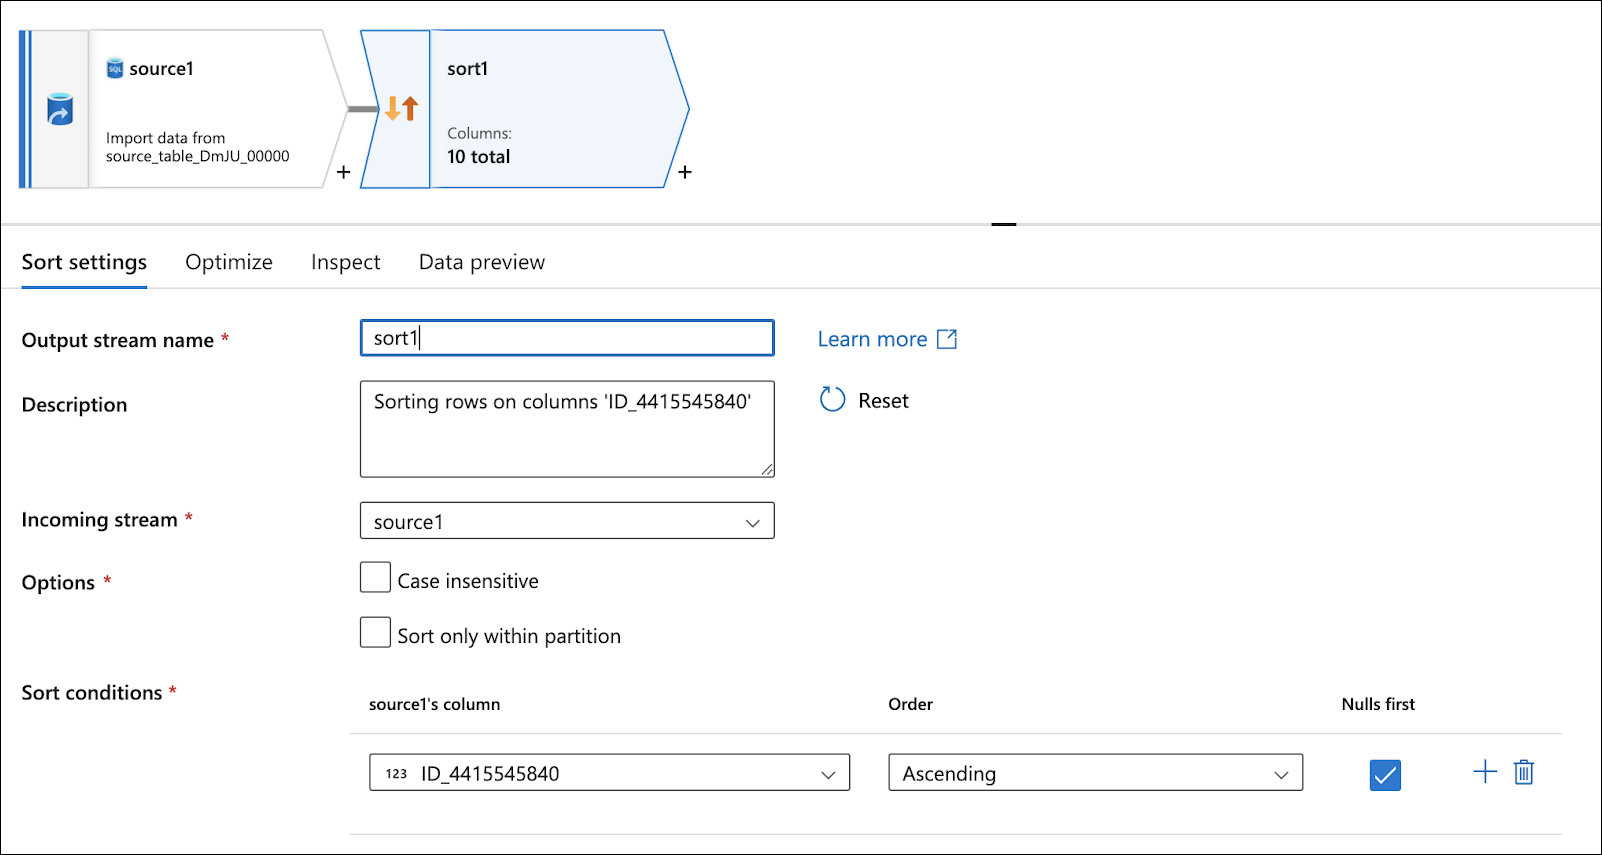
Set the Sort conditions to be any column.
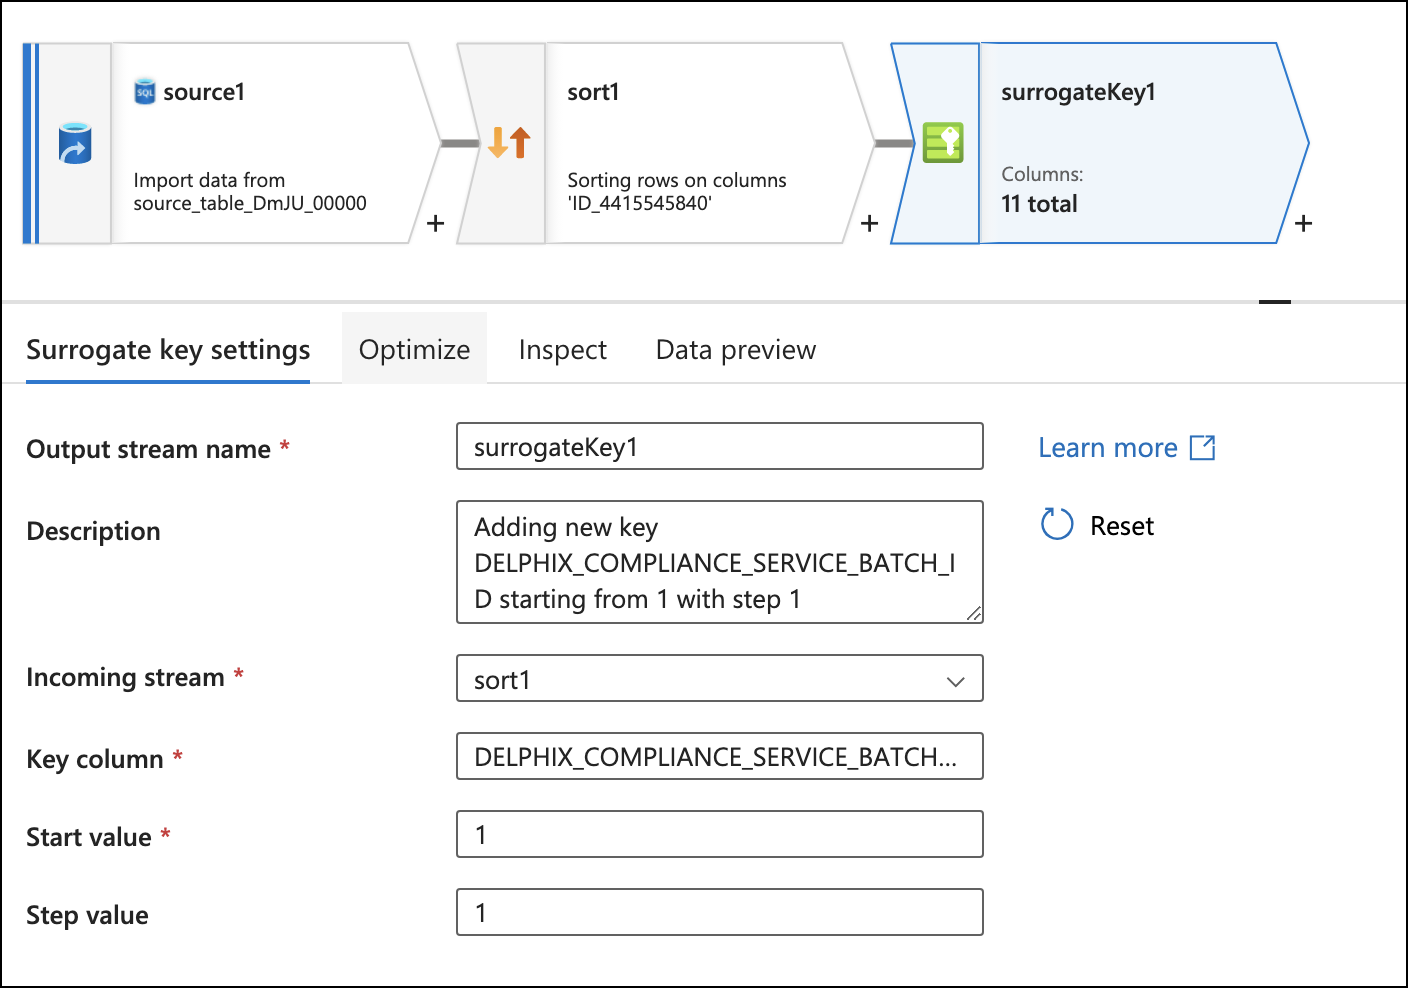
Click on the + to the bottom right of the sort box and add a Surrogate Key flow step.
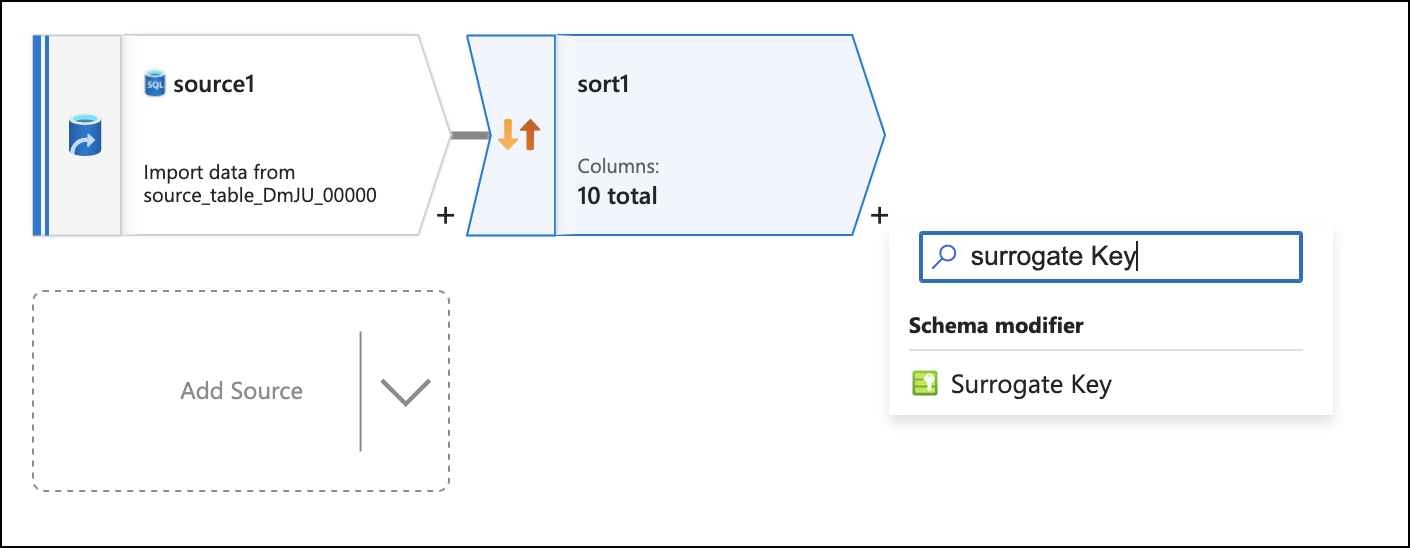
Set the Key column to DELPHIX_COMPLIANCE_SERVICE_BATCH_ID. This is to eventually join rows of masked data back with the same rows of unmasked data.
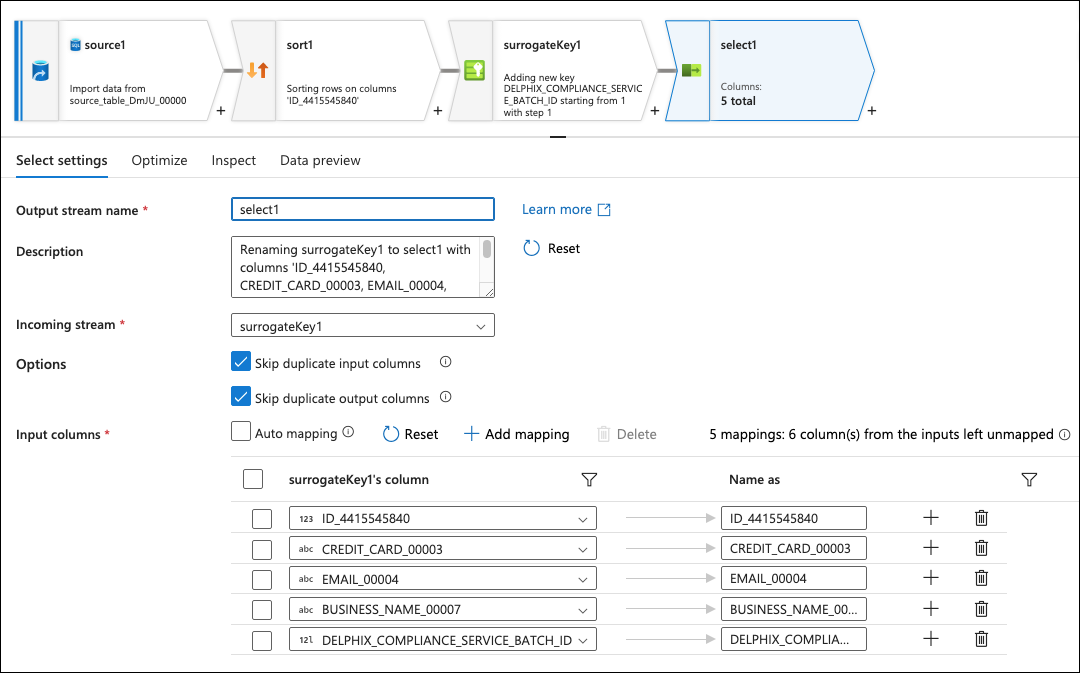
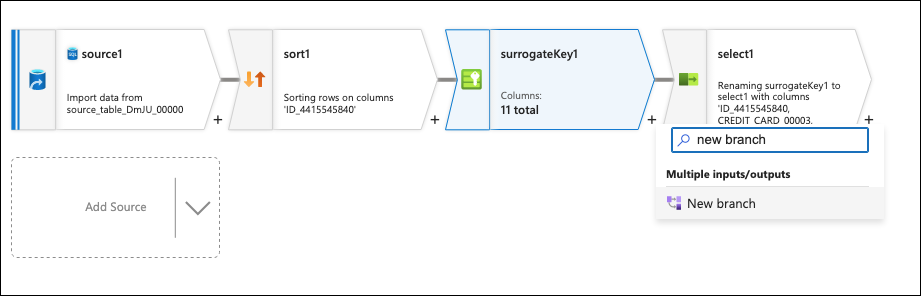
Click on the + to the bottom right of the surrogate key box and add a Select flow step.
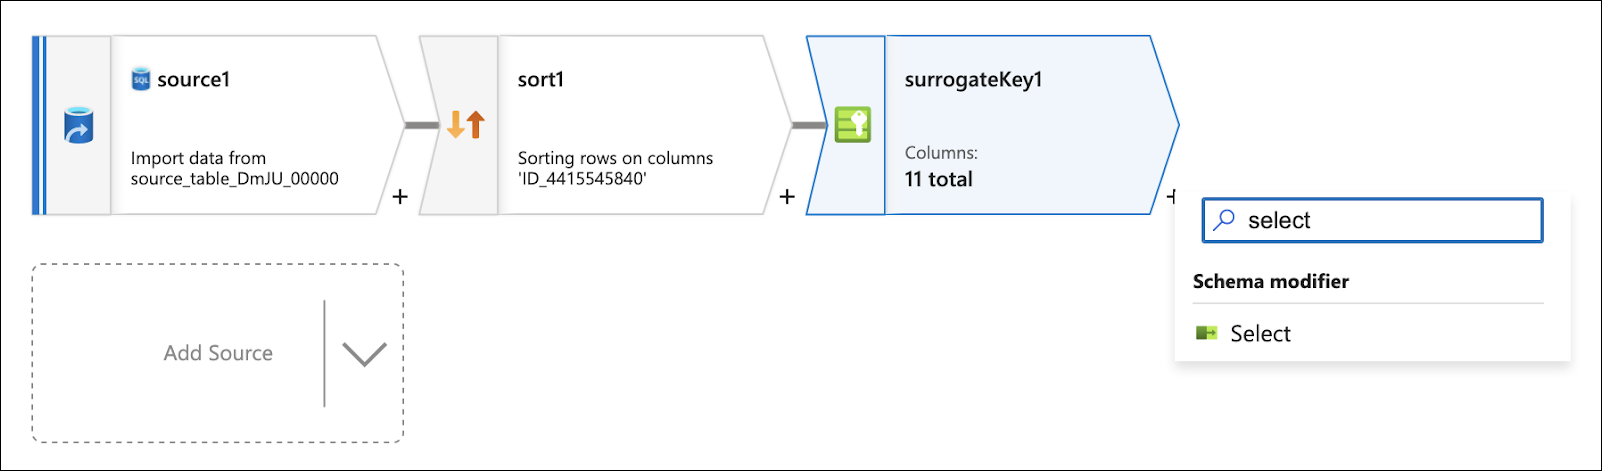
This step selects all columns that are not expected to be masked from the source, thus, you must delete any columns that would be masked. This is so this branch of the flow only sends on data that does not need to be masked.
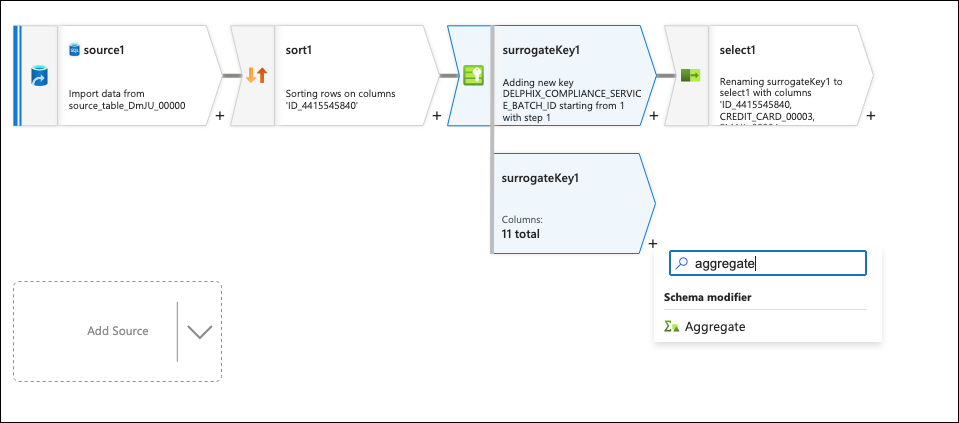
Click on the + to the bottom right of the surrogate key box again and add a New branch.
Click on the + to the bottom right of the second surrogate key box (that was just created) and add an Aggregate flow step.
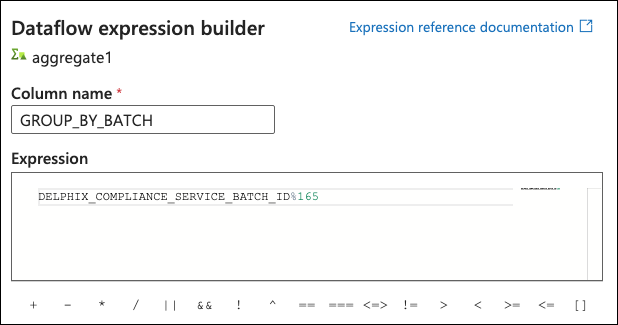
On the Group by tab, hover over the Select column… box and click on Open expression builder. Set the column name to GROUP_BY_BATCH and set the expression to DELPHIX_COMPLIANCE_SERVICE_BATCH_ID%<Number of batches>. The number set for this is dependent on the number of rows in the table, the number of columns being masked, and the length of the column identifier. The goal is to have enough batches so that the REST service calls have a body size smaller than 2 MBs.
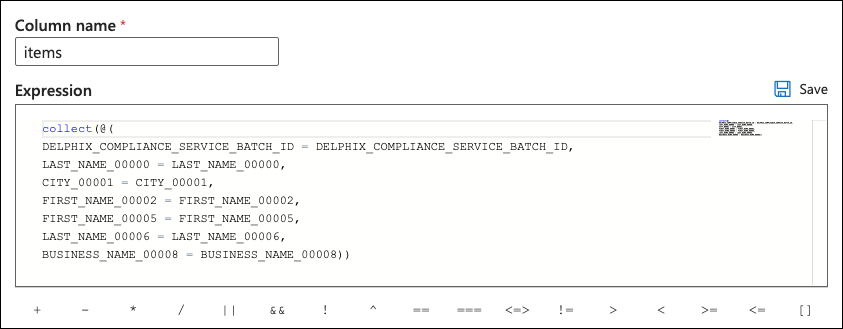
Switch to the Aggregates tab and click on the Expression box to click on Open expression builder. Set the column name to items and set the expression to:
collect(@(
DELPHIX_COMPLIANCE_SERVICE_BATCH_ID = DELPHIX_COMPLIANCE_SERVICE_BATCH_ID,
<mask col 1> = <mask col 1>,
<mask col 2> = <mask col 2>,
…
<mask col n> = <mask col n>))
The final Expression should include the surrogate key column and all columns that need to be masked.
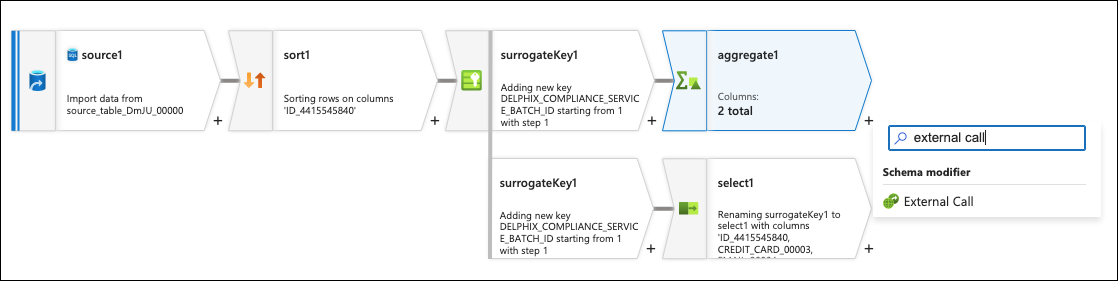
Click on the + to the bottom of the aggregate box and add an External Call flow step.
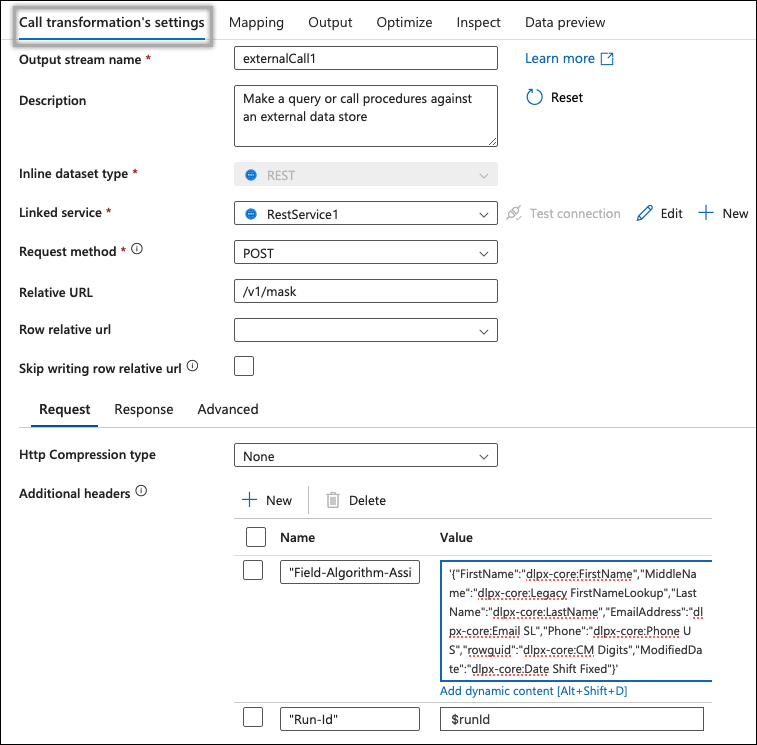
On the flow’s Call transformation settings page, select the REST service that was created previously that points to the Azure DCS endpoint.
On the same page, set the Request method to POST, Relative URL to /v1/masking/batchMask, and add two Additional headers:
Field-Algorithm-Assignmentmaps to the generated JSON string in the previous step. Note that the blob must be wrapped in single quotes to work properly with the ADF UI."Run-Id": $runId
Also switch over to the Advanced tab and change the Request timeout (s) to 180.
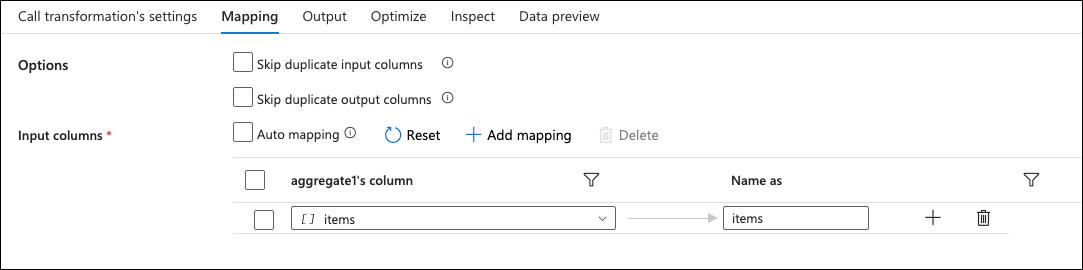
Go to the Mapping tab and uncheck the following options:
Skip duplicate input columns
Skip duplicate output columns
Auto mapping
Delete columns and add one single column by selecting items. This should auto set the column and Name as fields correctly.
Go to Output and under Body → Type and enter the expression to be the output of this external call. The format will look something like this:
(
    timestamp as date,
    status as string,
    message as string,
    trace_id as string,
    items as (
        DELPHIX_COMPLIANCE_SERVICE_BATCH_ID as long,
        <mask col 1> as <mask col 1 type>,
        <mask col 2> as <mask col 2 type>,
        …
        <mask col n> as <mask col n>
    )[]
)
To figure out the types of each of column, click the page icon on the top right corner and look under the source section of the text blob for the specific columns that need to be masked.
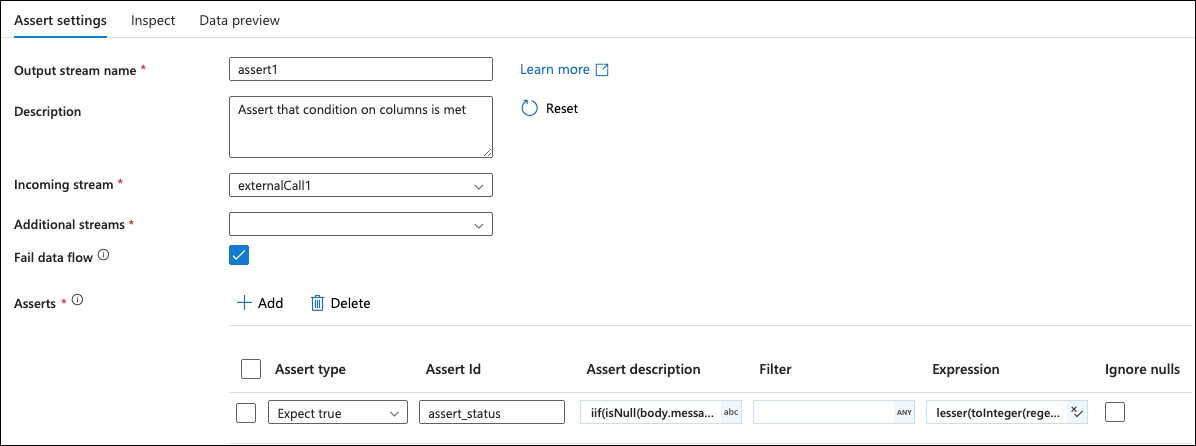
Click on the + to the bottom of the external call box and add an Assert flow step.

Enable Fail data flow and then in the first Asserts row, set the values as follows:
Assert type | Expect true |
Assert Id | assert_status |
Assert description | iif(isNull(body.message), status, concatWS(', ', 'timestamp: ' + toString(body.timestamp), 'status: ' + body.status, 'message: ' + body.message, 'trace_id: ' + body.trace_id)) |
Filter | Empty |
Expression | toInteger(regexExtract(status, '(\\d+)', 1)) == 200 |
Ignore Nulls | Disabled |
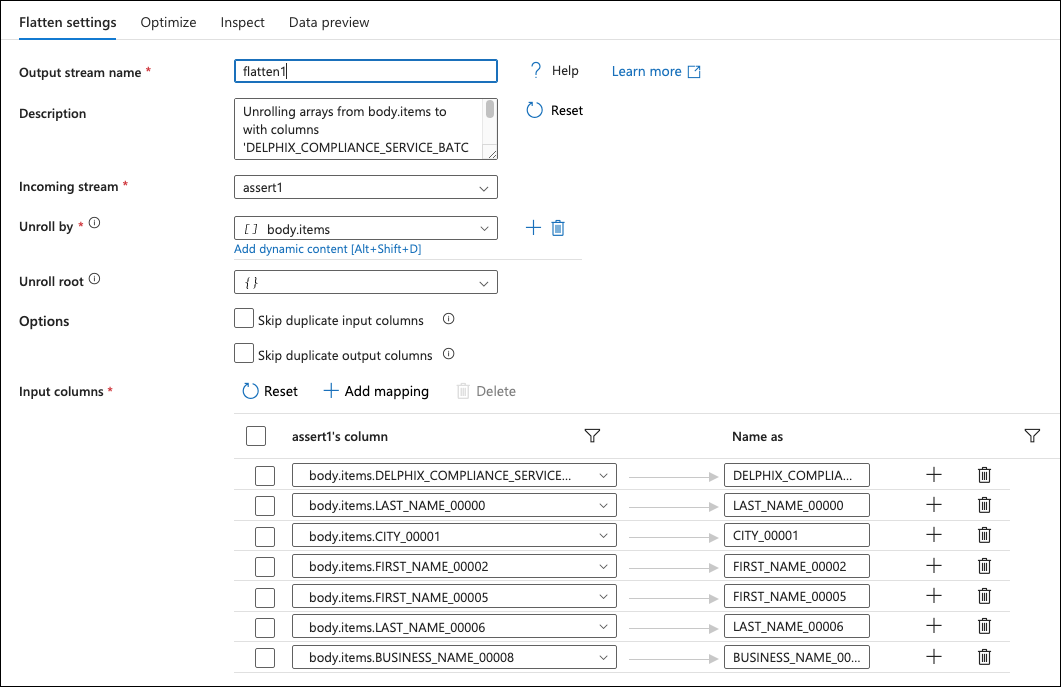
Click on the + to the bottom right of the assert box and add a Flatten flow step.

Set the Unroll by to body.items in the Flatten settings, then for the Input columns, add all the body.item columns that are coming back from the external call. These will be all the masked values with the surrogate key. It may be easier to click the reset button and delete unneeded columns.
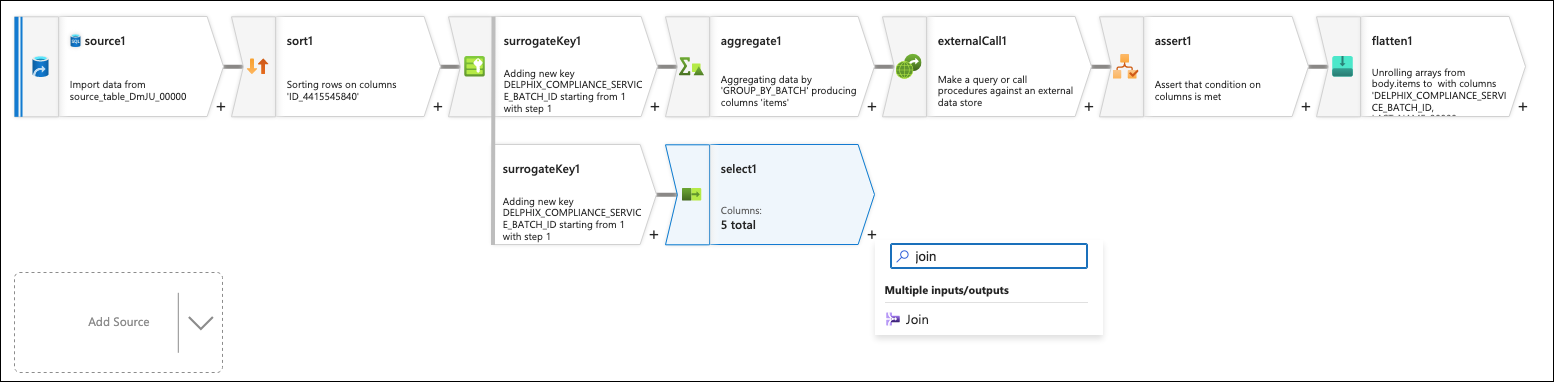
There should now be two branches; one that has all the columns that did not need to be masked and the other that has all the columns that did. Join them together by clicking on the + button to the right of the select box at the end of the first branch and add a Join flow step.
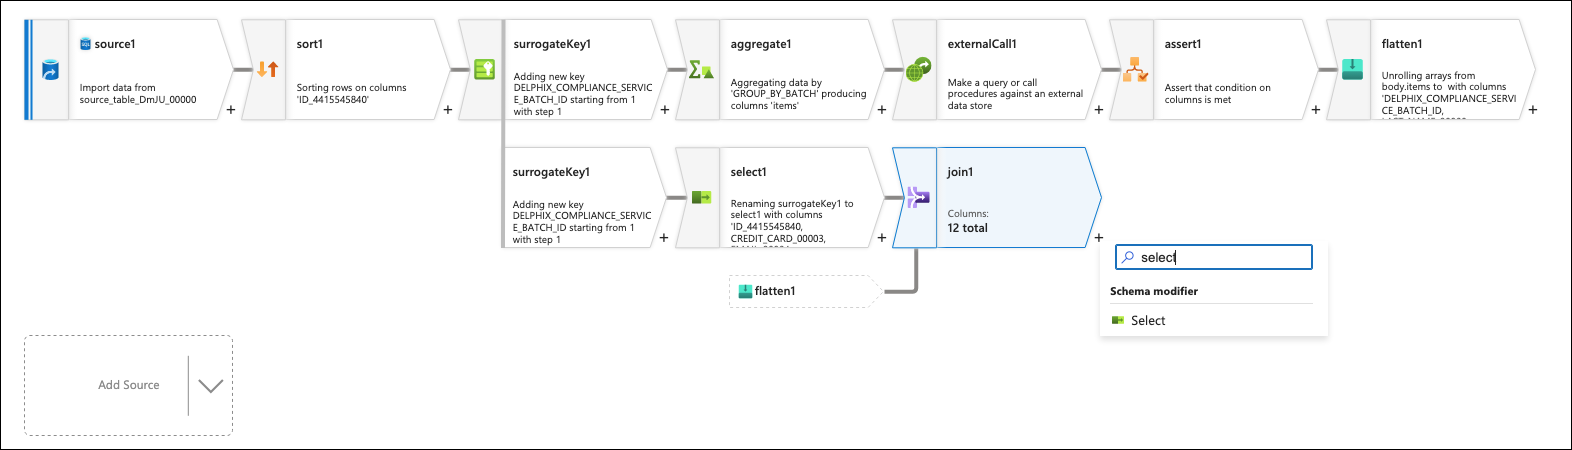
Set the right stream to the flatten flow step (left stream should already be selected). Leave the Join type to inner and for the Join conditions, set both columns to DELPHIX_COMPLIANCE_SERVICE_BATCH_ID.
Click on the + to the bottom of the join box and add a Select flow step.
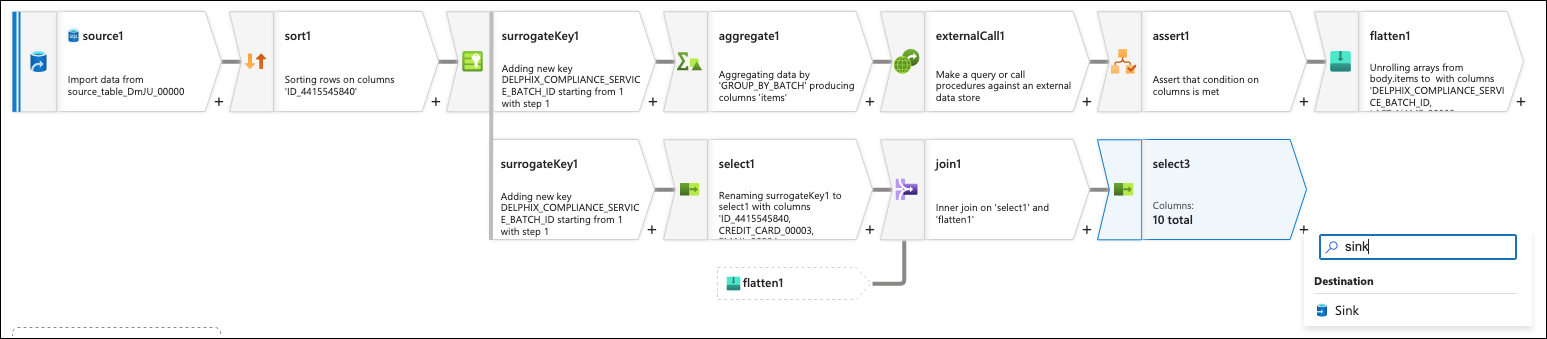
In the Select settings, delete the two columns that were joined with the names <flow step>@DELPHIX_COMPLIANCE_SERVICE_BATCH_ID. This is not always needed, but depends if the write out to the sink has issues with extra columns. For easier debugging, the order of the columns can also be modified to match the original source’s column ordering.
Lastly, click on the + to the bottom of the last select box and add a Sink flow step.
On the Sink tab, set the dataset to be the sink dataset that was previously added.
The Mapping should be set to Auto mapping already. Publish the dataflow that was created.
Create pipelines
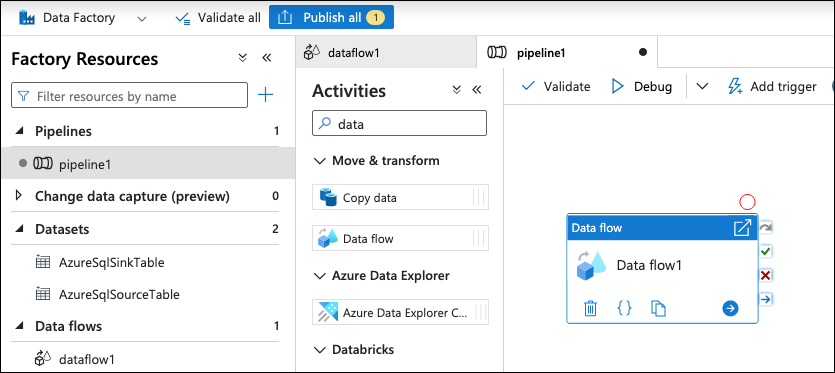
Navigate to on Pipelines > New pipeline. Under the Activities section, search for "Data flow" (under "Move & transform") and drag it to the page.
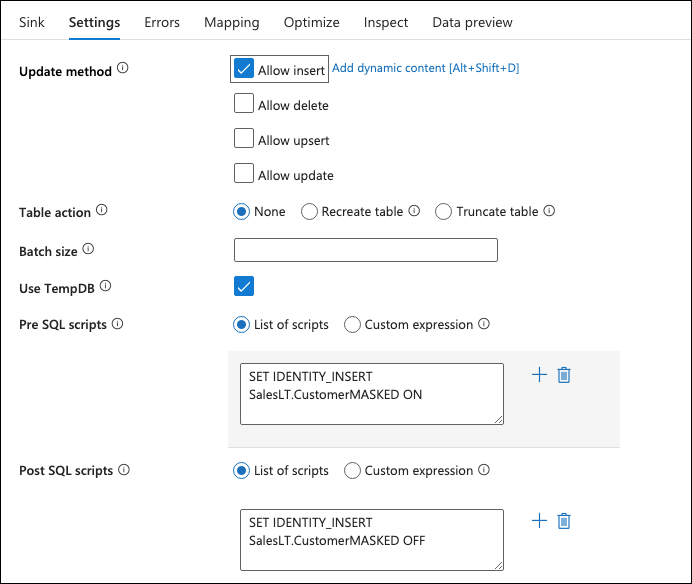
On the Settings tab, select the data flow that was created in the previous step and modify the settings to whatever is needed.
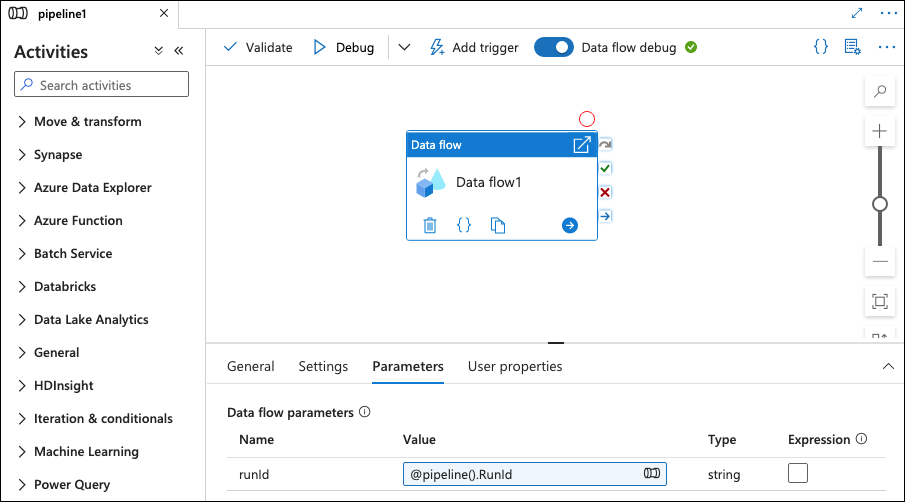
On the Parameters tab, modify the value of runId to be: @pipeline().RunId.
When running the pipeline, everything is now setup to run the masking job.